Do you think your Google Sheets table will do better if you switch columns and rows? Well, you've come to the right place then :) Today, we'll transpose!
Transpose in Google Sheets means converting your vertical table into a horizontal one (as well as horizontal into vertical). In other words, it's when you switch rows and columns in Google Sheets.
There are two ways to convert rows to columns in Google Sheets (and columns to rows as well).
Use Google Sheets menus to transpose rows to columns & vice versa
- Select the data you want to transpose in Google Sheets (I mean, switch rows and columns) and copy it to the clipboard.
Note. Make sure to select headers as well.
Tip. You can copy the data by pressing Ctrl+C on your keyboard or using the related option from the context menu:

- Create a new sheet (or pick any other place for your future new table) and select its leftmost cell.
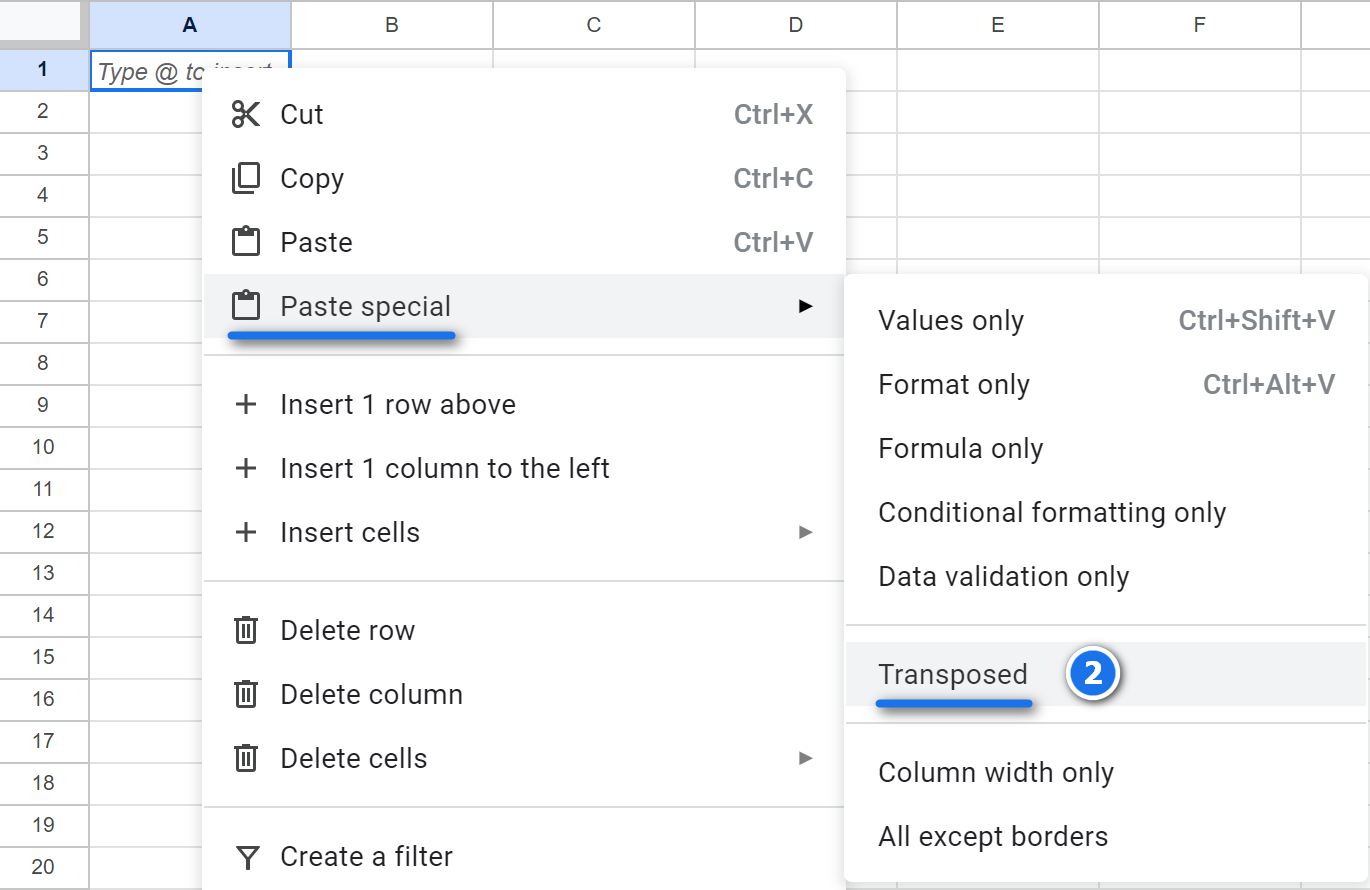
- Right-click that leftmost cell and choose Paste special > Transposed from the context menu:

The range you copied will be inserted but you'll see that Google Sheets transposed columns into rows:

Tip. If your Google Sheets table is of rows that you need to rotate to columns, the way above will work the same way. In both cases, Google Sheets rotates rows to columns & columns to rows at the same time.
Google Sheets TRANSPOSE function
You won't be surprised if I tell you there's a Google Sheets function specifically for this purpose, will you? It's called TRANSPOSE and it takes just the data you need to convert :)
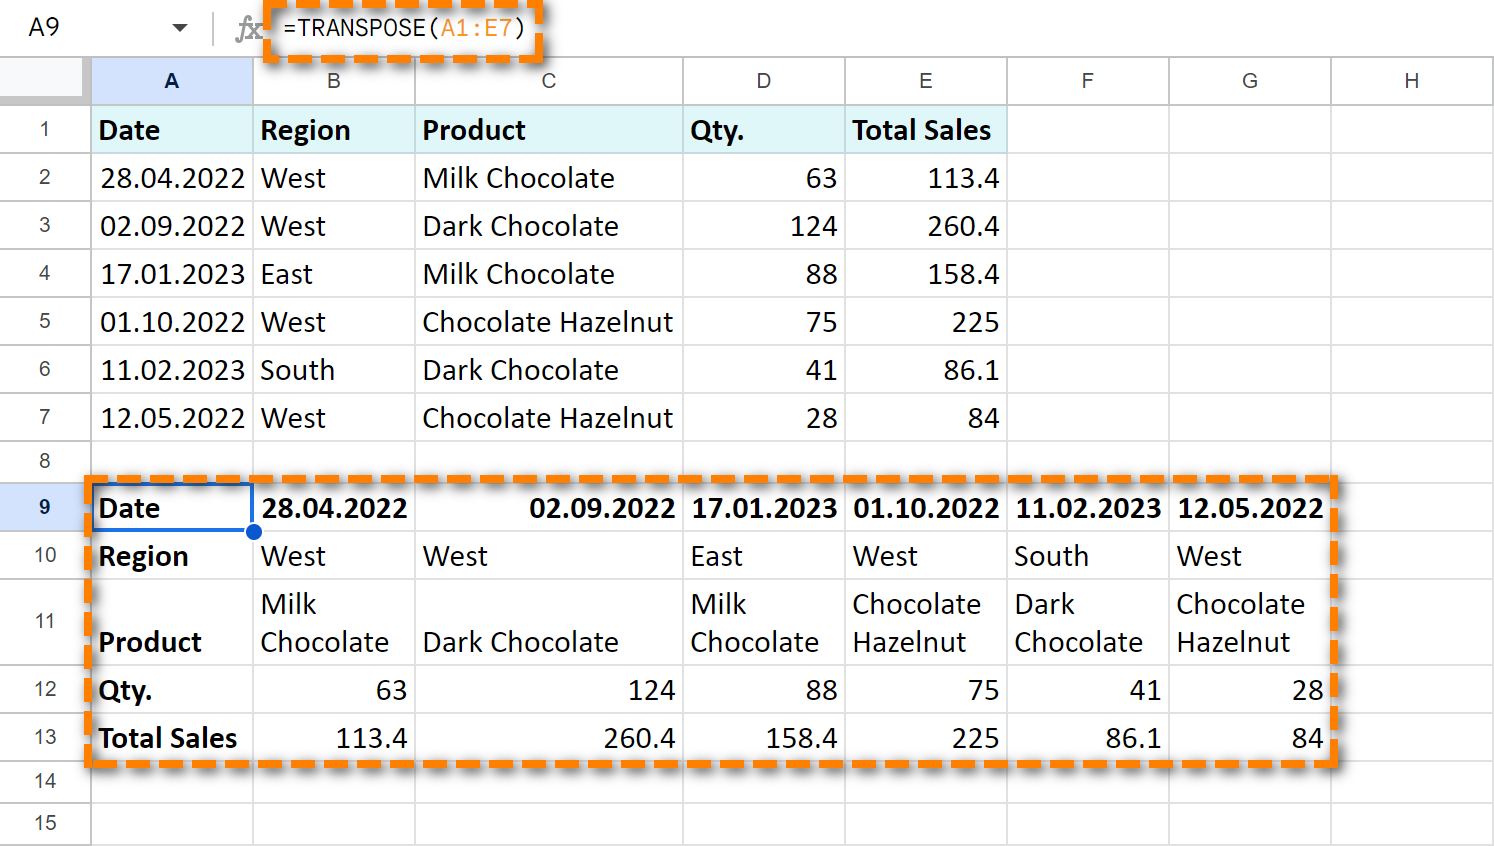
Here, I put the cursor into a cell where my future table will start — A9 — and enter the following formula there:
=TRANSPOSE(A1:E7)
A1:E7 is a range with my original table.
A9 — the cell with the Google Sheets TRANSPOSE — becomes the leftmost cell of my new table where rows and columns switch places:

The main advantage of this method is that once you alter the data in your original table, the values will change in the transposed table as well.
The first method, on the other hand, kind of creates a "photo" of the original table in its one state.
No matter the way you choose, both of them deliver you from manual copy-pasting of rows/columns one by one. So feel free to use the one you like the most.
I hope now you know a little bit more about how to easily switch rows and columns in Google Sheets. BTW, which method do you prefer?
 by
by
2 comments
is it possible to transpose but double the output?
for example I have 1,2,3,4,5 (vertically)
so transpose would make it 1,2,3,4,5 (horizontally)...
but I would like to to appear horizontally such as:
1, 1, 2, 2, 3, 3, 4, 4, 5, 5 (horizontally)
what I mean is each transpose returns twice.
is this possible?
Hello Andrew,
Yes, it's possible:
=TRANSPOSE(FLATTEN(ArrayFormula(SPLIT(REPT(A1:A5&" "&A1:A5&" ",1)," "))))