This tutorial will teach you how to use OneDrive to share files and folders with internal and external users securely. You will also learn how to get OneDrive shared folders to sync with your Windows Explorer.
These days, more and more people prefer to keep their files in online storages rather than on computers or local networks. Indeed, it's very handy to have one hub for all your files, sync them across multiple devices, share with other people and work together at the same time. A variety of online file storage systems such as Dropbox, Google Drive, and iCloud exist but only OneDrive is integrated directly into Windows 10.
Like most other online storages, OneDrive was designed with collaboration in mind, and they strived to make the sharing process easy and intuitive. However, there are some caveats to take notice of, especially when adding and syncing shared files to your computer.
How to share files on OneDrive (home or personal)
OneDrive home or personal provides just two options: anonymous sharing with anyone and sharing with specific people. Below we will cover each one in depth.
Get a OneDrive share link that works for anyone
This option enables you to share documents with many people, even those you don't know personally. You can include such links in your newsletters or post to social media networks such as Facebook, Twitter, or LinkedIn. Depending on the permission you provided, anyone who has the link can view or edit the shared items.
Please keep in mind that it is the least secure method because the link can be forwarded to anyone and published anywhere without your consent or even knowledge, sign-in to OneDrive is not required.
To get a OneDrive sharing link, carry out these steps:
- Sign-in to OneDrive with your Microsoft account.
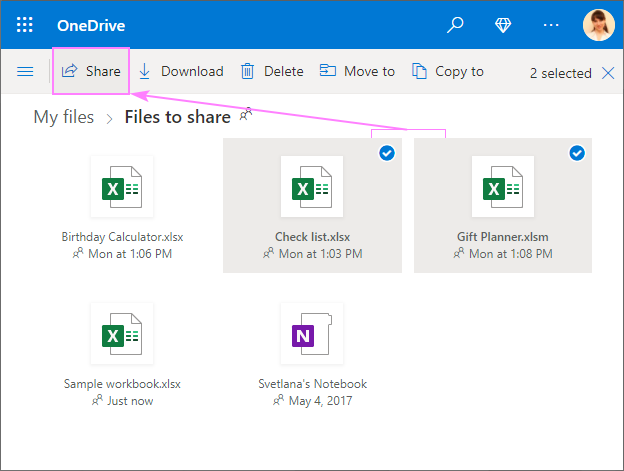
- Pick the file to share. You can also select multiple items and share them at once.
- Right-click the selected items and choose Share in the context menu. Or click the Share button at the top.
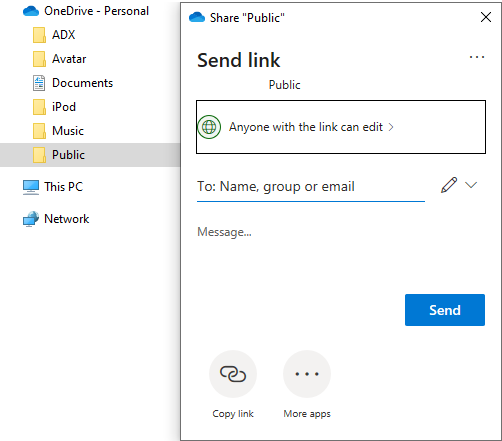
- The Send Link dialog box will appear. If you are happy with the default Anyone with the link can edit setting, jump right to the next step. For more choices, click on Anyone with the link, and configure the additional options under Other settings. When done, click Apply.

- Allow editing (turned on by default) - gives the edit permissions to the recipients.
Selecting this option allows anyone to edit the shared files as well as copy, move, and delete anything in the shared folder.
Unselecting the box lets people view, copy, forward and download the shared items without signing in, but not modify them. So, if you do not want any changes to your OneDrive items, be sure to uncheck this box.
- Set expiration date (available in the Premium plan) - gives access for a limited period of time. After the specified date the access is automatically revoked, and the link becomes invalid. If someone requires access after the expiry date, you'll have to create a new link.
- Set password (available in the Premium plan) - creates password-protected sharing links, which helps making publicly shared documents a little more secure. Before accessing the file, the user will be prompted to enter a password, and it's your responsibility to provide this password to the recipients.
- Allow editing (turned on by default) - gives the edit permissions to the recipients.
- Clicking Apply will take you back to the main Send link dialog window, where you click Copy Link.

- Finally, click Copy to have the link copied to your clipboard.

Now, you can paste the link in an email message, post it on social medial web-sites or wherever else.
When to use: choose this method to share items publicly or with lots of people.
When not to use: never use this way to share sensitive or confidential information.
Sharing OneDrive files with specific people
To keep tighter control over your shared items, you can make the link only work for the people you specify. Here's how:
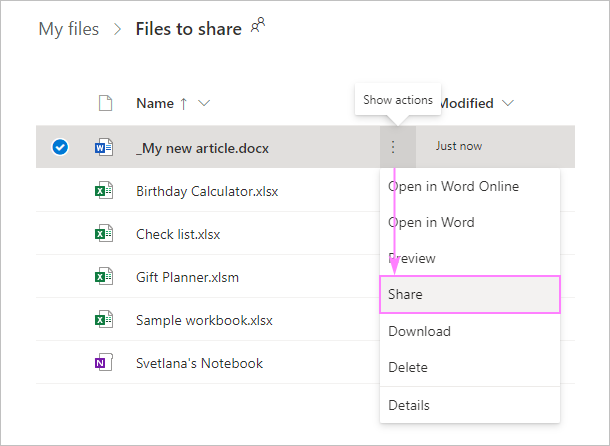
- In your OneDrive, select the item(s) of interest, and click the Share button at the top of the page. In a list view, you can also click the Show actions button (3 vertical dots) next to the item, and then click Share.
- In the dialog box that pops up, click Anyone with the link can edit, and then change the selection to Specific people. Choose whether to allow or not to allow editing, set the expiration date (optional), and click Apply.

- In the To field, enter the email addresses of the users you'd like to share your items with. You can also add a message to them if you wish. When done, click Send.

Tip. To quickly change the permissions level without opening the link settings, click the pencil icon and choose either Can edit (allows making changes) or Can view (read-only).
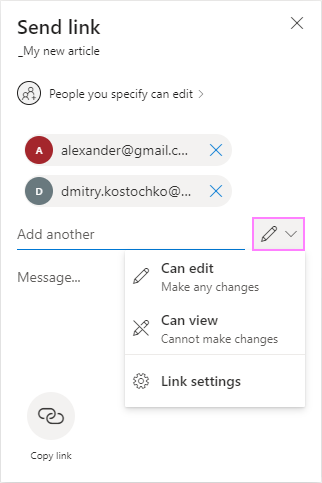
Note. The permissions you set apply to all recipients. If you want to let some people edit and others only view, then you will have to repeat the above steps for two groups of users with different permissions.
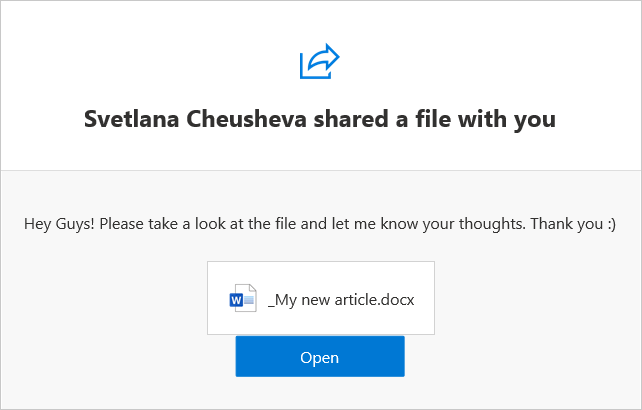
An email message like shown below is sent to the specified persons, and they will be able to access the documents via the embedded link.
When to use: always use this method to share sensitive information securely with OneDrive.
When not to use: won't work for sharing something publicly with unknown people.
How to share a OneDrive folder
The process of sharing OneDrive folders is exactly the same as sharing files.
Our recommendation is to share folders rather than files whenever possible, especially when you are providing Edit permissions. In this case, the recipients will be able to add a shared folder to their own OneDrive and get it synced with their computers automatically.
Share files and folders on OneDrive for Business (work or school)
OneDrive for work or school covers four different scenarios allowing you to share documents with:
- anyone
- people in your organization
- users who already have access
- people you specify
By and large, all the options are self-explanatory, though there are a few caveats that we'll discuss a little further.
As usual, you start with selecting the file or folder to share. On OneDrive for Business, the Share button appears next to the selected item and when you hover over a file or folder like shown below:
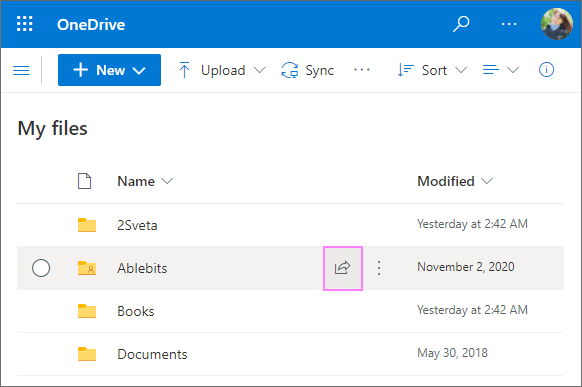
Usage notes:
- On OneDrive for work or school it is not possible to share multiple items at a time. For the sake of clarity, when you are sharing a folder, all the files and subfolders contained in it are shared at once. However, when you select two or more files or folders, the Share button disappears from the top of the page. The in-place Share icon (like in the screenshot above) is displayed for each of the selected items, however only the first item will be actually shared.
- Contrasting to home or personal accounts, on OneDrive for Business, the Allow editing box is unselected by default, whichever option you choose.
- If your organization has disabled or restricted certain settings, the options you see in your OneDrive may slightly differ from what is described on this page.
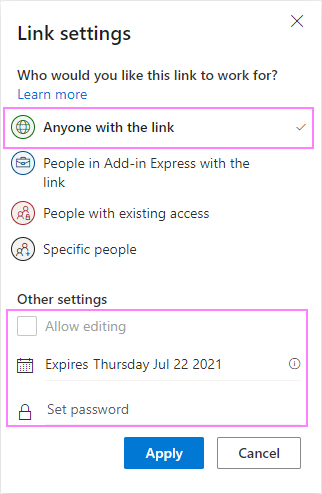
Share with anyone
In short, you get a OneDrive share link to a file or folder that can be sent to anyone and published anywhere. The steps are exactly the same as on OneDrive home or personal, there are just a couple of differences in settings:
- By default, the recipients have read-only permission. To allow making changes, select the Allow editing box.
- If your organization has introduced a time limit for links, the expiration date is set automatically. You can change it to any other date within the set period, but you cannot remove it entirely.
Share with people in your organization
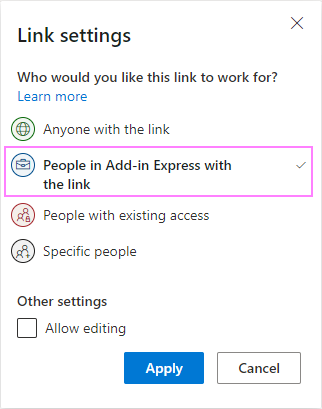
To share a certain file or folder with any person in your organization, use the People in <Your Organization> with the link option. Depending on what type of access you want to provide, select the Allow editing check box or leave it unselected, and click Apply.
When back at the primary Send Link dialog box, you have the following options to choose from:
- Send the link directly from OneDrive. In the To field, enter the e-mail address(es) of the people who have Office 365 accounts in your organization, type a message if you wish, and hit Send.
- Get a link to the shared item. Just click Copy link, and then click Copy one more time.
- Send a message from Outlook. If you prefer to send a personalized message, click the Outlook icon near the bottom. This will immediately create a new message with the embedded link in Outlook Online.

Note. Permissions can be further restricted by your organization policies. For example, your company may let you decide whether to allow other people to download the shared files or not. In this case, you will see the Block download switch that can be toggled on or off.
Send a link to people with existing access
This option creates a link that can be used by anyone who already has access to the shared item, without changing the current permissions. It's just a quick way to help people get to the file or folder shared with them.
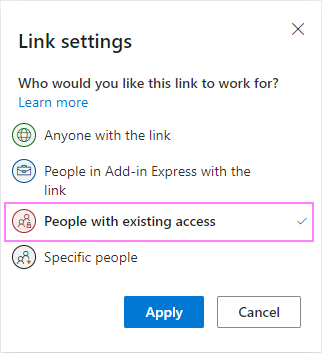
The process of getting a link is basically the same as discussed above, so we won't waste your time by repeating the instructions :)
Share with specific people
This feature gives you the most control over who can and who cannot access your items as the sharing link will only work for the people you specify. Unless restricted by your administrator, you can share with both internal users (people inside your organization) and external users (people outside of your organization).
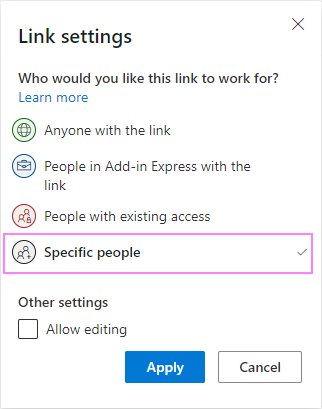
The steps for using this option are essentially the same as on OneDrive home or personal, and you can find the detailed instructions here.
Note. When providing access to certain people, please keep in mind that other people may already have access to that file or folder. You can check this on the Manage Access pane.
Share OneDrive files from Windows Explorer
If your OneDrive is synced to your computer, then you can easily share files and folders directly from Windows Explorer. Here's how:
- In your Explorer, right click the file or folder and choose Share in the context menu.
- In the dialog box that pops up, pick the desired option. Done!
How to add shared files to my OneDrive
OneDrive folders and files that someone has shared with you are displayed in the Shared list. Please keep in mind that Shared is a special view, not a folder, so it's not possible to move items out of it into your Files list. You can, of course, copy a shared file or folder to My files, but these will be two different items - any changes you make to the copy will not be reflected in the original item.
To make it more comfortable to work with a shared folder, you can add it to your Files list. This way, you will see the shared folder along with your own folders and will be able to easily move files between them. If your OneDrive is set to sync to your computer, the shared folders added to My files will be synchronized automatically, without any extra moves.
Traditionally, the implementation varies in different OneDrive versions :)
Add shared folders to OneDrive home or personal
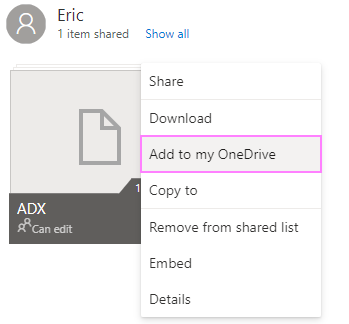
If you have the Edit permissions to a folder, you can add it to My Files in this way:
Select the folder and click Add to my OneDrive on the top menu. Or right-click the folder and choose the same option from the context menu.
Add shared folder's shortcut on OneDrive for work or school
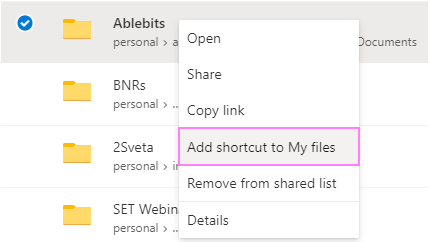
To add a shared folder to My Files, select it and click Add shortcut to My files at the top of the page, or right-click the folder and pick this option:
Tips and notes:
- This option is only available for folders, not individual files. If you want to add a shared file to your OneDrive, ask the file owner to put it in a folder first, and then share the folder with you.
- To add a shared folder to My Files on OneDrive personal, you need to have Edit permissions to it. On OneDrive for Business, the permission level does not matter - folders with View permissions can also be added.
- It's not possible to add multiple folders at a time.
- If the option is unavailable for a shared folder for which you have Edit level of access, then most likely you've already added that folder to your OneDrive Files.
- When you remove the folder from My files, it will still be accessible from your Shared list.
How to sync shared OneDrive folder to computer
When you sync your OneDrive content to a computer, by default, only the folders from My Files are added to your File Explorer. But what if you also want to sync folders that other people have shared with you?
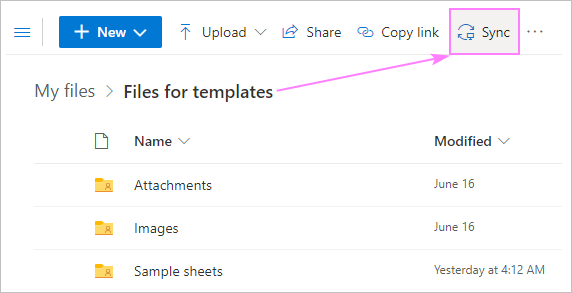
To sync a shared OneDrive folder to your computer, use this amazingly simple trick that very few people know about:
- In your OneDrive, click Shared on the left pane.
- Open the folder you'd like to sync to your computer. Pay attention, you need to open the folder, not just select it.
- On the top menu, click Sync in a work or school OneDrive account, or Add Shortcut to My Files in a personal account.
That's all there is to it!
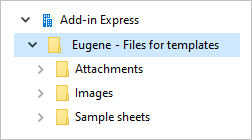
The folder will show up in your File Explorer under the name of your organization (Add-in Express in my case). The folder name will be preceded with the name of the person who shared it.
If direct syncing of a shared folder to your PC fails, producing an error such as "Sorry, we cannot sync this folder", try adding the shared folder as a shortcut to My Files first. Then, sync OneDrive with Windows. Once syncing is complete, the shared folder will appear alongside your personal OneDrive folders in File Explorer. A chain icon on a folder indicates it's a shortcut to a shared folder.

Note. The Sync option is only available on OneDrive for work or school. If you are using a personal account, then adding a folder shortcut to My files is the only option available.
How to stop syncing a OneDrive folder to your computer
If you are syncing shared OneDrive folders to your computer, you might want to disable the sync at some point, but you want to be sure that if you delete a shared folder on your PC, it will not be deleted on OneDrive of the owner.
To unsync a shared OneDrive folder, carry out these steps:
- On the Windows taskbar, right-click the OneDrive icon, and then click Settings.

- In the window that opens, switch to the Account tab.
- In the list of the syncing locations, find the folder you want to unsync, and click Stop sync.

Note. After syncing has been turned off, online files will be removed from the folder, while the files that you opened on your computer (locally downloaded copies) will remain. To remove the folder from your File Explorer entirely, right-click on it, and choose Delete in the context menu. Before you do that, it'd be wise to double-check that syncing is really disabled, otherwise you may end up deleting the original folder from the owner's OneDrive.
These are the best practices for working with OneDrive shared folders and files. Your feedback is most welcome and will be much appreciated :)
 by
by
5 comments
If sharing a read only link with one person to a folder, does that person get access to view all the documents in that folder or do I have to set each document to share manually? And what about documents uploaded after the folder was shared - are they automatically accessible for that person?
I want one person to be able to access all documents in a folder. There are hundreds of documents in many subfolders. Can I set the sharing permissions at the top level and it cascade all the way down through all child folders to all documents?
Hello Alex!
Please read the above article carefully. Sharing OneDrive folders is similar to sharing files.
Thanks for the great info, also using tools like Gs Richcopy 360 and SecureCopy make it easy to sync to Onedrive
> You wrote: Selecting this option allows anyone to edit the shared files as well as copy, move, and delete anything in the shared folder. Unselecting the box lets people view, copy, forward and download the shared items without signing in...
Are you sure this works without signing in? The album share links I generate all redirect to a Onedrive signin page.
Hi Tom,
The "Anyone with the link" option works without signing in for files and folders. In case of albums, there seems to be a bug reported by many users. For more details, please see the discussion at answers.microsoft.com.