In this tutorial, you'll learn how to edit or delete templates in Gmail. You’ll also discover advanced methods to manage team templates, control permissions, and recover items you accidentally deleted.
Templates are perfect for sales teams, customer support, busy executives, and anyone who dreams of spending less time typing and more time doing what matters. Let’s say you’ve created a template (if not, follow this guide to add your first one!). But templates aren’t set in stone: today’s perfect text may need revisions tomorrow. What if your template needs adjustments? You can edit and update the template or even delete it and create a new one. Let me show you 🧐.
How to edit templates in Gmail
While Gmail’s built-in template editor is functional rather than feature-rich, it gets the job done for basic text updates. This chapter walks you through the straightforward (if somewhat hidden) process of modifying templates using Gmail’s original settings.
Here's how you can modify your template in Google email:
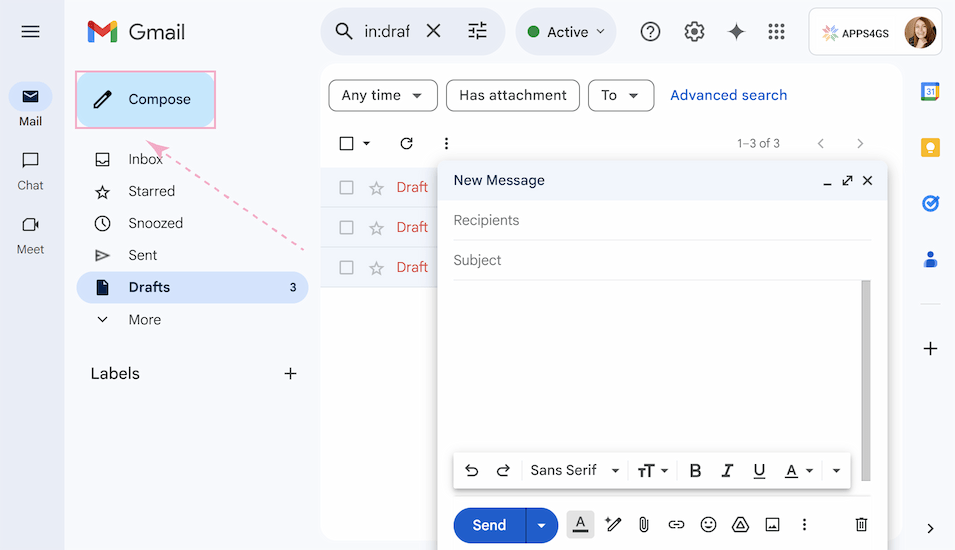
- Open Gmail and click Compose to start a new email. Use a web browser on a computer, because Gmail's built-in template editing feature is not accessible through the mobile app.
- Click the More options (three-dots icon) at the bottom of the new message window. Here you can see the Templates tab.
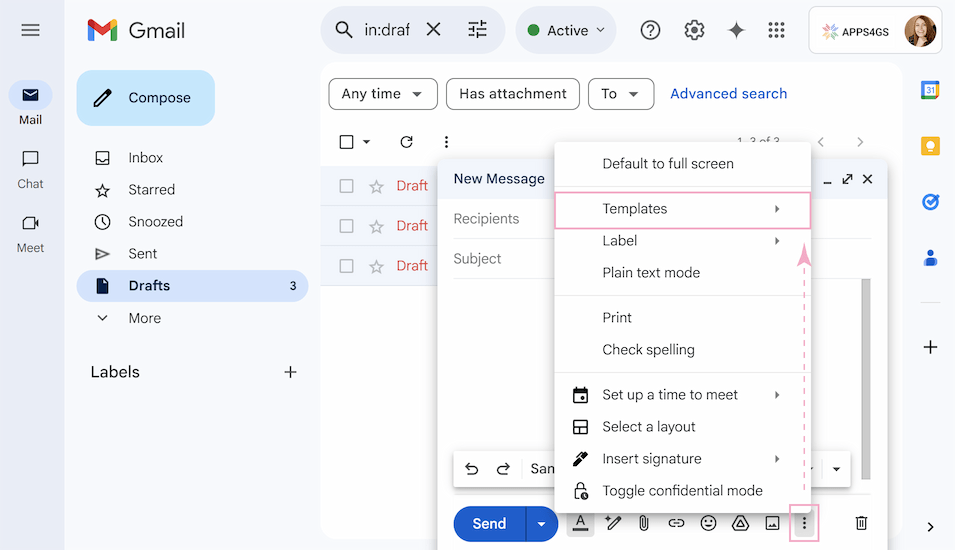
Note. If the Templates are not displayed in the list of options, it means that they are disabled. You can see how to enable templates in Google email by following the link.
- Click Templates and your previously saved templates will appear automatically. Select the template you wish to update.
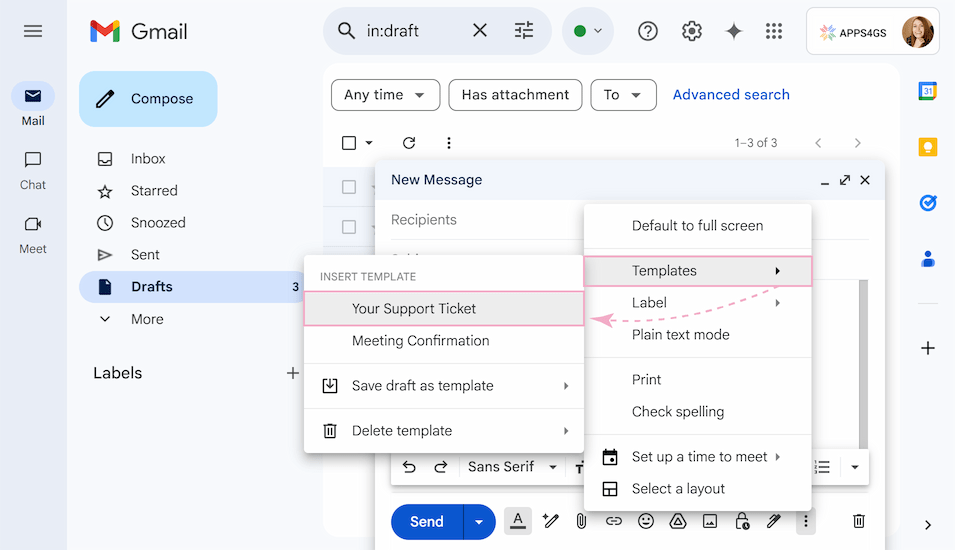
- The chosen template will load in your compose window. Edit the text, style, and subject as you like.
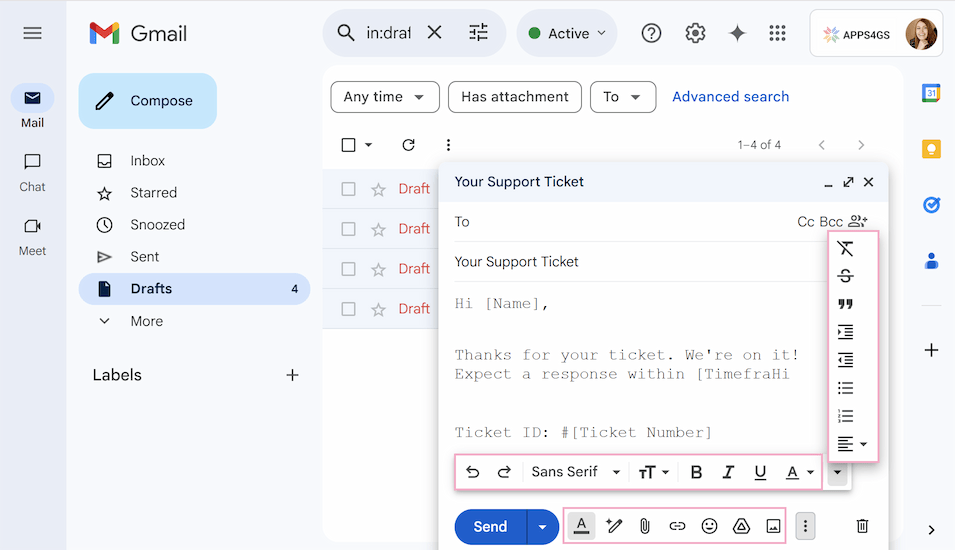
Note. Built-in templates don't support attachments, they won't be saved for future reference. If you want to create templates with attachments, this article will be useful for you.
- Click More options again (three-dots icon at the bottom).
- Hover over Templates and select Save draft as template.
- Choose the template name you’re updating to overwrite it. If the required template isn't appearing, please scroll further down.
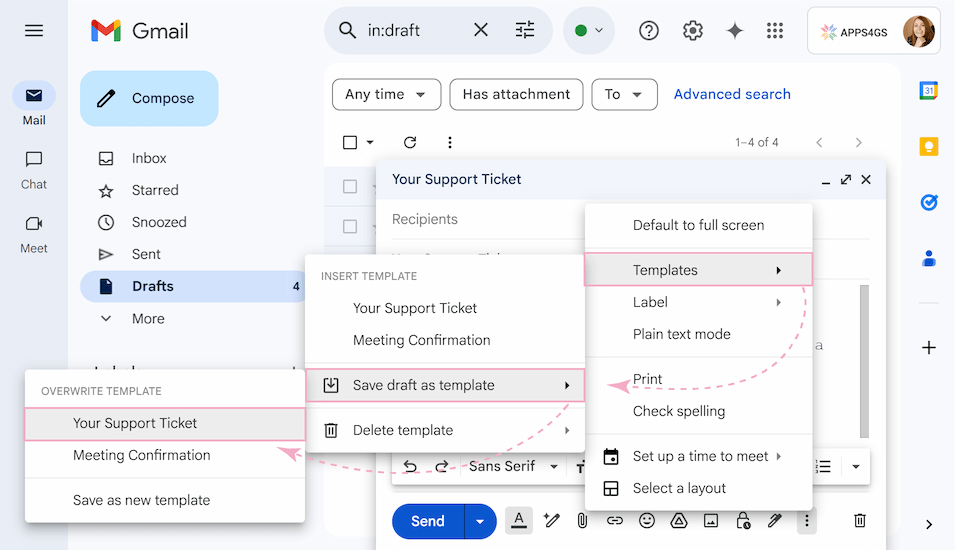
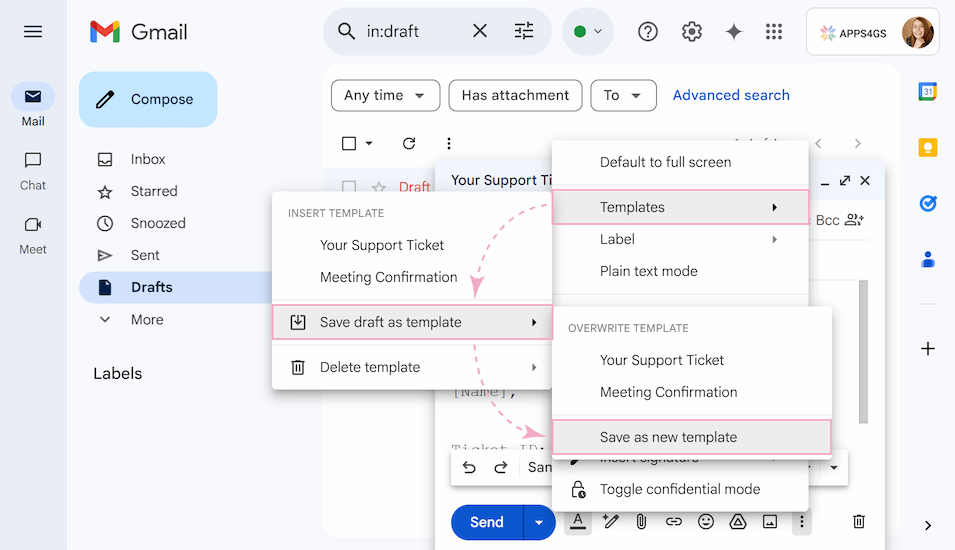
Tip. To keep both versions, you can choose Save as new template option and give it a unique name.
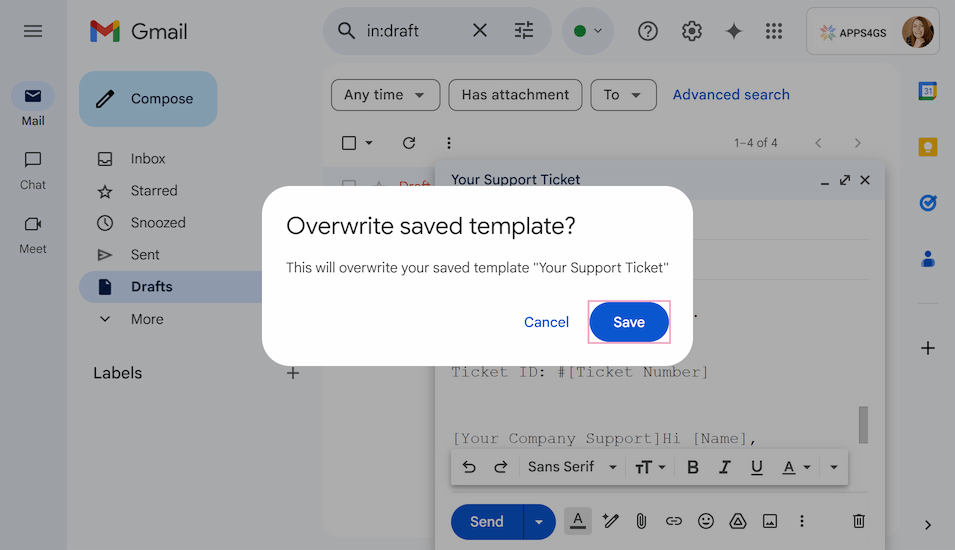
- Confirm the changes by clicking Save in the pop-up window.
How to delete templates in Gmail
While Gmail makes it easy to edit templates, you may eventually need to clean up outdated or unused ones — whether to reduce clutter or ensure your team only accesses current messaging.
To delete email templates in Gmail, follow these simple steps:
- Open a new email with the Compose button.
- Click the More options icon and hover over Templates in the menu.
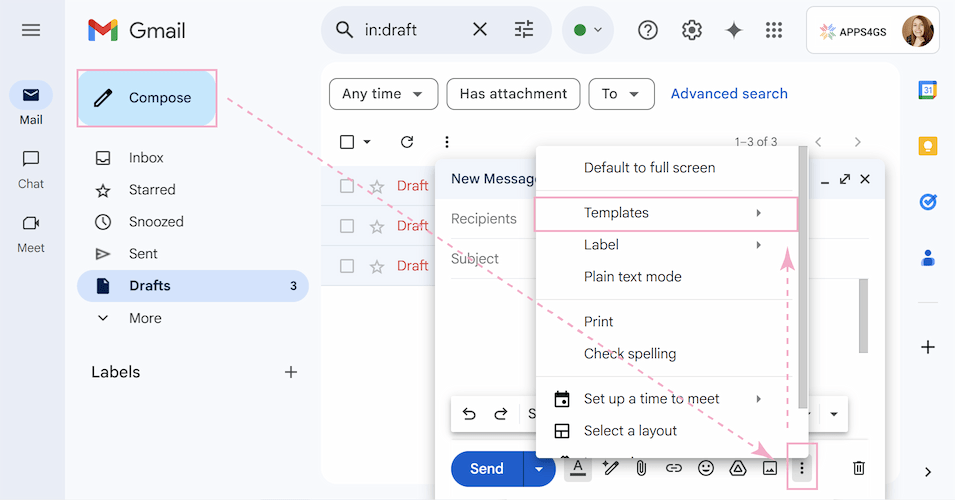
- Select Delete template.
- Choose the template name you want to remove. Same as when editing, if the required template isn't visible, scroll down to find it.
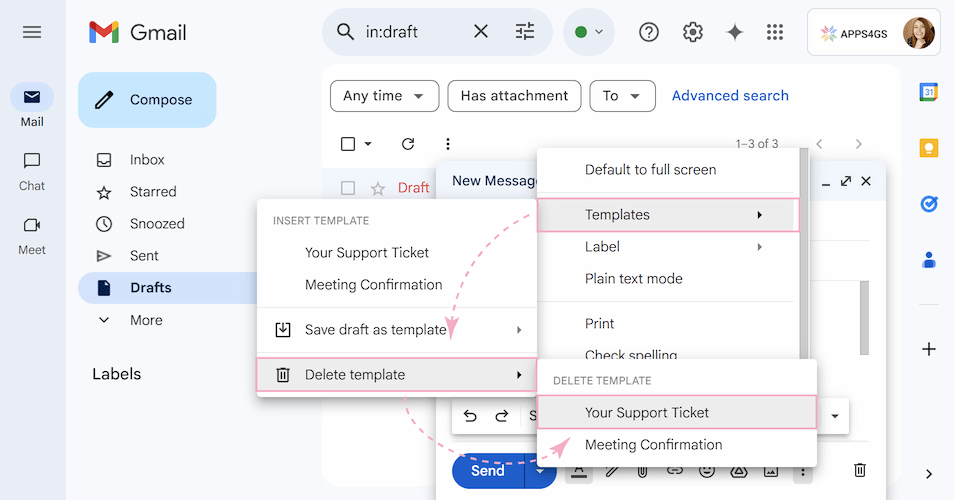
- Click Delete in the pop-up window to confirm.
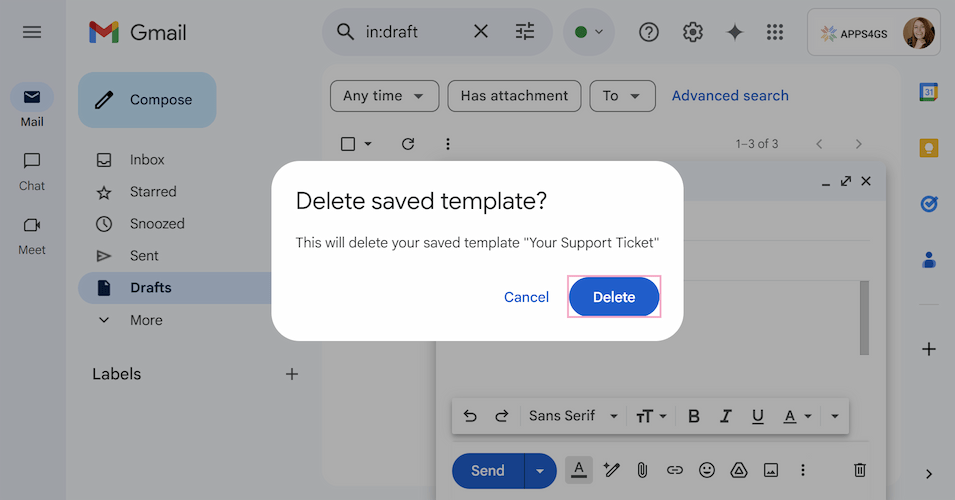
Note. Deleted templates can't be restored!
How to manage templates in Gmail
While Gmail’s built-in templates handle basic edits and deletions, Shared Email Templates for Gmail improves template management with real-time collaboration and recovery options. Any template edit becomes immediately available to all authorized users, so that your entire team always accesses the latest approved content. Moreover, you can set precise access levels to maintain template integrity. And in case a template is accidentally deleted, simply restore it from the Recycle Bin – no more “oops” moments!
Tip. Hit the Add to Chrome button in the store, and follow the intuitive setup.
Let me show you how our app can easily improve your work with templates, turning your daily correspondence into a matter of minutes.
Control who can edit vs. use templates
To edit templates right from the Gmail sidebar, follow these steps:
- Go to the Shared Email Templates extension, where your pre-written templates should be.
- Choose the one you want to edit and click the Edit button to modify your template right in the Gmail sidebar.
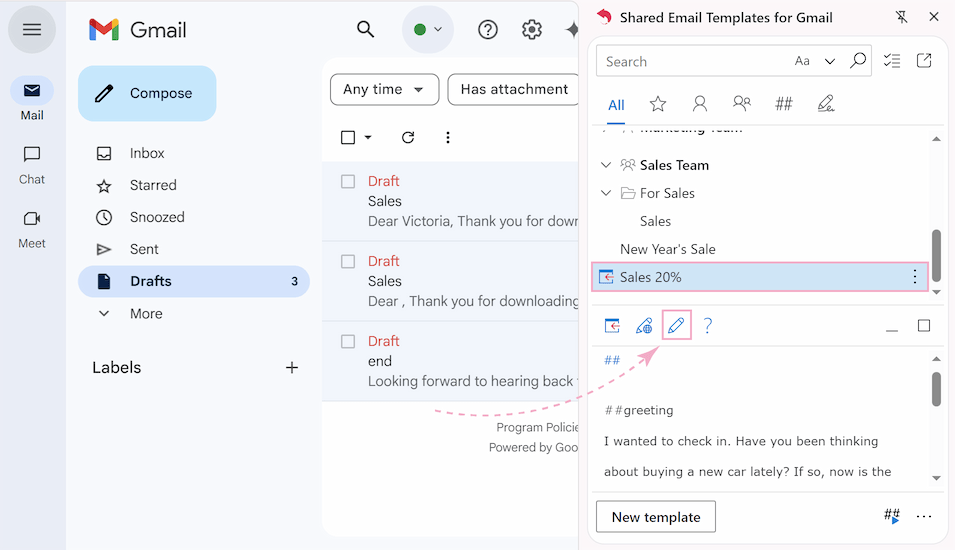
- You'll see an editing panel with formatting tools displayed above your template, creating an intuitive workspace where you can quickly modify the template. The editor offers comprehensive options, from basic text styling to advanced features like macro automation.
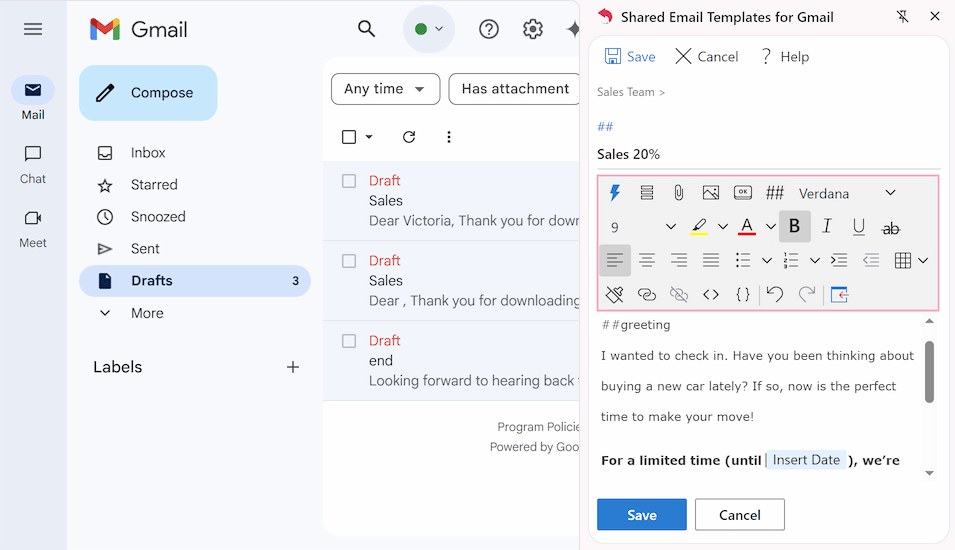
- Once you're happy with your editing, click Save to apply all changes.
To edit templates in an isolated browser window, use this guide:
- Click Edit in browser from the sidebar menu.
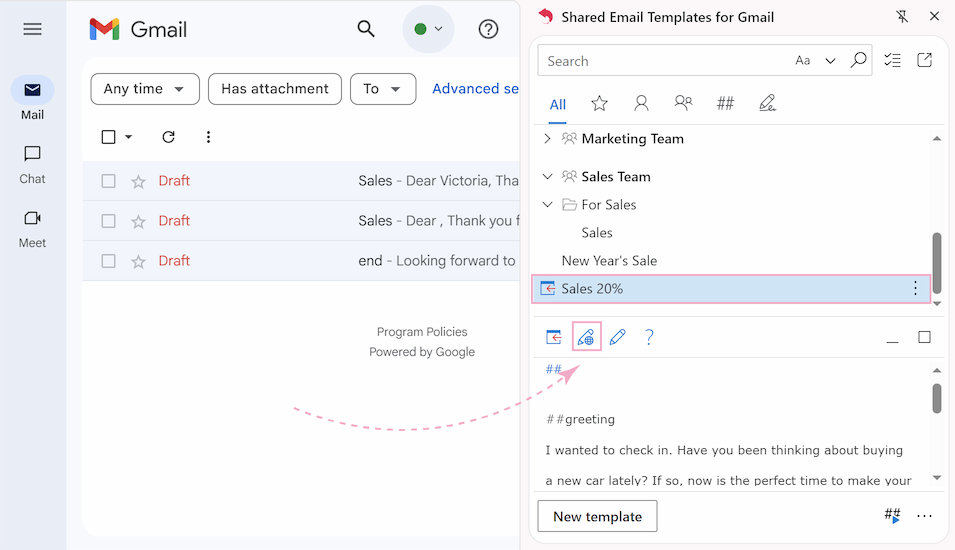
- An editor will open in a new browser window instead of the sidebar.
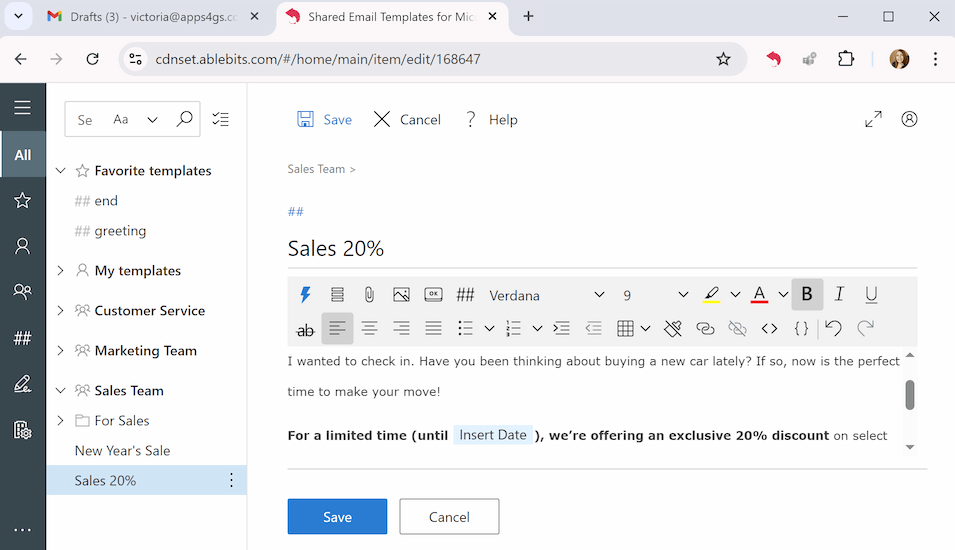
- After all the changes, don't forget to click Save.
Editing templates individually is just the beginning. With Shared Email Templates, you can manage access and permissions across your entire team, ensuring the right people can edit, while others can only use them.
Setting up access permissions in Shared Email Templates is quite easy:
- Click the three-dots icon to the left of the template and choose either Copy to or Move to.
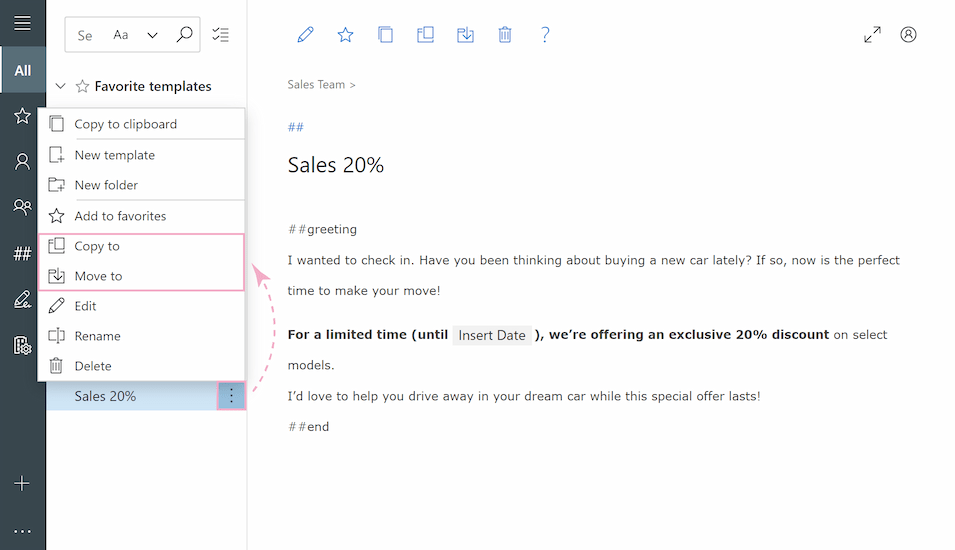
- Move or copy your template to the appropriate group.
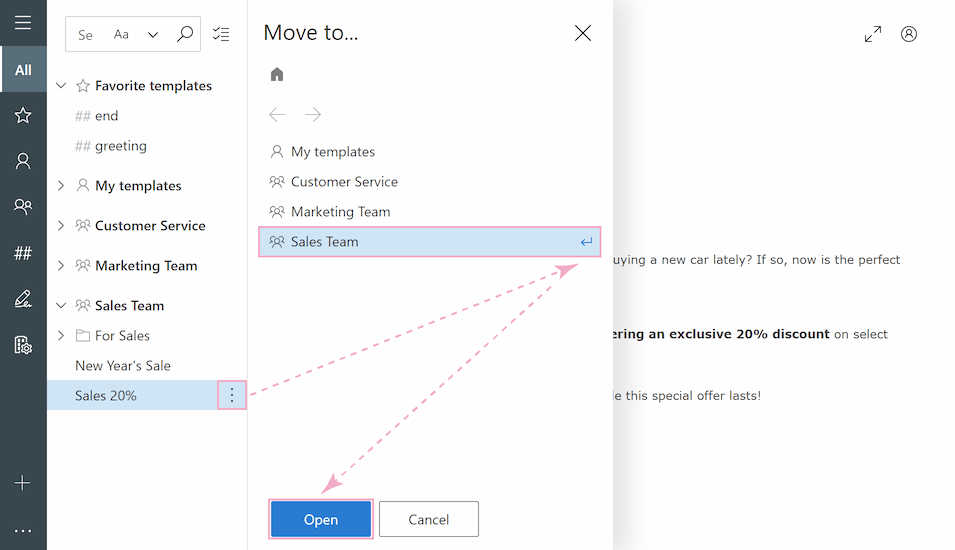
- Navigate to Manage account at the bottom of the panel and select Teams to see all user groups and their members.
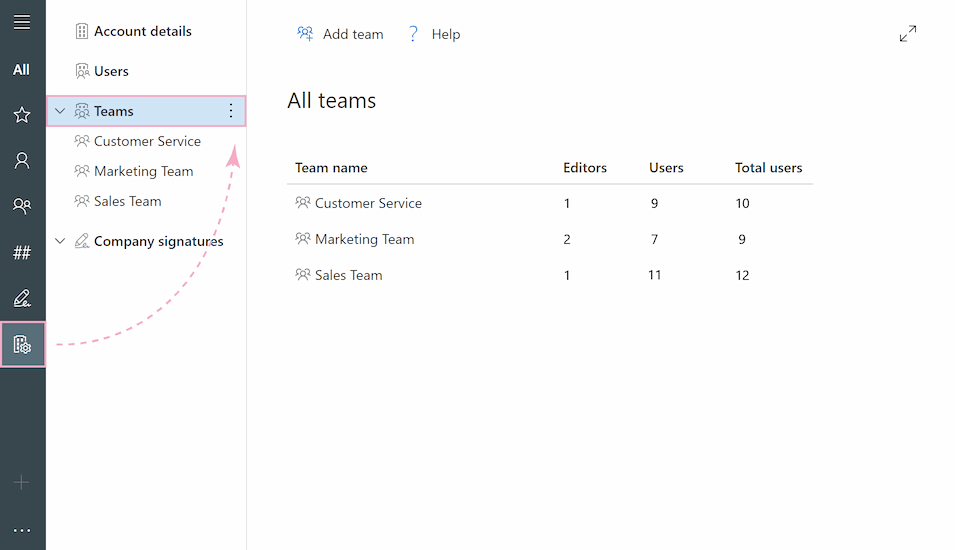
- To check users' access status select the relevant team and click Add Users to view its members and permissions.
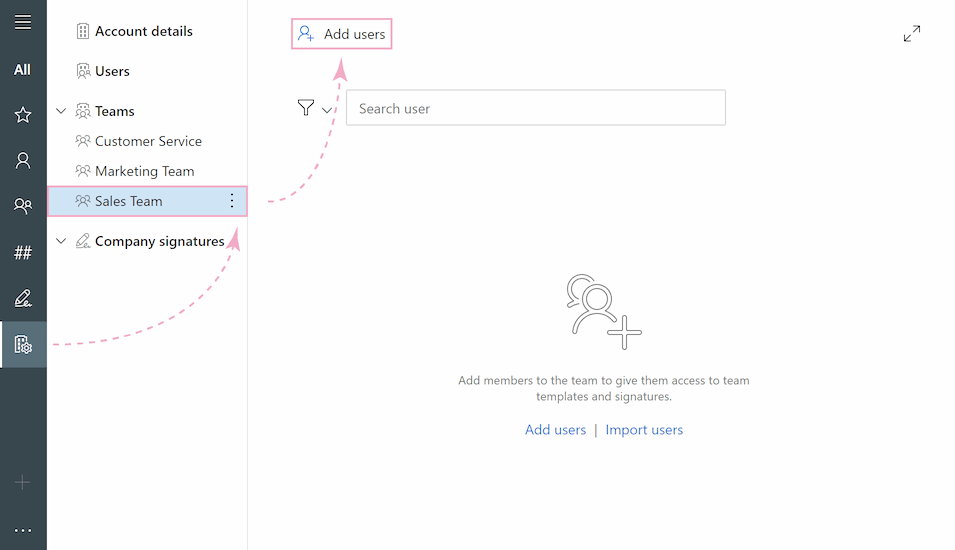
- Here you can modify access for specific members.
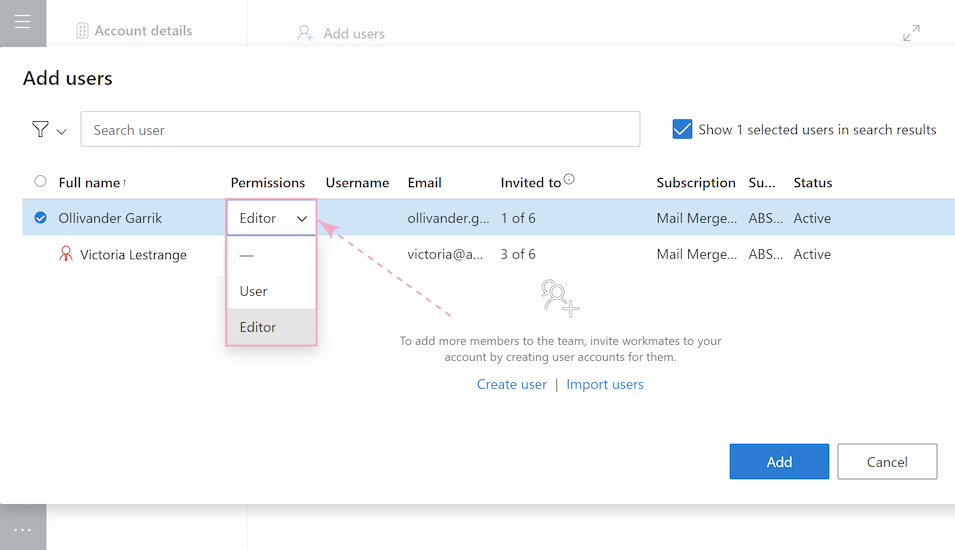
- Click Add after you have set the required access levels.
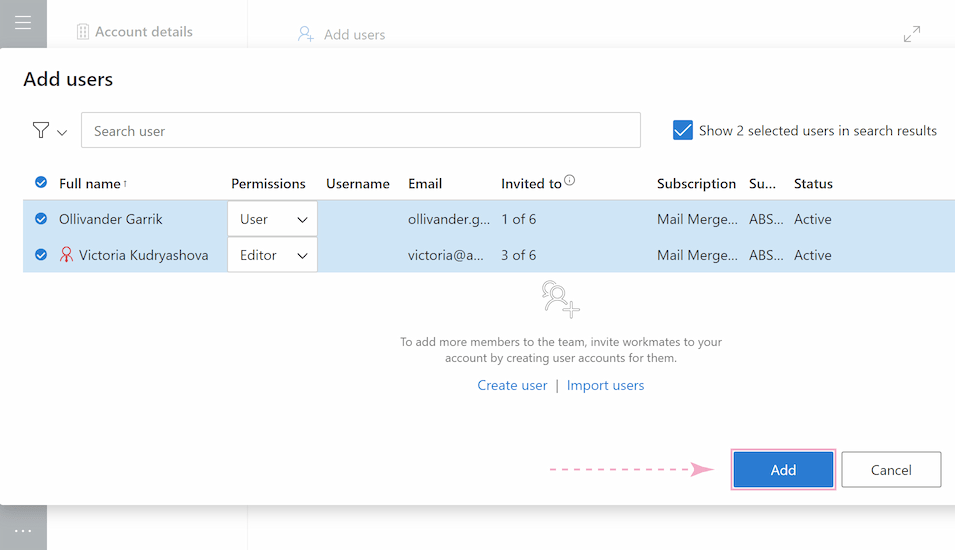
Moving a template to a particular group allows you to restrict editing rights for some users within that group, enabling them only to use the approved template. Simultaneously, you can grant full editing permissions to other members of the same group. It keeps your templates on-brand while still giving the right people the ability to make necessary changes.
Delete and recover templates easily
Deleting templates within the extension is even simpler:
- Open the Shared Email Templates sidebar.
- Select the template you wish to remove.
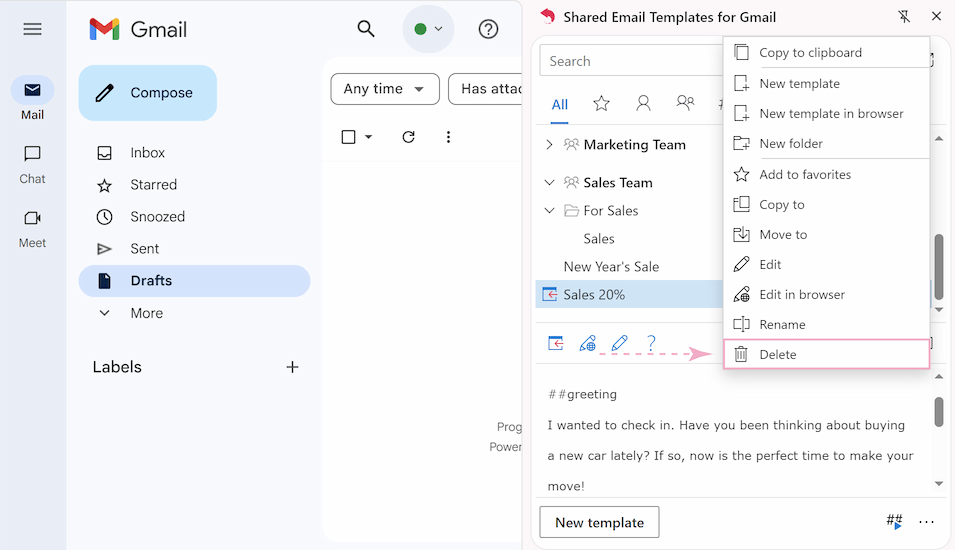
- Click the three-dots icon next to the template.
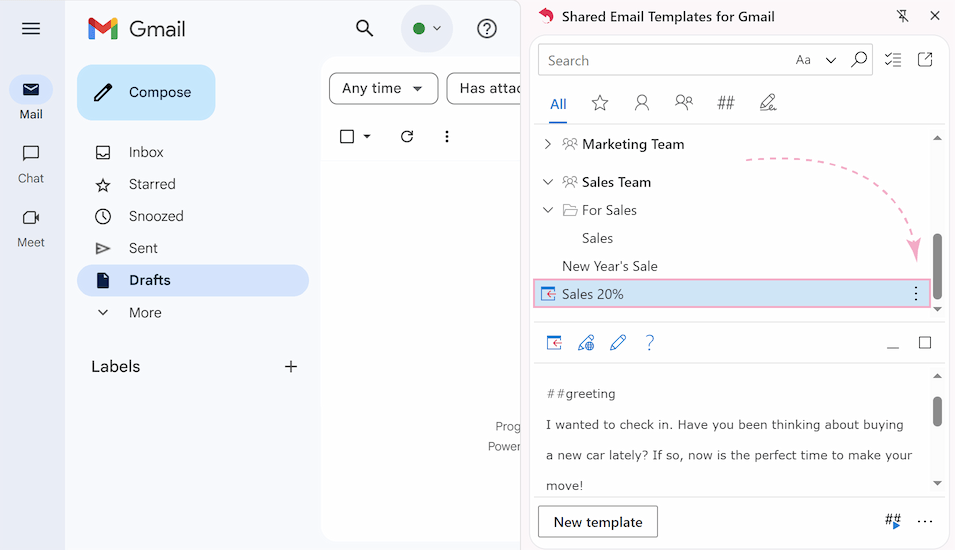
- Select Delete from the drop-down menu.
Need to delete several templates quickly? Follow these steps:
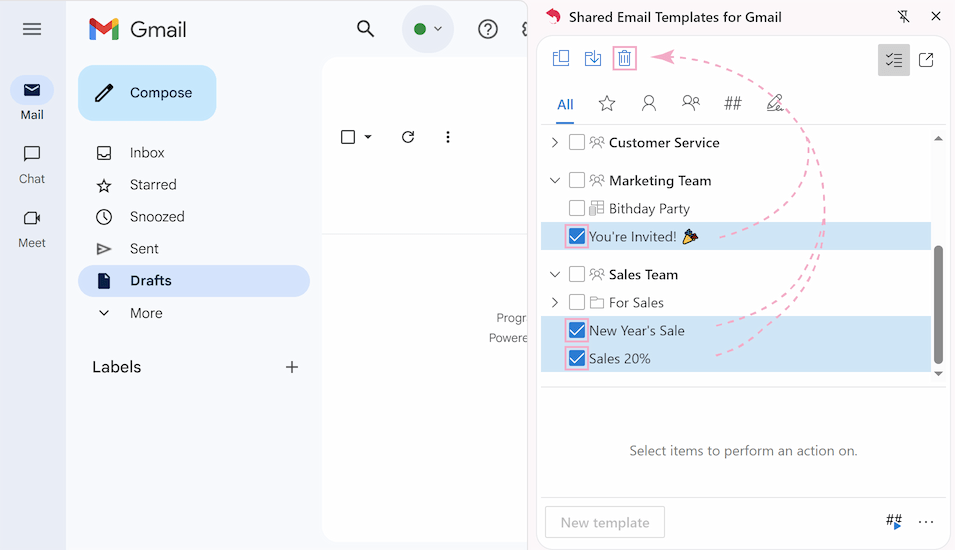
- Click the Checkbox icon at the top of your template list.
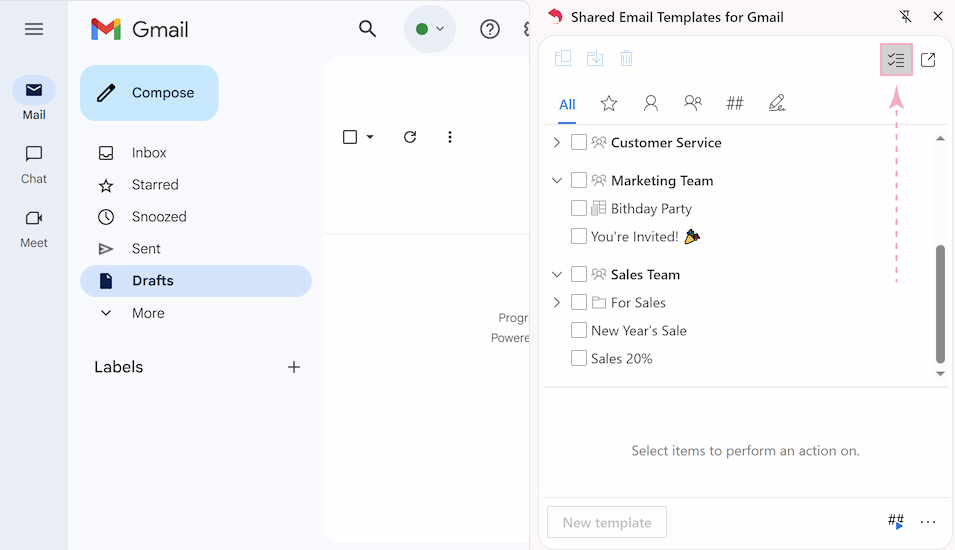
- Check the boxes next to all templates you want to remove.
- Tap the Bin icon to delete selected templates.
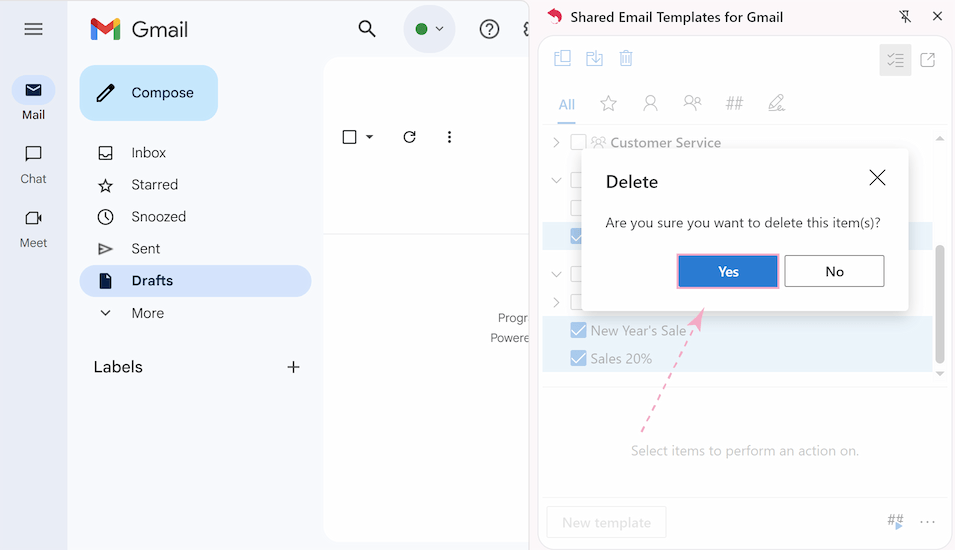
- Confirm the deletion by clicking Yes in the pop-up window.
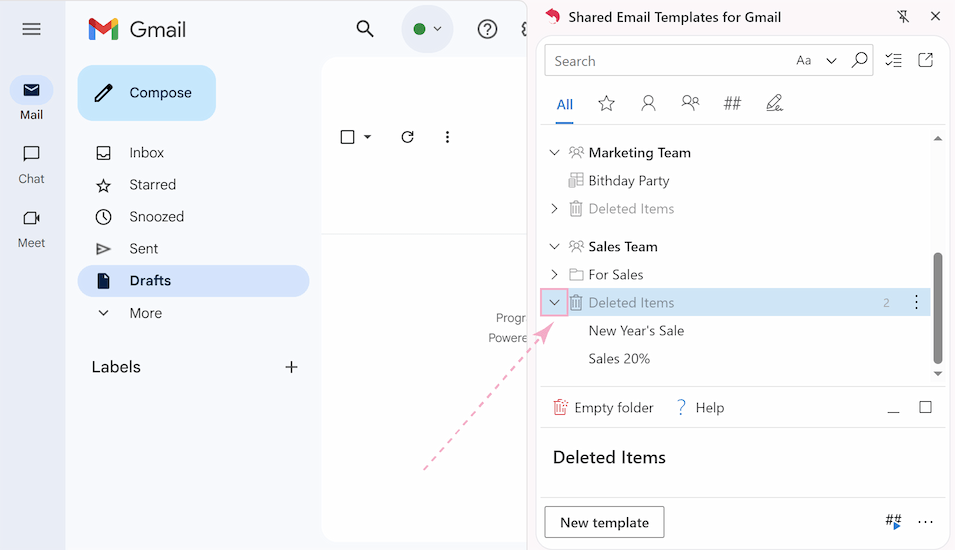
Deleted the wrong template? We've got you covered. Here's how to recover it:
- Navigate to the group where the template was deleted.
- Click the arrow of the Deleted items folder to view all the deleted templates.
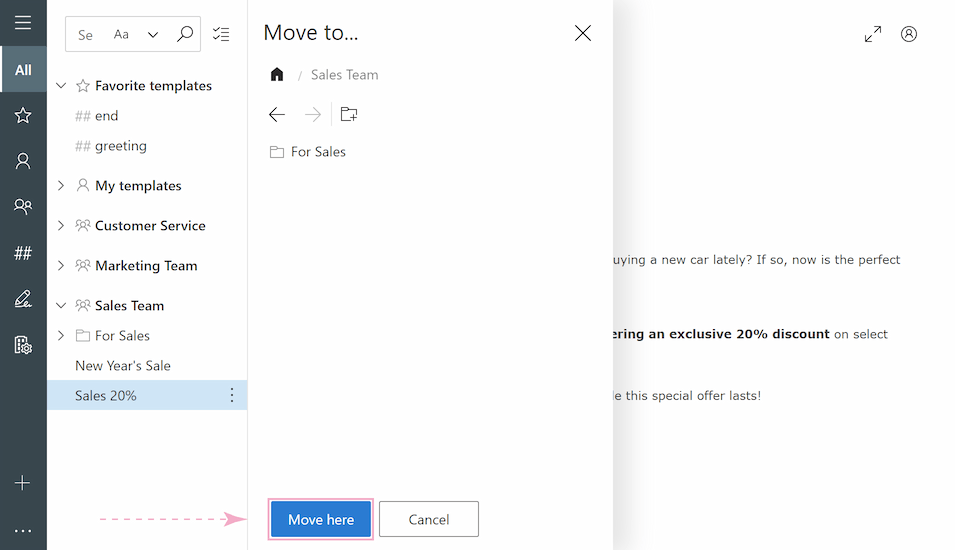
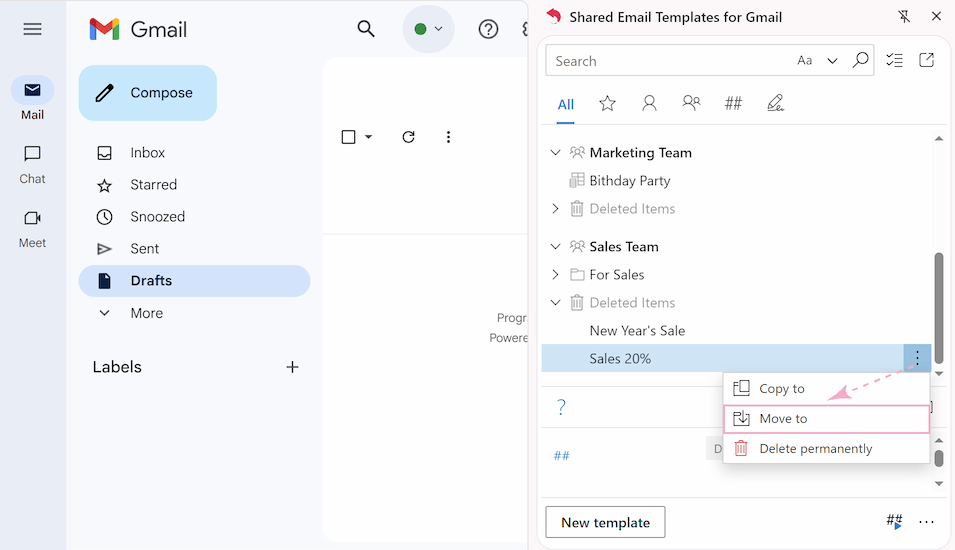
- Select the template you want to restore, click the three-dots icon beside it, then choose Move to.
- Choose the group where you want to place your template, and click Open.
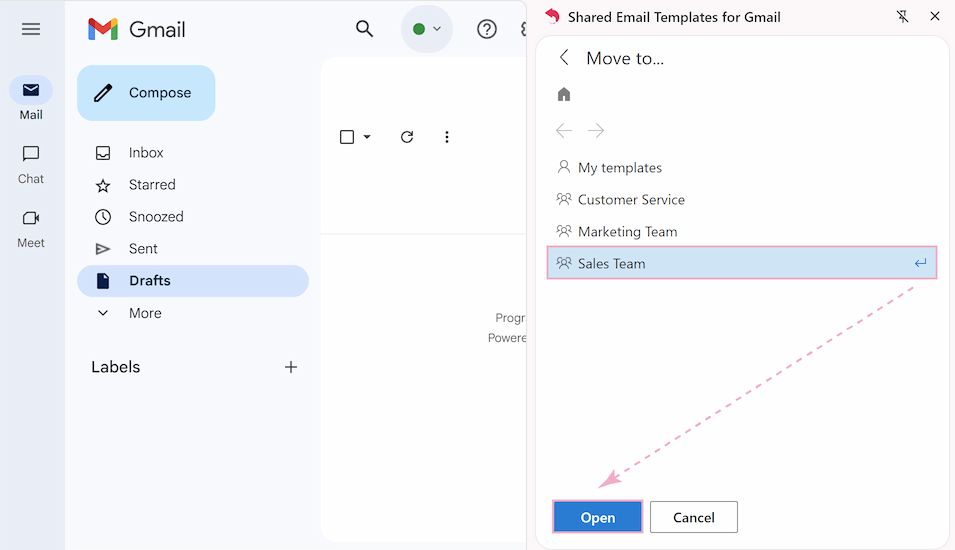
- Create a folder with the New Folder button to move the template to a new folder, or simply move it to a group by clicking Move here.
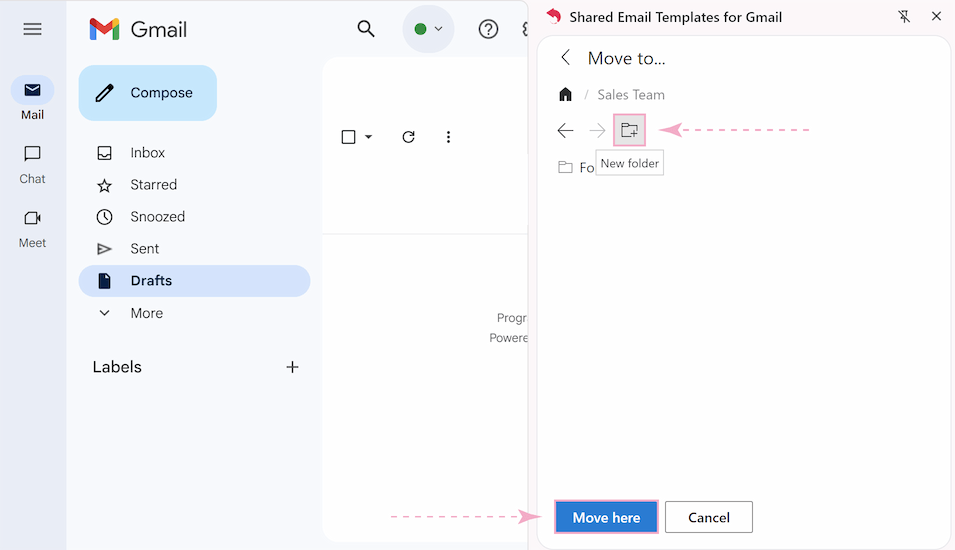
- Your deleted template will appear where you moved it!
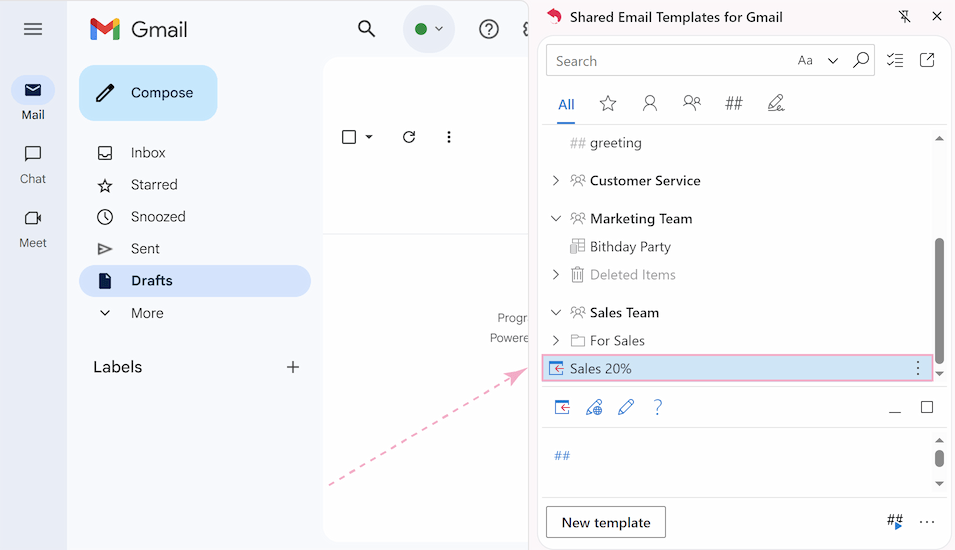
Now your templates are always safe😉
Templates can boost your efficiency once you get comfortable editing and organizing them. I hope this tutorial will help you work with Gmail templates more easily!
If you ever need to do more – like letting some team members edit templates while others just use them, or recovering accidentally deleted templates – we've built Shared Email Templates for Gmail to handle those situations smoothly. It's free to try for 60 days if you want to explore those features.
 by
by 