Today we’re going to have a closer look at Outlook table templates. I’ll show you how to create them, merge and color cells and format your tables to use them in email templates for your correspondence.
Previous to showing you how to add tables to your emails, I’d like to devote a few lines to a small introduction of our app for Outlook called Shared Email Templates. We designed this tool to make your routine correspondence not only quicker, but also more efficient. With Shared Email Templates you’ll be able to create a nice looking reply with formatting, hyperlinks, images and tables in a few clicks.
I’d love to encourage you to look through our Docs and blog posts to discover the add-in’s countless abilities and make sure it worth checking :)
BTW, you may always install Shared Email Templates from Microsoft Store and give it a try for free ;)
Create a table in Outlook email templates
I’d like to start from the very beginning and show you how to create a new table in a template:
- Start Shared Email Templates.
- Create a new (or start editing an existing) template.
- Click on the Table icon on the add-in’s toolbar and set the size of your table:
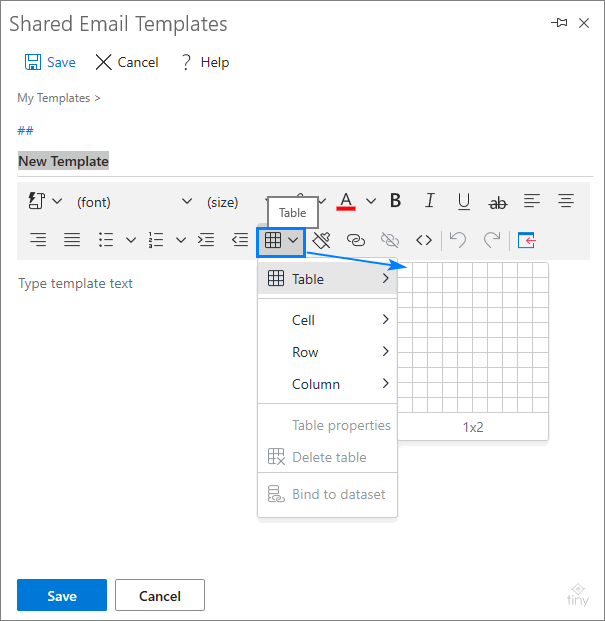
You just need to specify the number of rows and columns for your future table and it’ll be added to your template.
Alternatively, you may paste a ready-made table in your template. However, it’ll require a small modification. The thing is your table will be pasted borderless so you’ll need to go to Table properties and set Border width to 1 in order to make the borders visible.
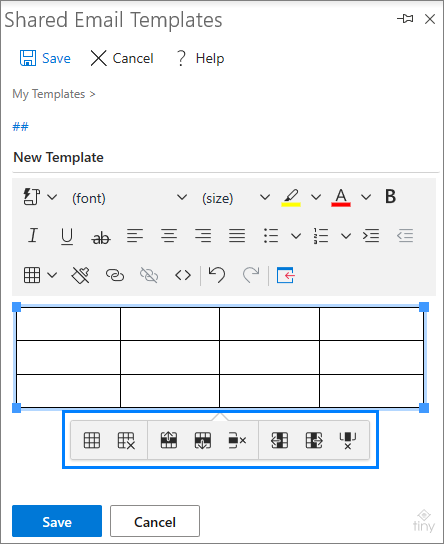
Tip. In case you need to add new rows/columns or, on the contrary, remove some, just place the cursor in any cell and choose the necessary option from the dropdown pane:
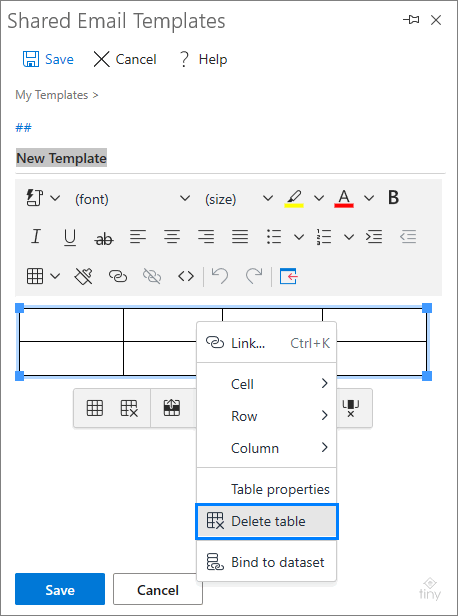
If you no longer need this table, just right-click on it and choose Delete table:
How to format a table in a template
Tables are not always just black-bordered rows and columns so if you need to highlight some key points, you may brighten your table a little :) Right-click in any cell and choose the Table properties option from the dropdown list. There will be two fields for you to modify:
- On the General tab, you can specify the size of your cells, their spacing, padding, alignment. You can change the border width and show caption.
- The Advanced tab lets you change the border styles (solid/dotted/dashed, etc.), colors and update the cells’ background. You may enable your creativity mode and make your table less casual or leave it as is, it’s totally up to you.
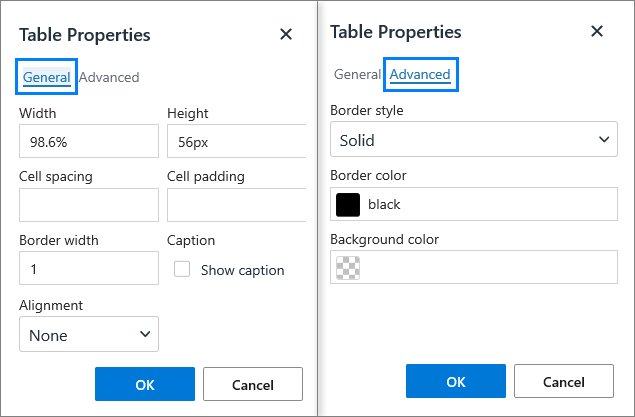
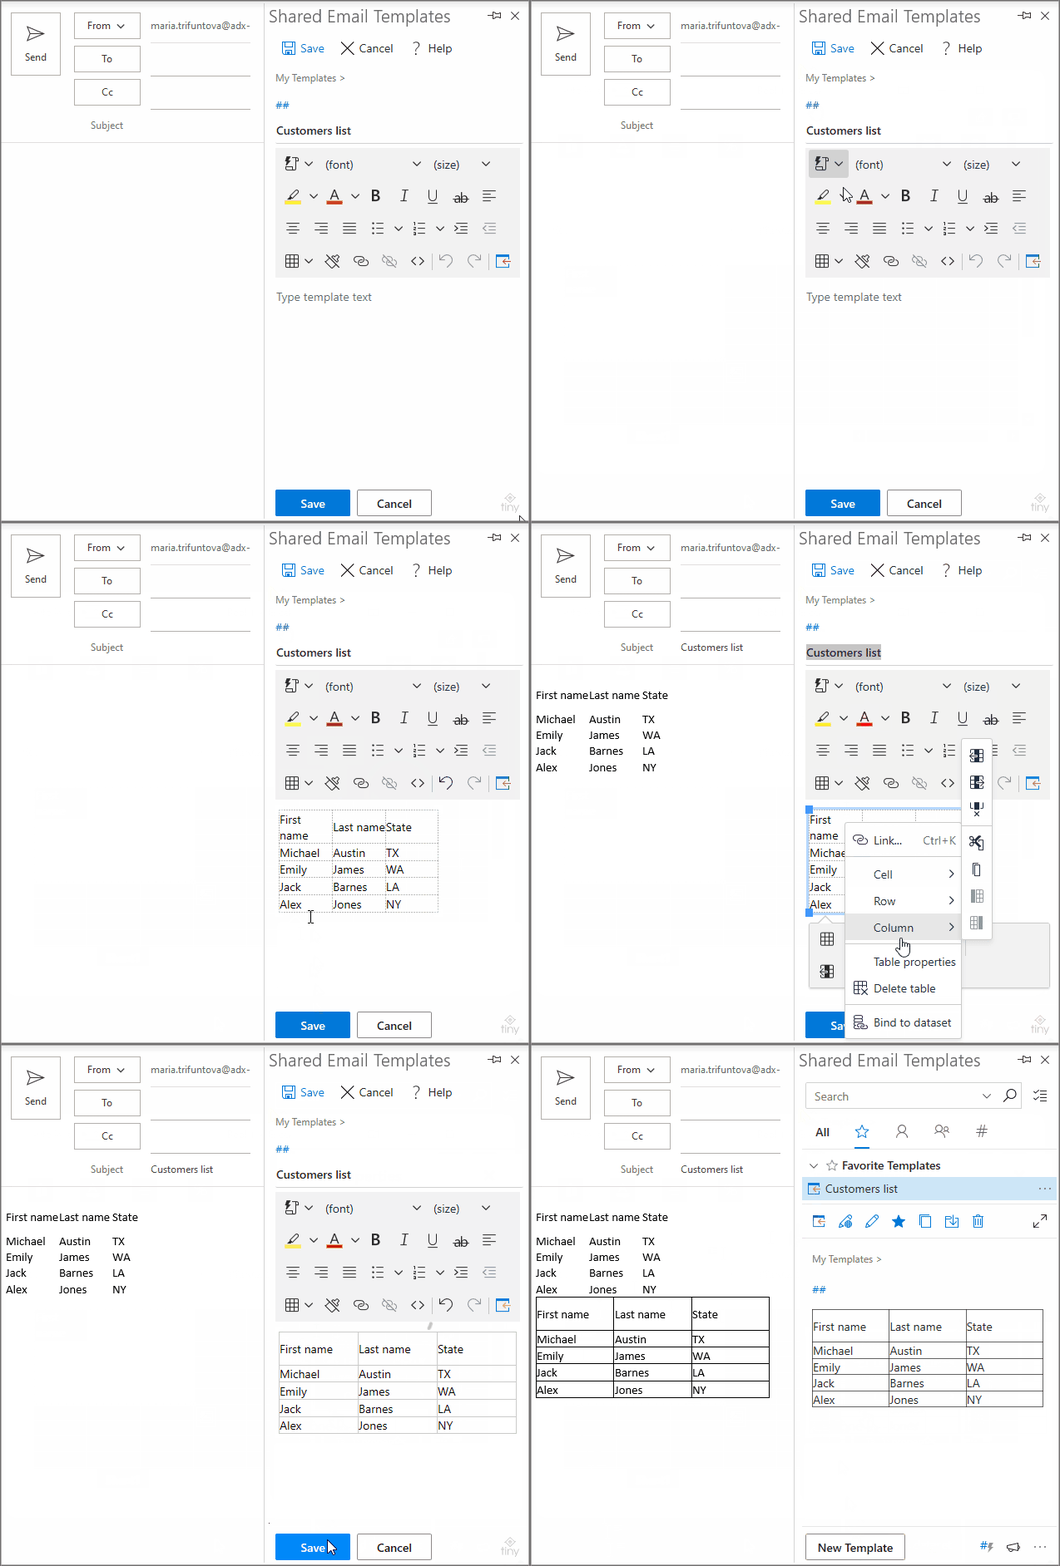
Let’s format some sample table and see how it works. For example, I have a template with the list of my company’s customers that I’d like to improve a little. First off, I’d color it all. So, I right-click somewhere on this table and go Table Properties -> Advanced.
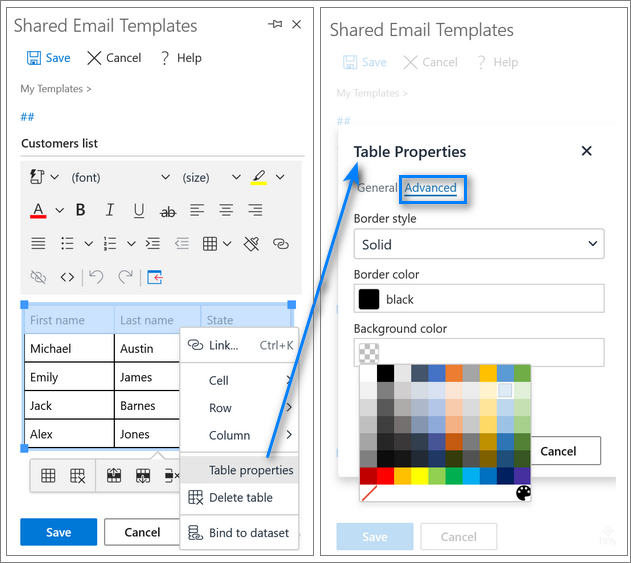
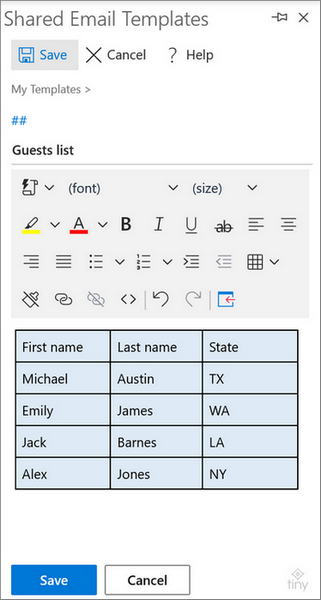
Once I choose the color and hit OK, my table gets much brighter. Looks better, doesn’t it? ;)
But I’m not done yet. I’d also love to make the header row brighter and more visible. Speaking generally, I want to change the formatting of the first row only. Can I do that in Shared Email Templates? Absolutely!
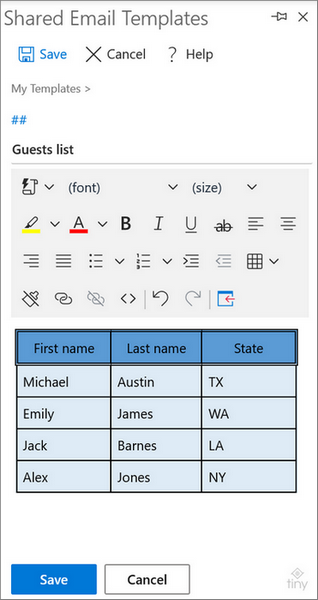
So, I select the first row, right click on it and choose Row -> Row properties. There are two tabs of properties to choose from. I set the central alignment on the General tab, then go to the Advanced one, change the border style to “Double” and renew the background color to a deeper tone of blue.
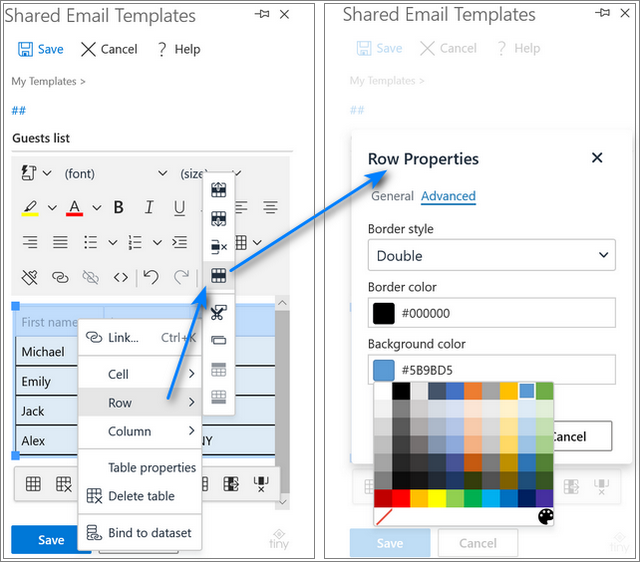
Here is how my table looks like after the modifications applied:
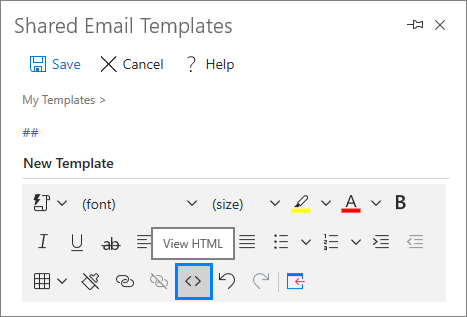
If, however, you feel like a pro, you may open the template’s HTML code and modify it the way you want.
Merge and unmerge cells in an Outlook table
A table wouldn’t be a table if it wasn’t possible to combine its cells and split them back if needed. Our Shared Email Templates allows modifying an Outlook table in such manner. And I’ll tell you more, you can merge cells without losing data and unmerge them back preserving all their content.
Sounds too good to be truth, right? Here are three simple steps to merge cells in Outlook:
- Open Shared Email Templates and start editing a template with a table.
- Select the cells you’d like to merge and right-click in any place of the selected range.
- Choose Cell -> Merge cells.
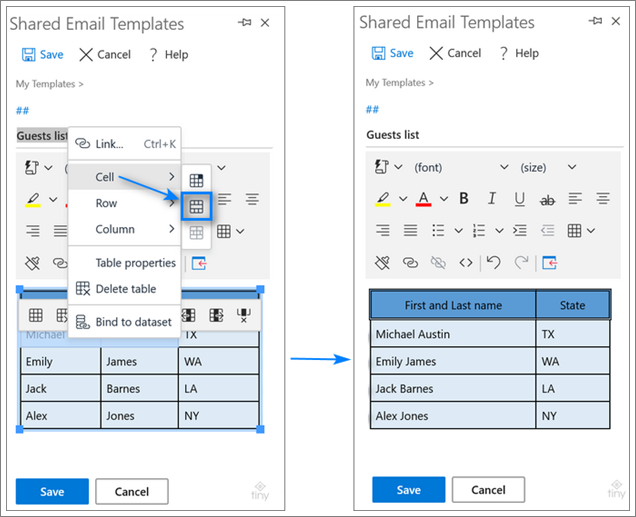
Voila! The cells are merged, the content of the merged range is preserved, no data in the table is moved, replaced or deleted.
But is it possible to merge not only columns, but also rows or, maybe, even the whole table? No problem! The drill is identical, you select the range, right-click on it and go Cell -> Merge cells.
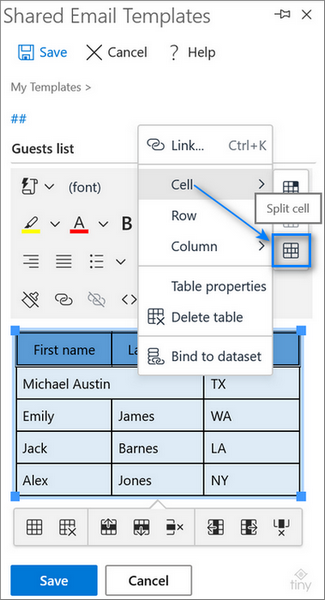
And what about splitting the cells back? Will they be unmerged correctly? Will the data be saved? Will the original rows’ arrangement be preserved? Yes, yes, and yes! Just select the merged range, right click on it and do Cell -> Split cell.
Drawing a conclusion
In this tutorial I showed you how to use Outlook tables as templates. Now you know how to create, modify and fill in email template tables. I hope I managed to convince you that our Shared Email Templates will boost your productivity in Outlook and you’ll give this app a shot :)
Thank you for reading! In case there are any questions left, please don’t hesitate to leave them in the Comments section. I’ll be happy to hear back from you :)
Available downloads
Why choose Shared Email Templates? Top 10 reasons (.pdf file)
 by
by
6 comments
I have created a Table with free-fill fields for users to type in information. How do I Lock or Protect the title boxes? I am not using dropdowns or select boxes. I would like my users to be able to tab to the fillable fields and not be able to modify the instruction fields.
Thanks for this. If the table is larger or contains more information (for instance, in sentences) how do I get the table to hold it's form between different screen sizes?
Hi Fran,
Thank you for your question. The size of your table will adapt to the size of the window where it is displayed but please make sure that the width of the table in Table Properties is 100% or less.
Is there a way to hide specific borders? For example, I have created a table with 3 columns and 3 rows. I would like to hide the borders on the middle column, whilst keeping the outside borders visible. How can I achieve this?
Hello Holly,
Our sincere apologies for the delay in replying to your question.
Am I right in thinking that you would like to make only horizontal lines within the second column invisible? If so, you can do that by following these steps:
1. Select and merge cells of the second column.
2. Insert a new table consisting of 1 column and 3 rows into a merged cell.
3. Change the properties of the new table. In Table Properties -> General, the width and the height should be 100%, the border width should be 0px. In Table Properties -> Advanced, pick "None" for the border style and "Remove color" for the border color.
You have added the value into your stuff, Awesome work! I am just reaching out because I recently published a content that might be a good fit. Either way keep up the good work.