In this article, you will learn how to use Outlook stationery to personalize emails with your favorite background colors and images. You'll also discover how to quickly add it to an individual email or all your messages, and how to remove someone's stationery from your replies.
With Outlook stationery, you can customize your emails using a variety of backgrounds, patterns, and fonts to reflect your unique style or brand. Sometimes, though, someone else's designs can carry over into your replies when you least expect it. Knowing how to set up and remove them will help you keep your emails looking just right on every occasion. In this guide, you'll learn:
What is stationery in Outlook?
Outlook stationery refers to a set of predefined design elements that can be applied to the body of an email. It can include:
- Background colors, images, or patterns
- Custom fonts and text styles
- Design elements like bullet lists, lines or WordArt
Outlook offers a large collection of built-in stationery, but you can also create your own. For instance, you might design custom stationery that features your company's logo and brand colors.
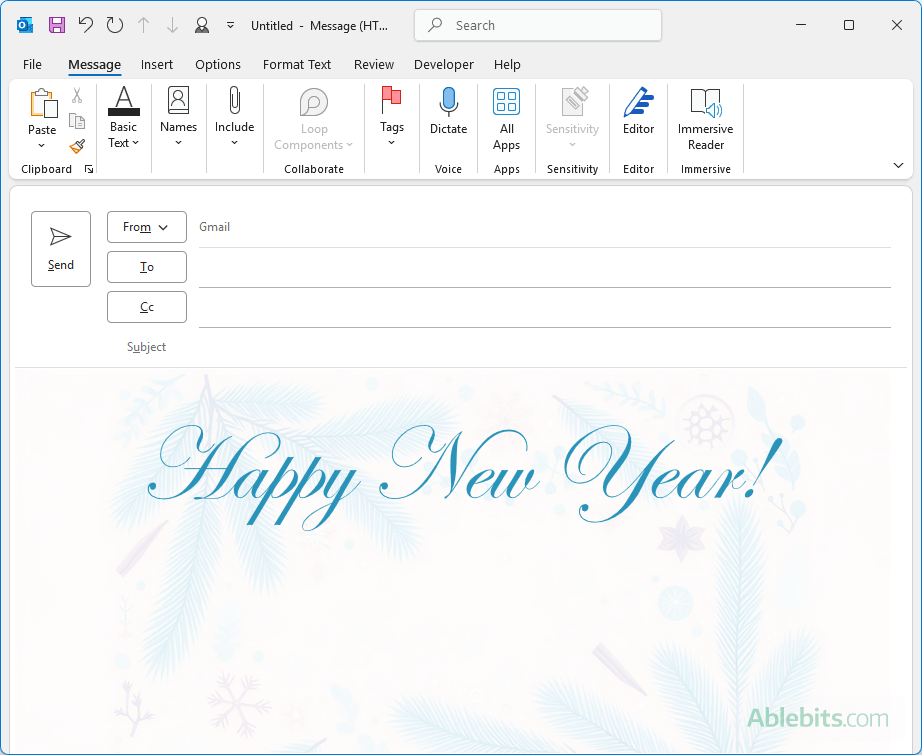
You can also create your own unique designs for special occasions. Here is an example of Christmas stationery for Outlook with a festive background image and a decorative greeting header in a stylized font.
Notes:
- Stationery is only available in classic Outlook, including Microsoft 365, Outlook 2024 – 2013 desktop versions. It is not supported in the new Outlook and web app.
- Stationery can only be used with HTML-formatted messages, not plain text.
- In your sent messages, the stationery design may appear differently for recipients because many email clients (e.g. new Outlook or Gmail) do not support background images.
How to add stationery to Outlook email
If you want to give a specific email a more personalized or decorative look, you can apply stationery to it. Here's how:
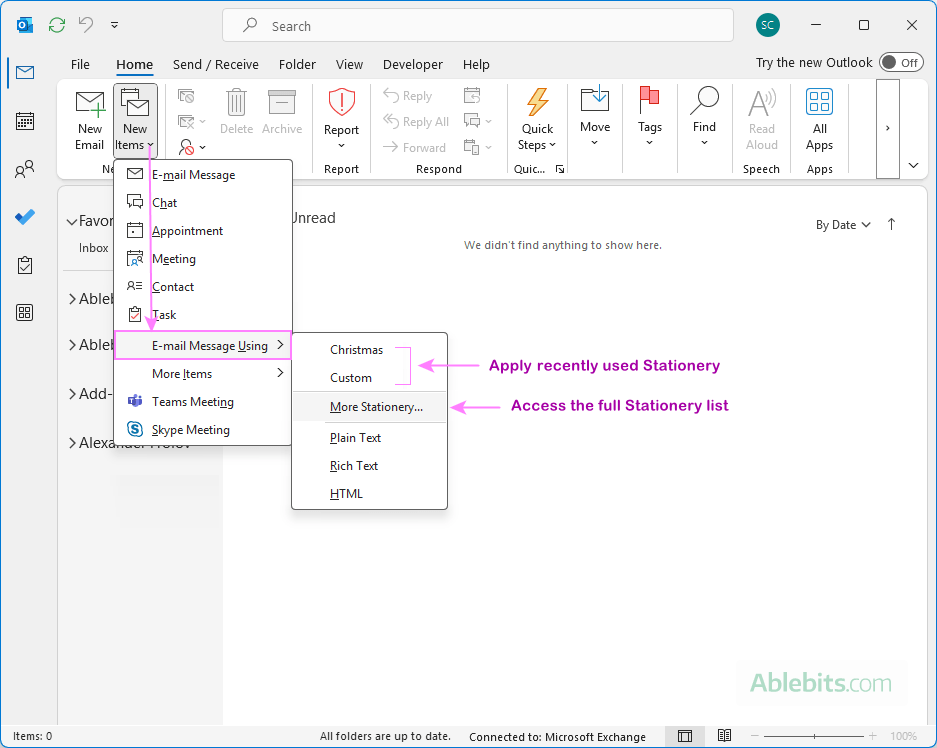
- Go to the Home tab > New group.
- Click New Items > Email Message Using.
- Pick one of your recently used items from the top of the menu. Or click More Stationery... to get to the full list of stationery and themes.
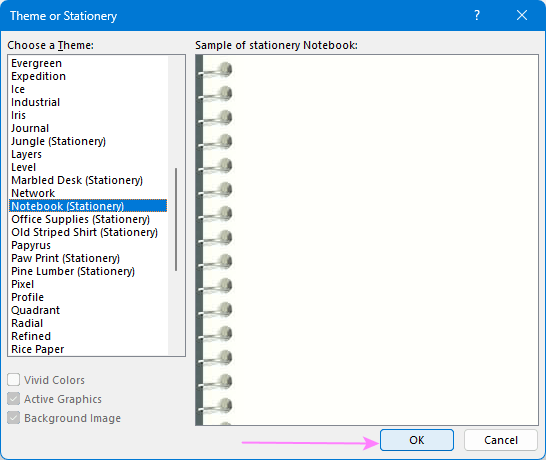
- In the Theme or Stationery window, select either a built-in design or a custom one you've created yourself, and click OK to add it to your email.
Once the stationery is applied, compose your message as you normally would, then send it.
How to create custom stationery in Outlook
To use a custom design in your Outlook emails, begin by creating a new message in HTML format. Add all your preferred design elements, then save it as stationery to re-use in other emails.
Here are the steps to create new stationery for Outlook:
- Create a new email. First, create a new email formatted as HTML. You can check this on the Format Text tab, in the Format group.
- Design the message. Next, customize your email the way you want your stationery to look. Here are some popular options:
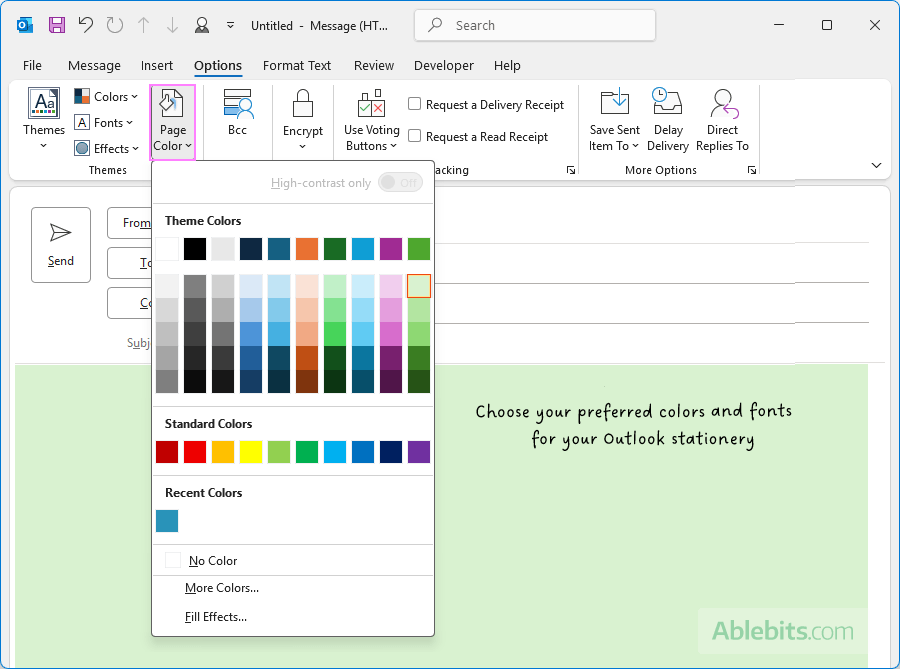
- Set a background color: go to the Options tab > Themes group > Page Color, then under Theme Colors, choose your preferred one.
- Add a background image: head over to the Options tab > Page Color > Fill Effects > Picture tab, then select an image from your computer or OneDrive.
- Apply a background pattern or texture: navigate to the Options tab > Page Color > Fill Effects, then use the Pattern or Texture tab and explore the available styles.
- Set custom fonts: on the Home tab, in the Basic Text group, choose your desired Font, Font Size, and Font Color.
Continue to design the message exactly how you'd want every future email to appear.
- Save the email as HTML file. Once you're happy with your design, switch to the File tab, click Save As, and save the email as HTML (*.htm, *.html) type to the default Stationery folder:
C:\Users\UserName\AppData\Roaming\Microsoft\Stationery
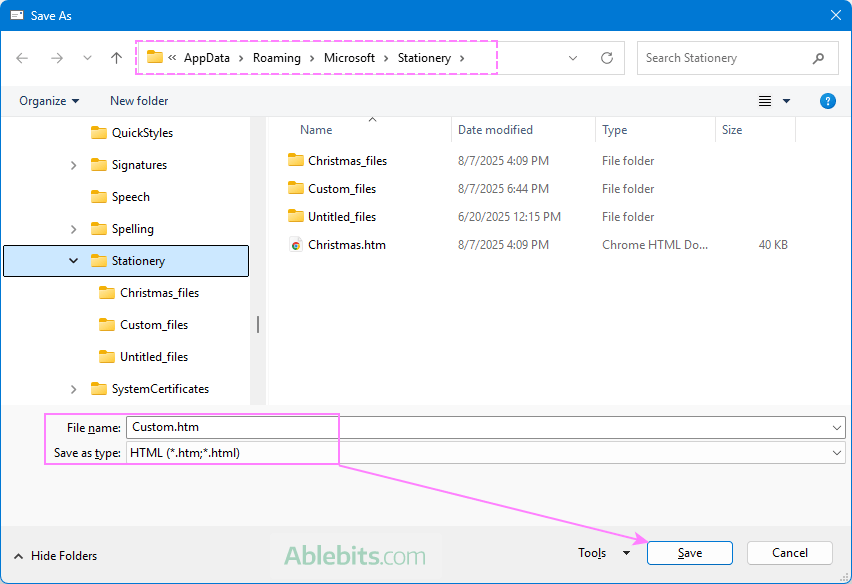
Once saved, this file will become available as a reusable stationery template in Outlook.
Tip. You can also design your custom stationery using any HTML editor for more advanced formatting, and then save the resulting .html file to the Stationery folder. Just be sure to test how it looks in different Outlook versions, as rendering can vary significantly on different platforms.
How to change stationery in Outlook
You can only edit custom stationery designs that you've created yourself; built-in ones cannot be modified.
To change custom stationery in Outlook, the steps are:
- Open your stationery. Add your custom stationery to a new email as described in this section.
- Change the design. Adjust the background color or image, update fonts, or make any other changes you want.
- Save the updated stationery. Save the email as an HTML file to the default Stationery folder. You can save it under the same name to replace the original or under a different name to keep both versions.
Automatically apply stationery or theme to all new messages
If you want a specific stationery or theme to appear in every new email you write, Outlook can apply it automatically and silently. Here is how to set it up:
- Click the File tab > Options.
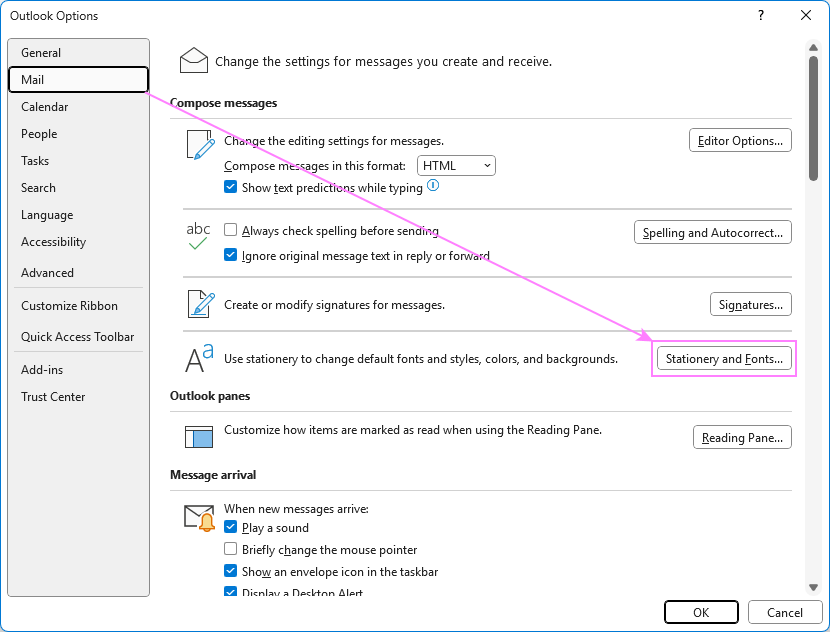
- In the Outlook Options window, go to Mail > Stationery and Fonts.
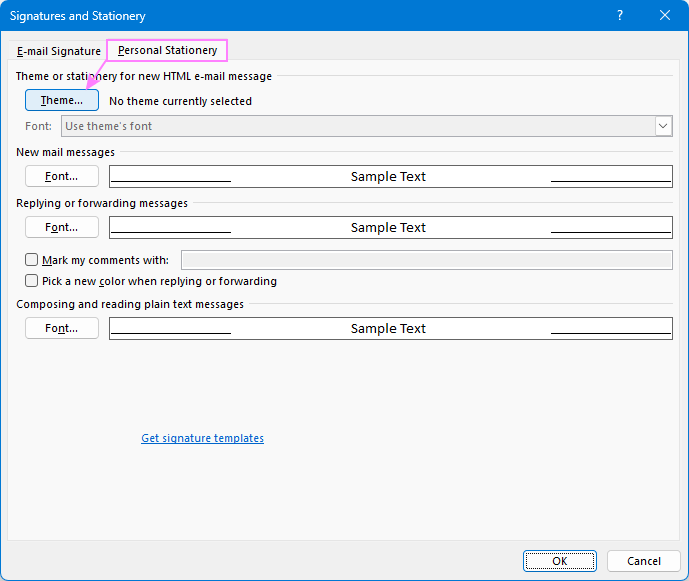
- In the Signatures and Stationery window, go to the Personal Stationery tab, and click Theme.
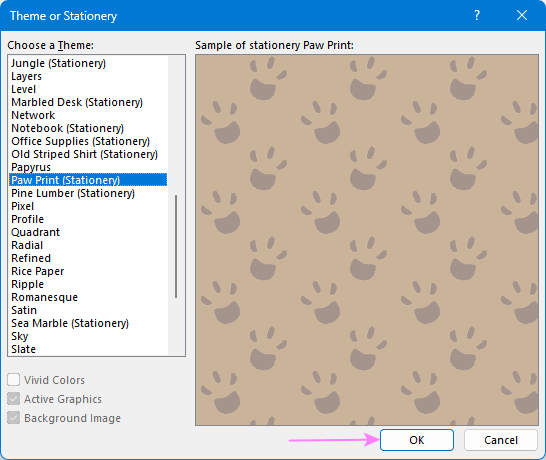
- Select the theme or stationery you want to use for all new messages and click OK.
That's it! Your default Outlook stationery is now set.
Tip. In the Signatures and Stationery window, you can also set the font style, size, and color for your messages.
Note. If you see the message "Themes are not installed" when trying to set a stationery, check that your default message format is set to HTML: File tab > Options > Mail > Compose messages section.
Where is Outlook stationery stored?
By default, any custom stationery you create in Outlook is saved in this folder:
C:\Users\UserName\AppData\Roaming\Microsoft\Stationery
To quickly open it, you can enter the command below in the Run dialog or File Explorer's address bar and press the Enter key:
%AppData%\Microsoft\Stationery
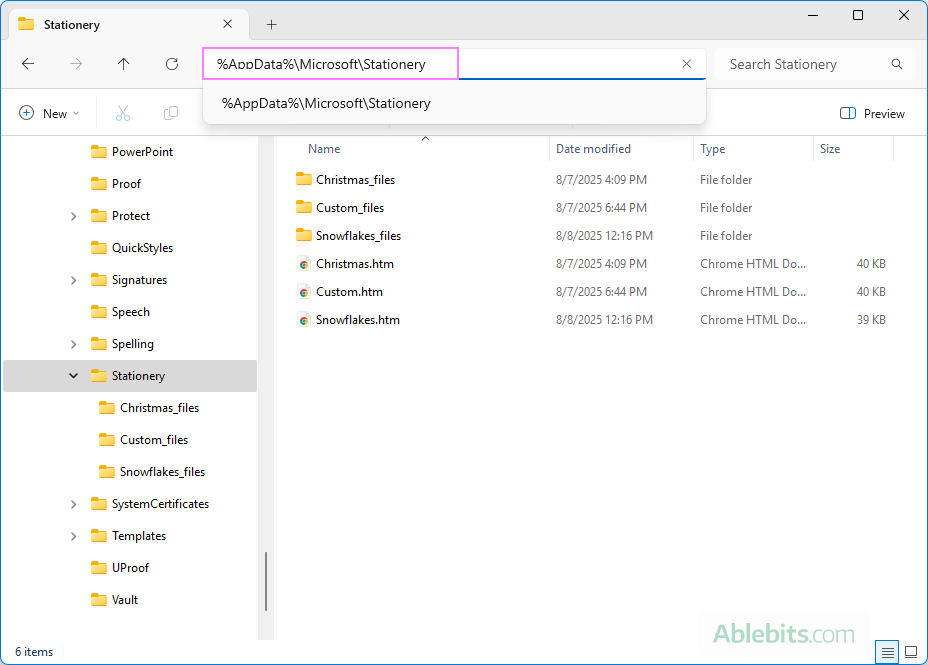
Tip. The AppData folder is hidden by default. If you navigate there manually, enable hidden items in File Explorer by clicking View > Show > Hidden items.
How to back up and export Outlook stationery
If you want to keep your custom stationery safe or move it to another computer, you just need to copy one folder:
- Copy the entire Stationery folder and save it to a safe location.
- To transfer stationery to another computer, paste the folder into the same location on that computer.
Remove stationery from Outlook emails
If you've set stationery to add automatically to your emails but changed your mind later, here's how you can remove it:
- Go to File tab > Options > Mail > Stationery and Fonts.
- On the Personal Stationery tab, click Theme.
- Choose (No Theme), which is the first item on the list.
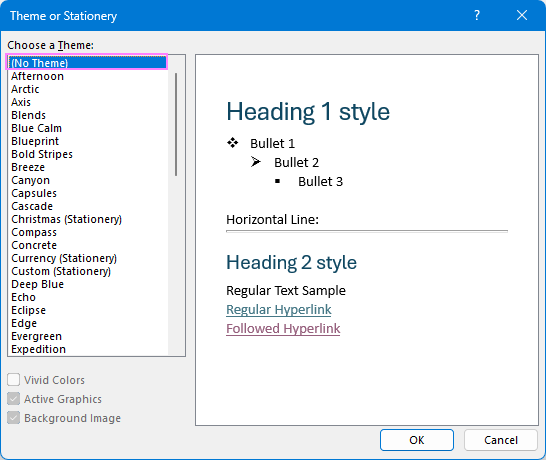
After removing stationery, your emails will use Outlook's default background and styles.
Remove stationery from Outlook replies or forwards
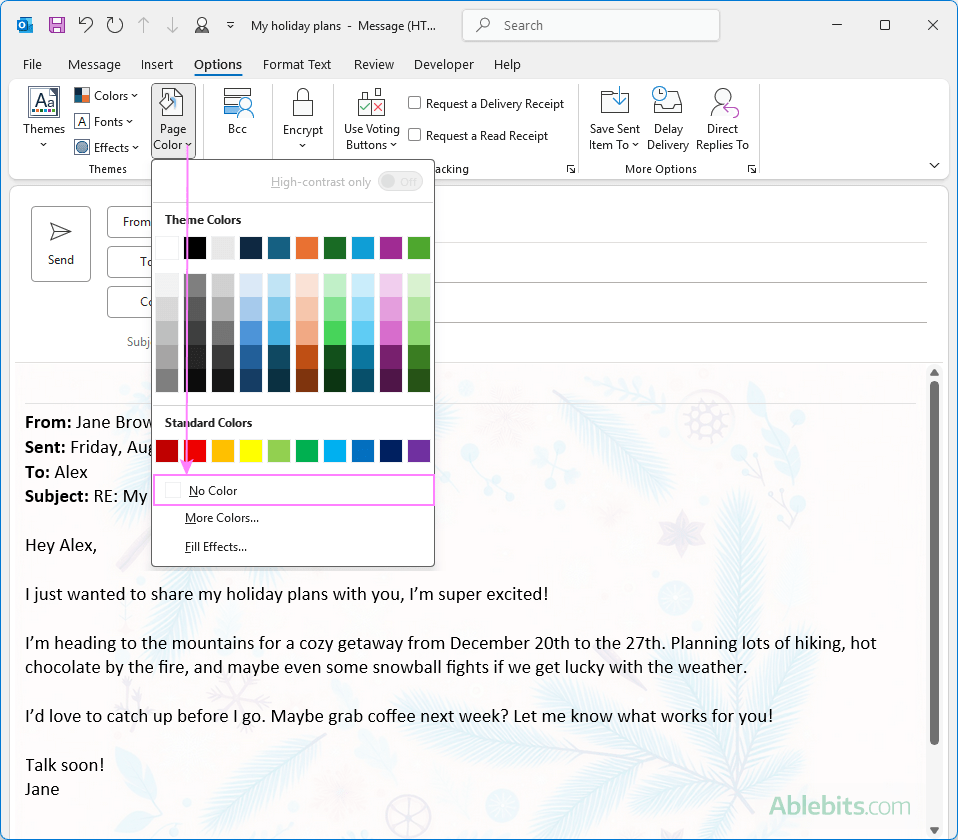
If someone has sent you a message with stationery or background, but you do not want it in your reply, you can easily remove it:
- Open the message you received and click Reply, Reply to All, or Forward.
- Place the cursor anywhere in the message body.
- On the Options tab, in the Themes group, click Page Color > No Color.
This will immediately clear the background, letting you send your message with a clean, simple look.
How to delete stationery in Outlook
To delete a custom stationery that you created, this is what you need to do:
- Open the folder where your stationery items are stored. For each custom stationery it contains an HTML file and a folder with images and other assets.
- Delete the .html file with the same name as the stationery you want to remove from your Outlook. For this, either:
- Select the file and click Delete on your keyboard, or
- Right-click the file and choose Delete from the context menu.
- Deleting the .html file will automatically delete the folder with the same name.
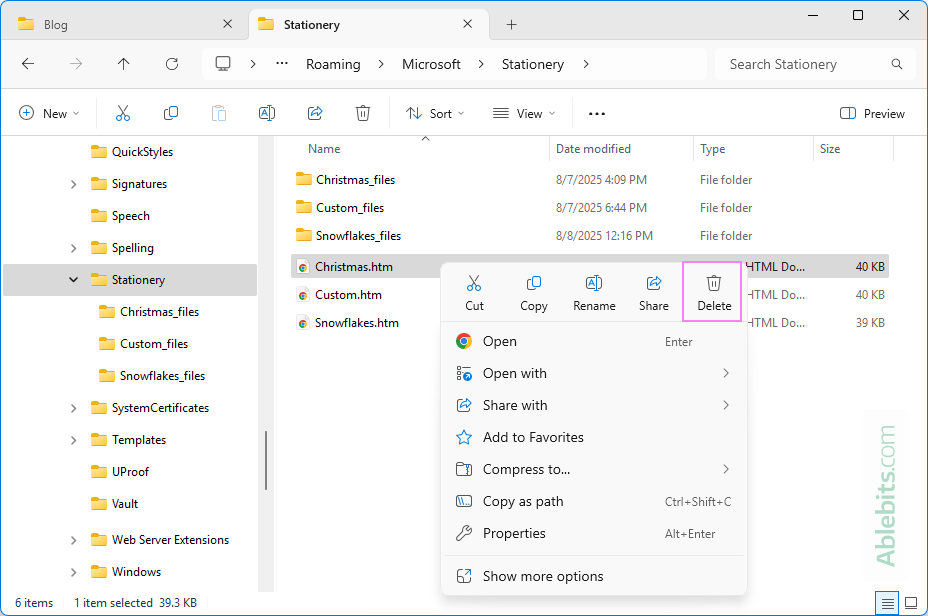
Once the .html file is deleted from the Stationery folder, the corresponding item will no longer appear in the Stationery and Themes list.
Now that you know how to add, change, or remove stationery in Outlook, you can dress up your emails when you want or keep them plain when you don't 😊
 by
by