Need to set up multiple signatures in Gmail? This guide provides step-by-step instructions on how to create multiple signatures, change, delete, or switch between them. This is particularly useful if you need distinct signatures for professional, personal, or multi-lingual correspondence.
Adding a signature in Gmail is a great way to personalize your emails, but sometimes a single signature just isn’t enough. Fortunately, Gmail allows you to create multiple email signatures. After reading this article, you will be able to use multiple signatures for a more personalized and professional touch.
Can you have multiple signatures in Gmail?
Google email allows you to easily create and manage different signatures for various situations within one or several accounts. It can be useful for both work and personal emails. Here are the key benefits:
- Firstly, with this feature you can switch automatically between personal and business correspondence, keeping an appropriate tone for the message. It doesn’t look good if you sign your official email with “Cheers!” or send your business information to family members.
- Secondly, for initial emails, it’s important to include your full contact information. But for forwards and replies, it could be overkill; and you may need a shorter version of the signature. This way, your email looks neat without losing its meaning.
- Thirdly, you may exchange emails with a lot of people around the world in different languages. It would be a polite gesture to use a separate signature in each language. Moreover, this will help to avoid misunderstandings due to cultural differences.
- Finally, this feature can save the time you spend on correspondence. You just need to create the necessary signatures in advance. So, you won’t need to update your signatures every time you send a different type of email.
How to add multiple signatures in Gmail?
To create multiple signatures, follow these steps:
- Access your Google email account by logging in with your credentials as you typically do.
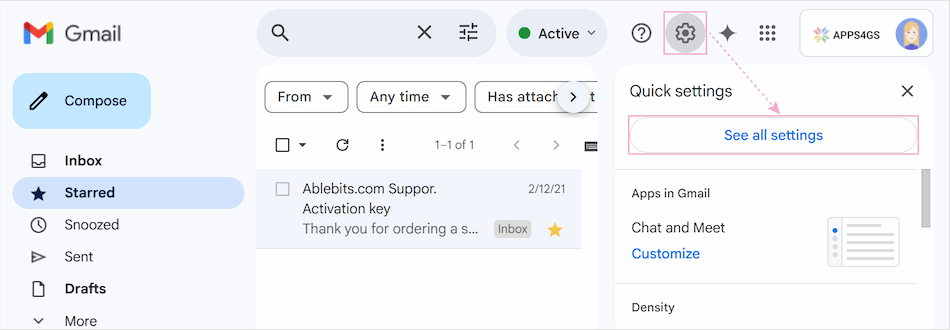
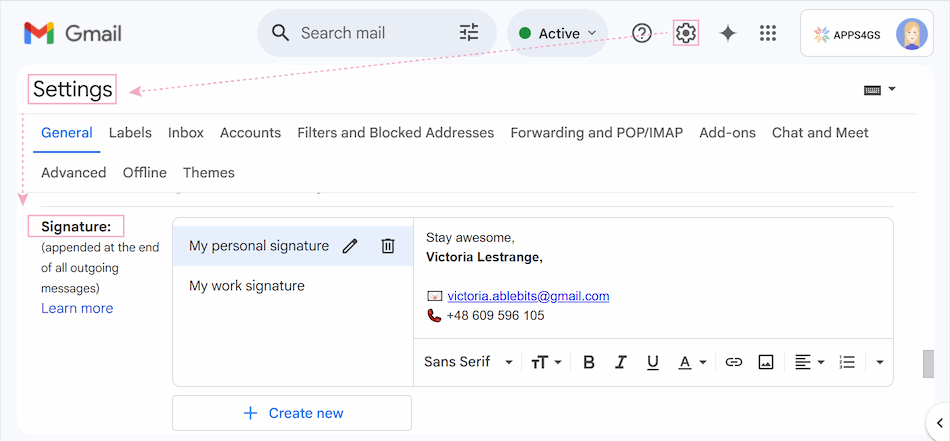
- On the top right of your screen, click the Gear icon and then See all settings.
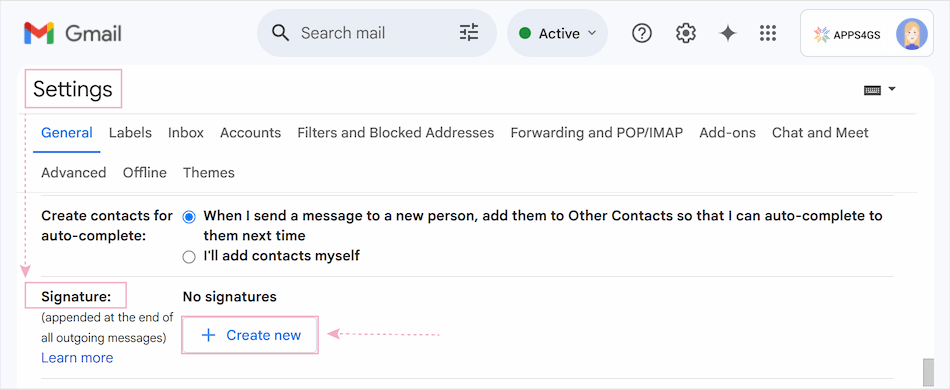
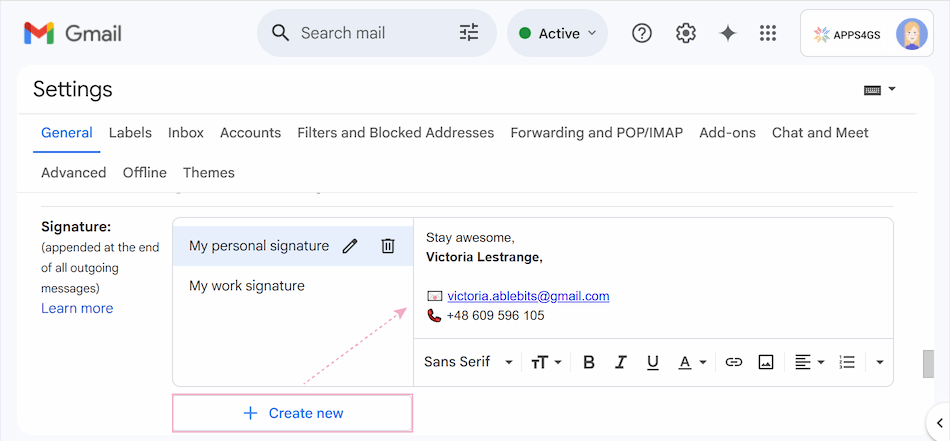
- From the General tab, scroll down to the Signature section. In the Signature section of Settings, click on the Create New button.
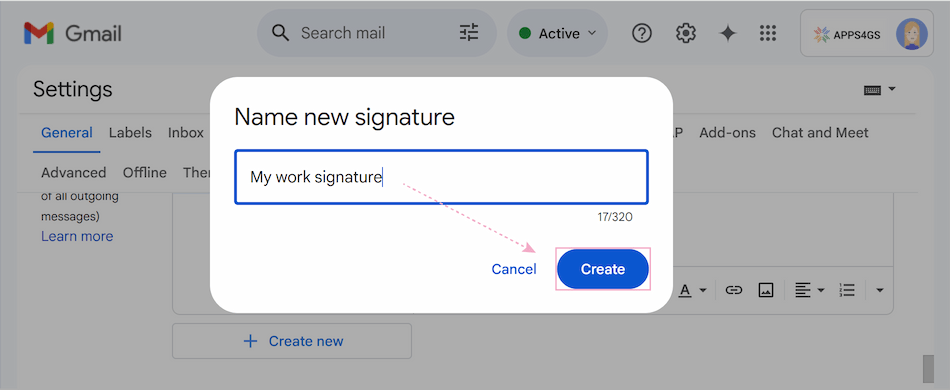
- After clicking the Create New button, name your new signature and hit Create.
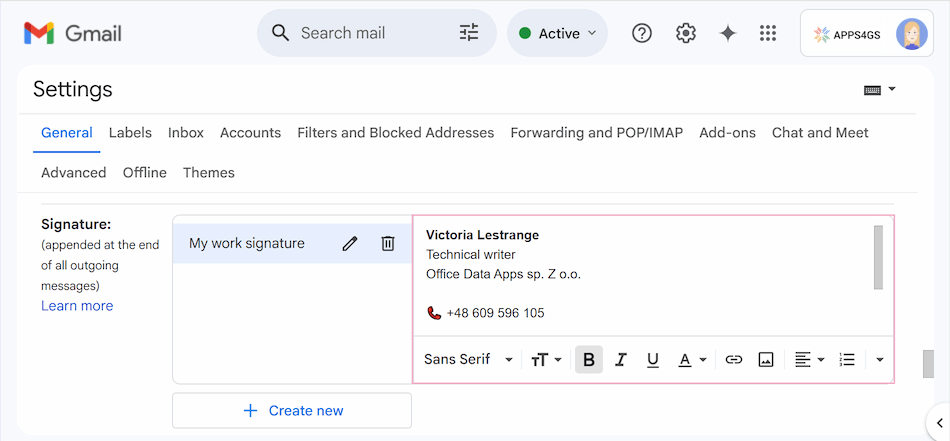
- A text editor will appear for your new signature. Type the content of your email signature in the box on the right. Here you can add your name, title, contact information, and even images or links.
Tip. Your image also counts toward the character limit (10,000 characters). If you exceed the limit, try to resize the image.
- Now you can easily create a second signature the same way as the first one: click the Create New button again, name your second signature, hit Create, and type the content of your next email signature. If you need to create additional signatures, just repeat the steps above.
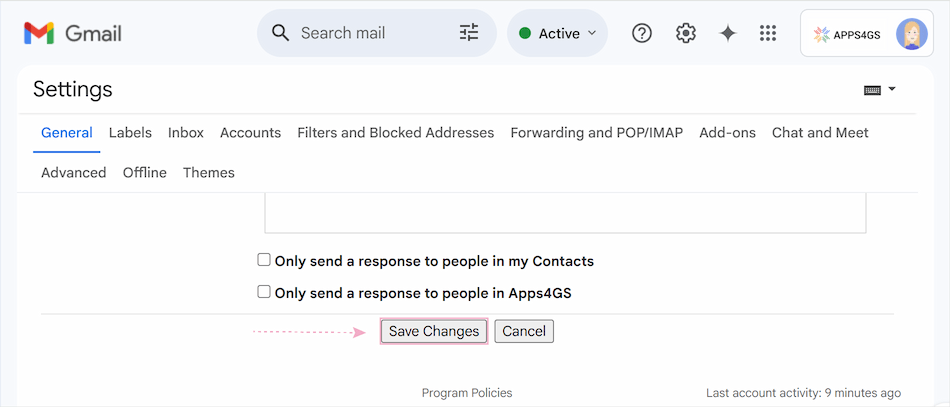
- Don’t forget to click the Save Changes button at the bottom of the page. Then your signatures will be ready to use.
How to change or delete signature in Gmail
To edit your signature or delete it, the steps are almost similar:
- Go back into your Gmail account and click on the Gear icon in the top right-hand corner and then See all settings again. Scroll down to the Signature section under the General tab of the Settings.
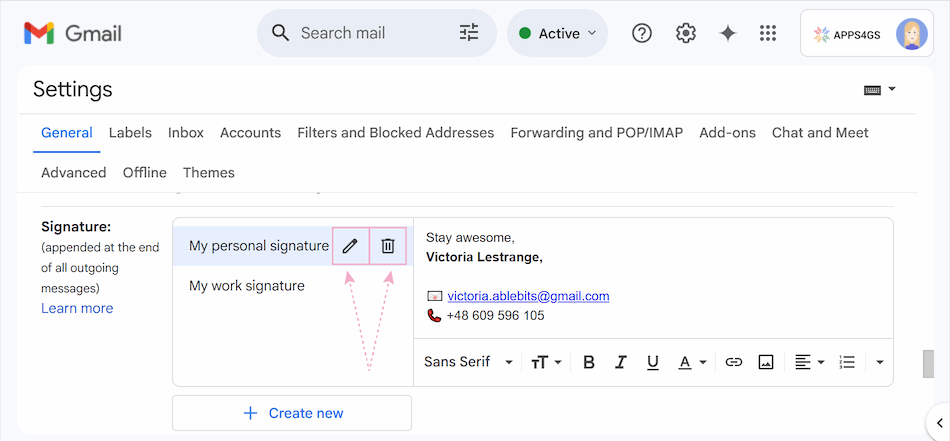
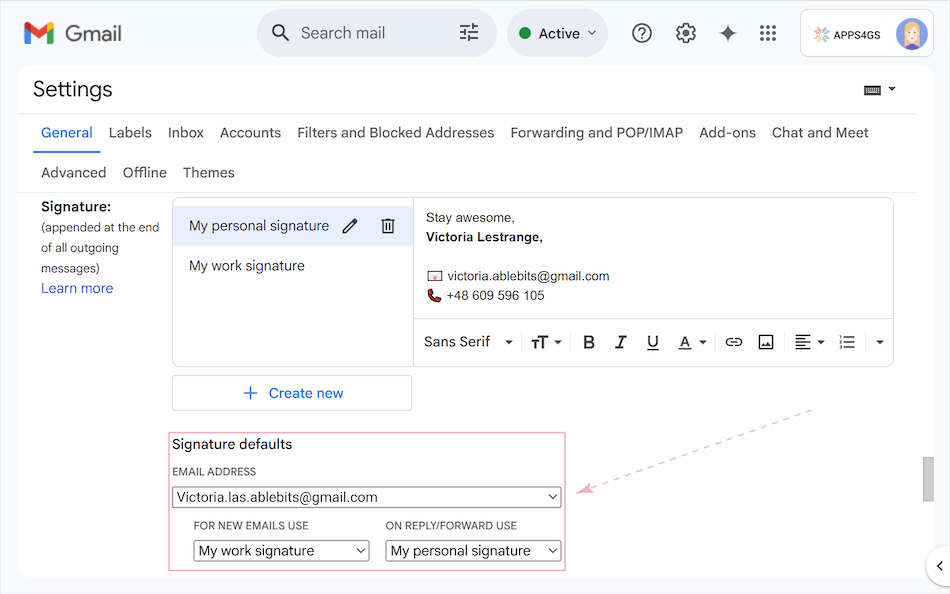
- Here, you’ll be able to see all your previously created signatures. Click the Pencil icon to change your signature name or edit the information in the text editor beside it. Please see the screenshot provided in point 3.
- You can also remove unnecessary signatures. Click the signature you want to delete and use the Trash can icon.
- Once you're happy with your signatures, click Save Changes at the bottom of the page.
How to set default signature in Gmail
To set the signatures as default (so they’re added to all your emails automatically), return to See all settings and navigate to the Signature section. You can find the Signature defaults at the bottom. Under the Signature Defaults, there are several options: For new emails use and On Reply/Forward use.
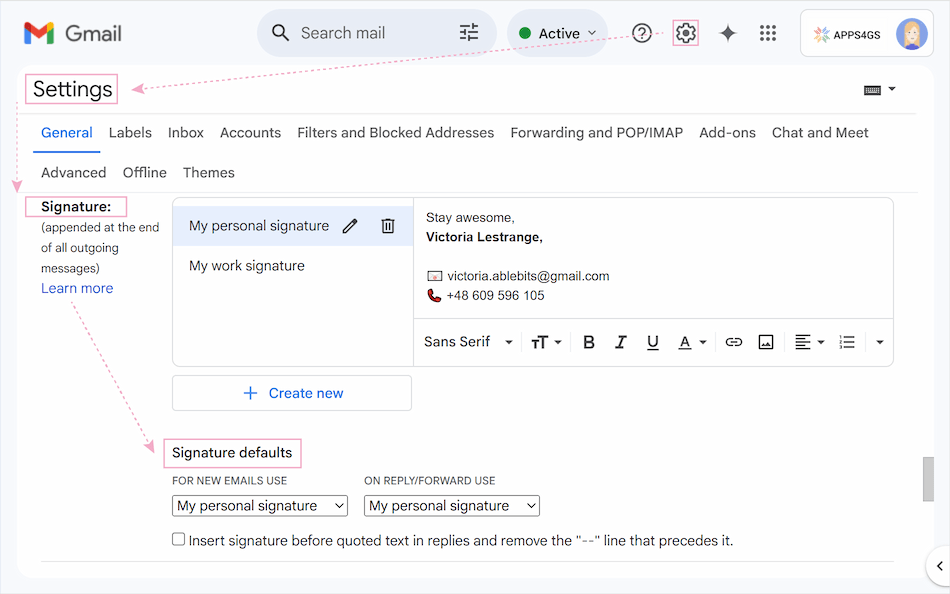
Here you can choose which signature appears and when. As the names suggest, the first signature default setting is for new emails, the second one is for replies or forwards. Click the drop-down menu and select the necessary signatures. Then click the Save Changes button to save default settings.
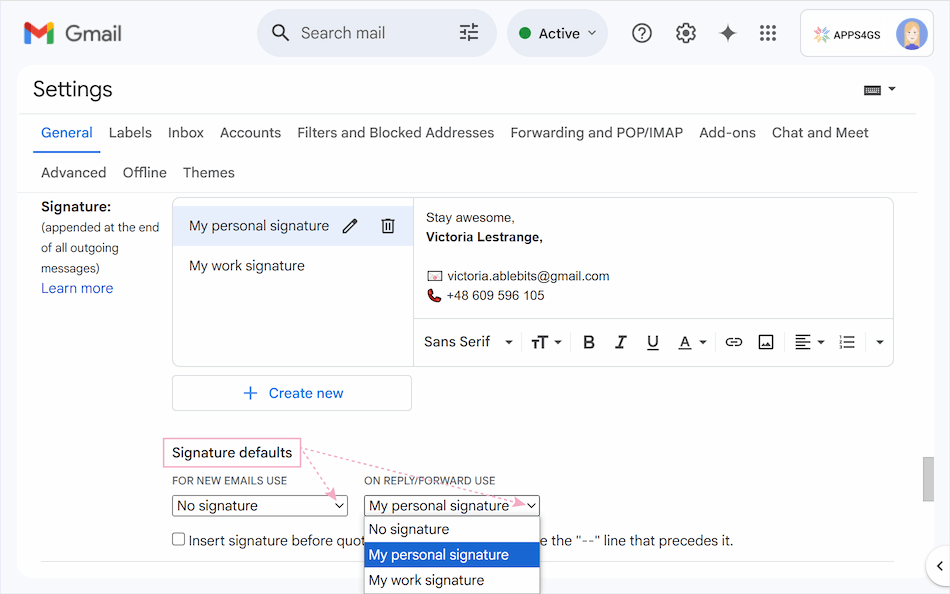
Optionally, you can choose No signature. Click the matching drop-down menu and select the preferable option. If you choose the No signature option, your signatures won’t keep showing up when you’re composing or replying to emails.
How to switch between signatures in Gmail
Switching between multiple signatures is quite straightforward:
- Click the Compose button on your Gmail Inbox page to compose a new message.
- Tap the Pen icon in the message box toolbar and select the desired signature before you hit send. It will automatically appear in your email.
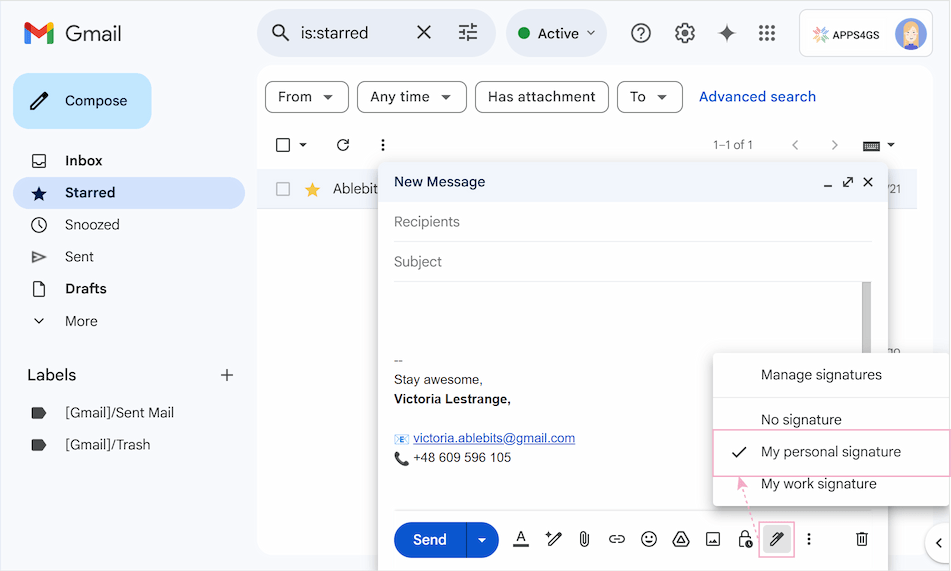
- The Pen icon also gives you access to the signature settings. So, you can easily create a new one right there, if you need to.
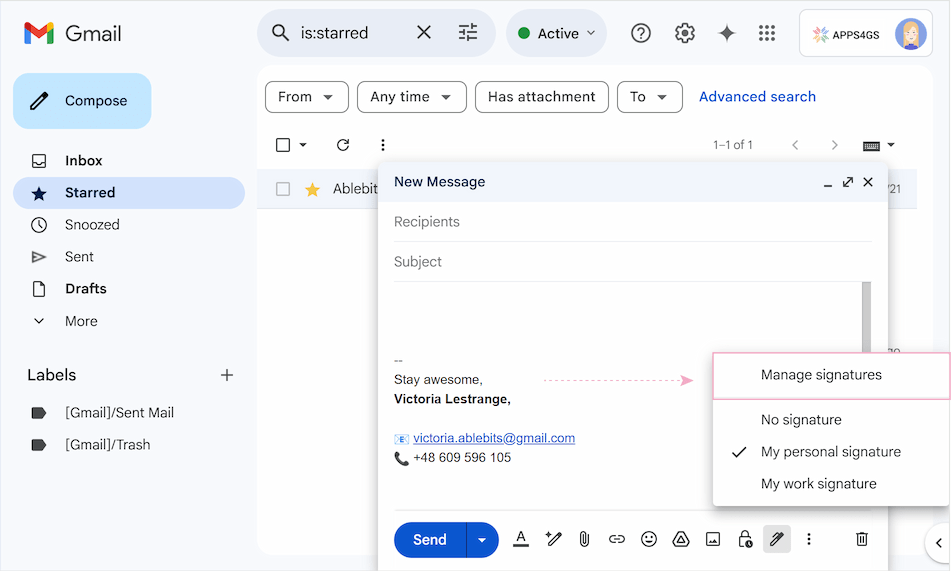
As you can see, switching between multiple signatures is simple and convenient.
How to set up multiple signatures in Gmail for different accounts
If you have several Gmail accounts, you can create different signatures for each account. Just follow these steps:
- Open your Google email account and click on the Gear icon, then go back to See all settings.
- In the Signature section, you will see a drop-down menu. Click here and select the email address for which you want to create or edit a signature.
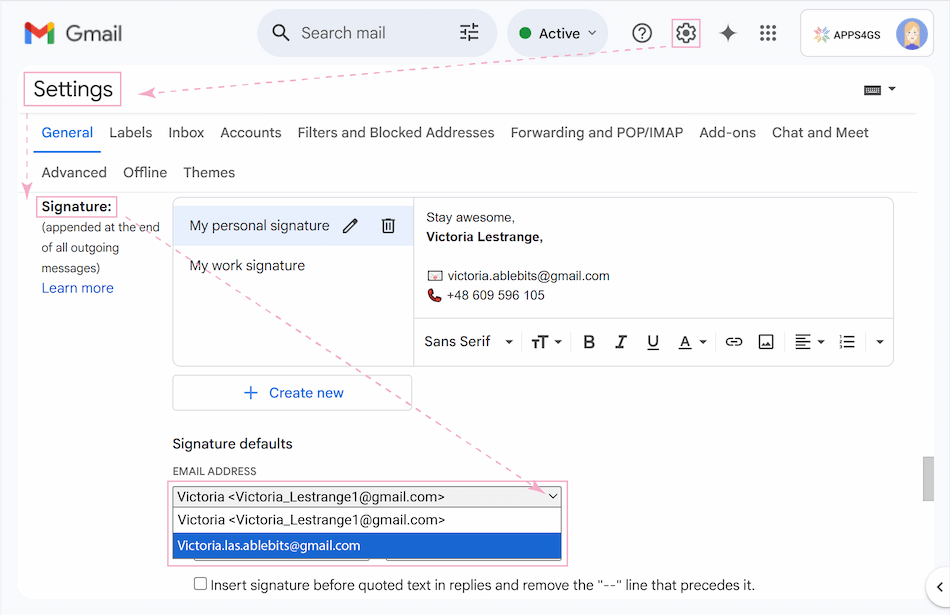
- If you cannot see the drop-down menu or any additional email addresses, don’t worry. This means there’s only one account in your settings, the others need to be added separately. Go to the Accounts and Import settings page (or the Accounts for corporate emails with restrictions).
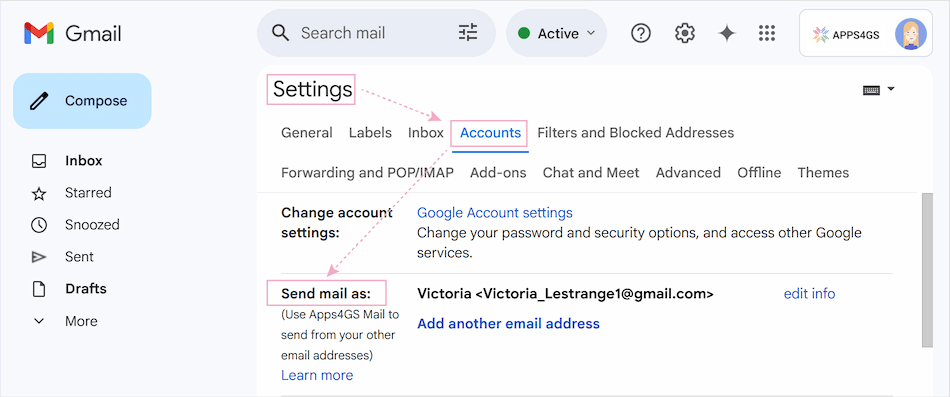
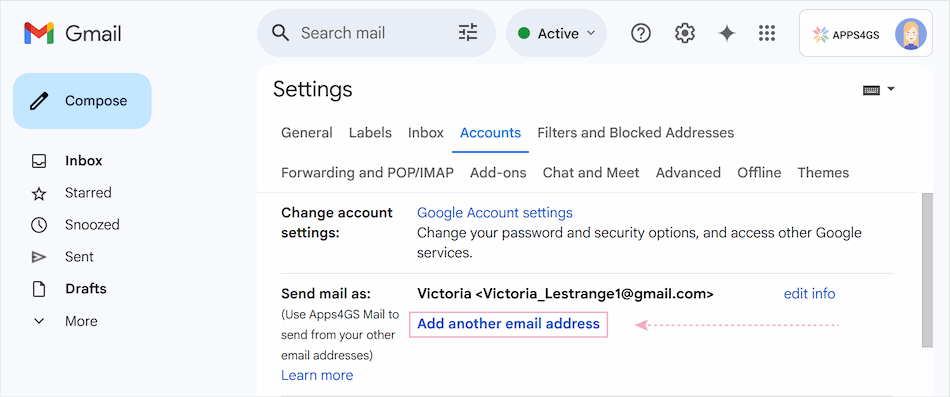
- In the Send mail as section, select Add another email address.
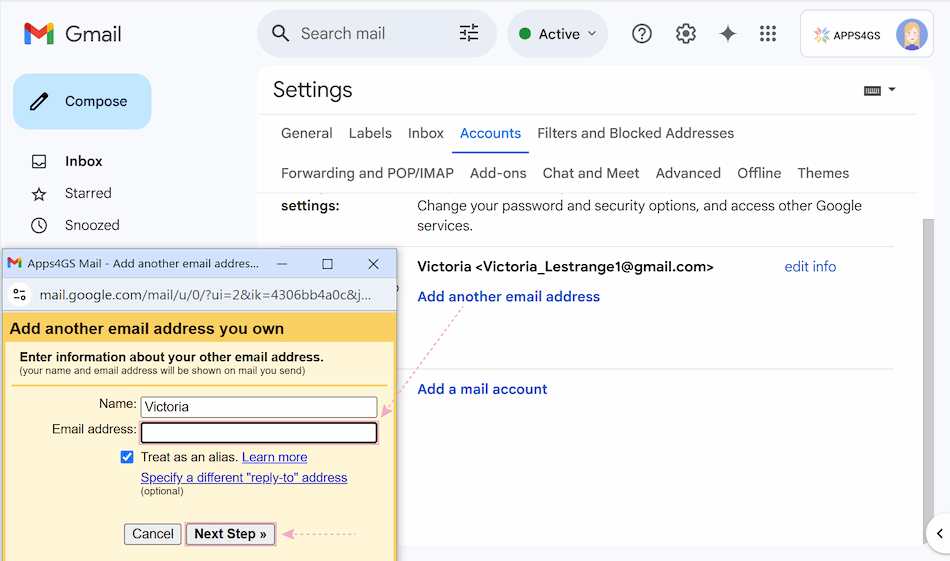
- Enter the required details (Name and Email address), click the Next Step button. Go through the verification by clicking Send verification. To complete the verification, check the inbox of the attached account. Find the email with the confirmation, click on the link in the email to confirm your request. If you have difficulties with verification, you can find more detailed information at the link.
- After confirmation, come back to the Accounts and Import settings page (or the Accounts for corporate emails with restrictions). Now, once verified, several addresses will be linked to your account. Make sure all alternative email addresses are correctly listed in the Send mail as section. Click the Save Changes button at the bottom of the page.

- Now, you can set up unique signatures for each email address associated with your Gmail account. Select the email address you want to create or edit a signature for. Adjust your default signature settings as needed, then click Save Changes to apply them.
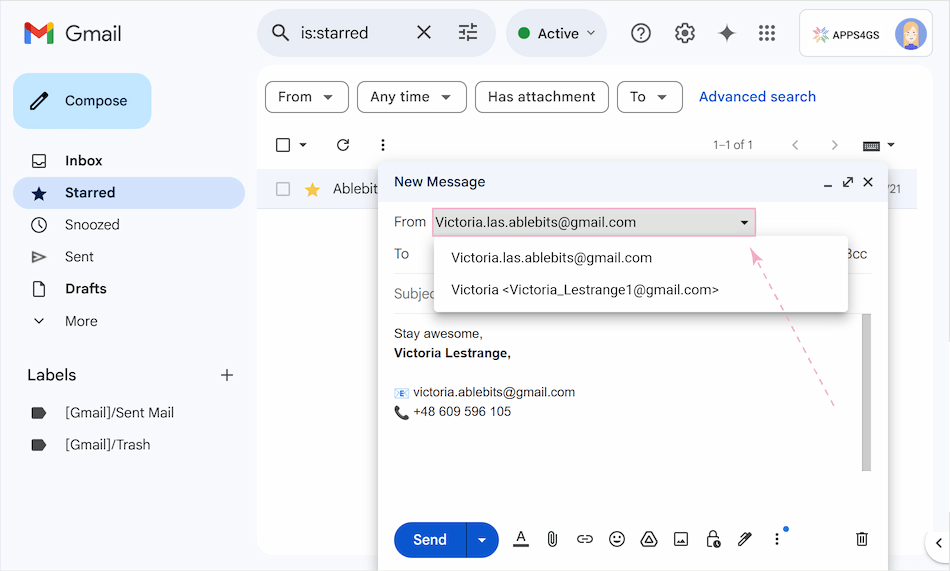
Currently, when composing a message, you can simply click the From field and select the address you want to send from. Gmail will automatically switch to the right signature for that address.
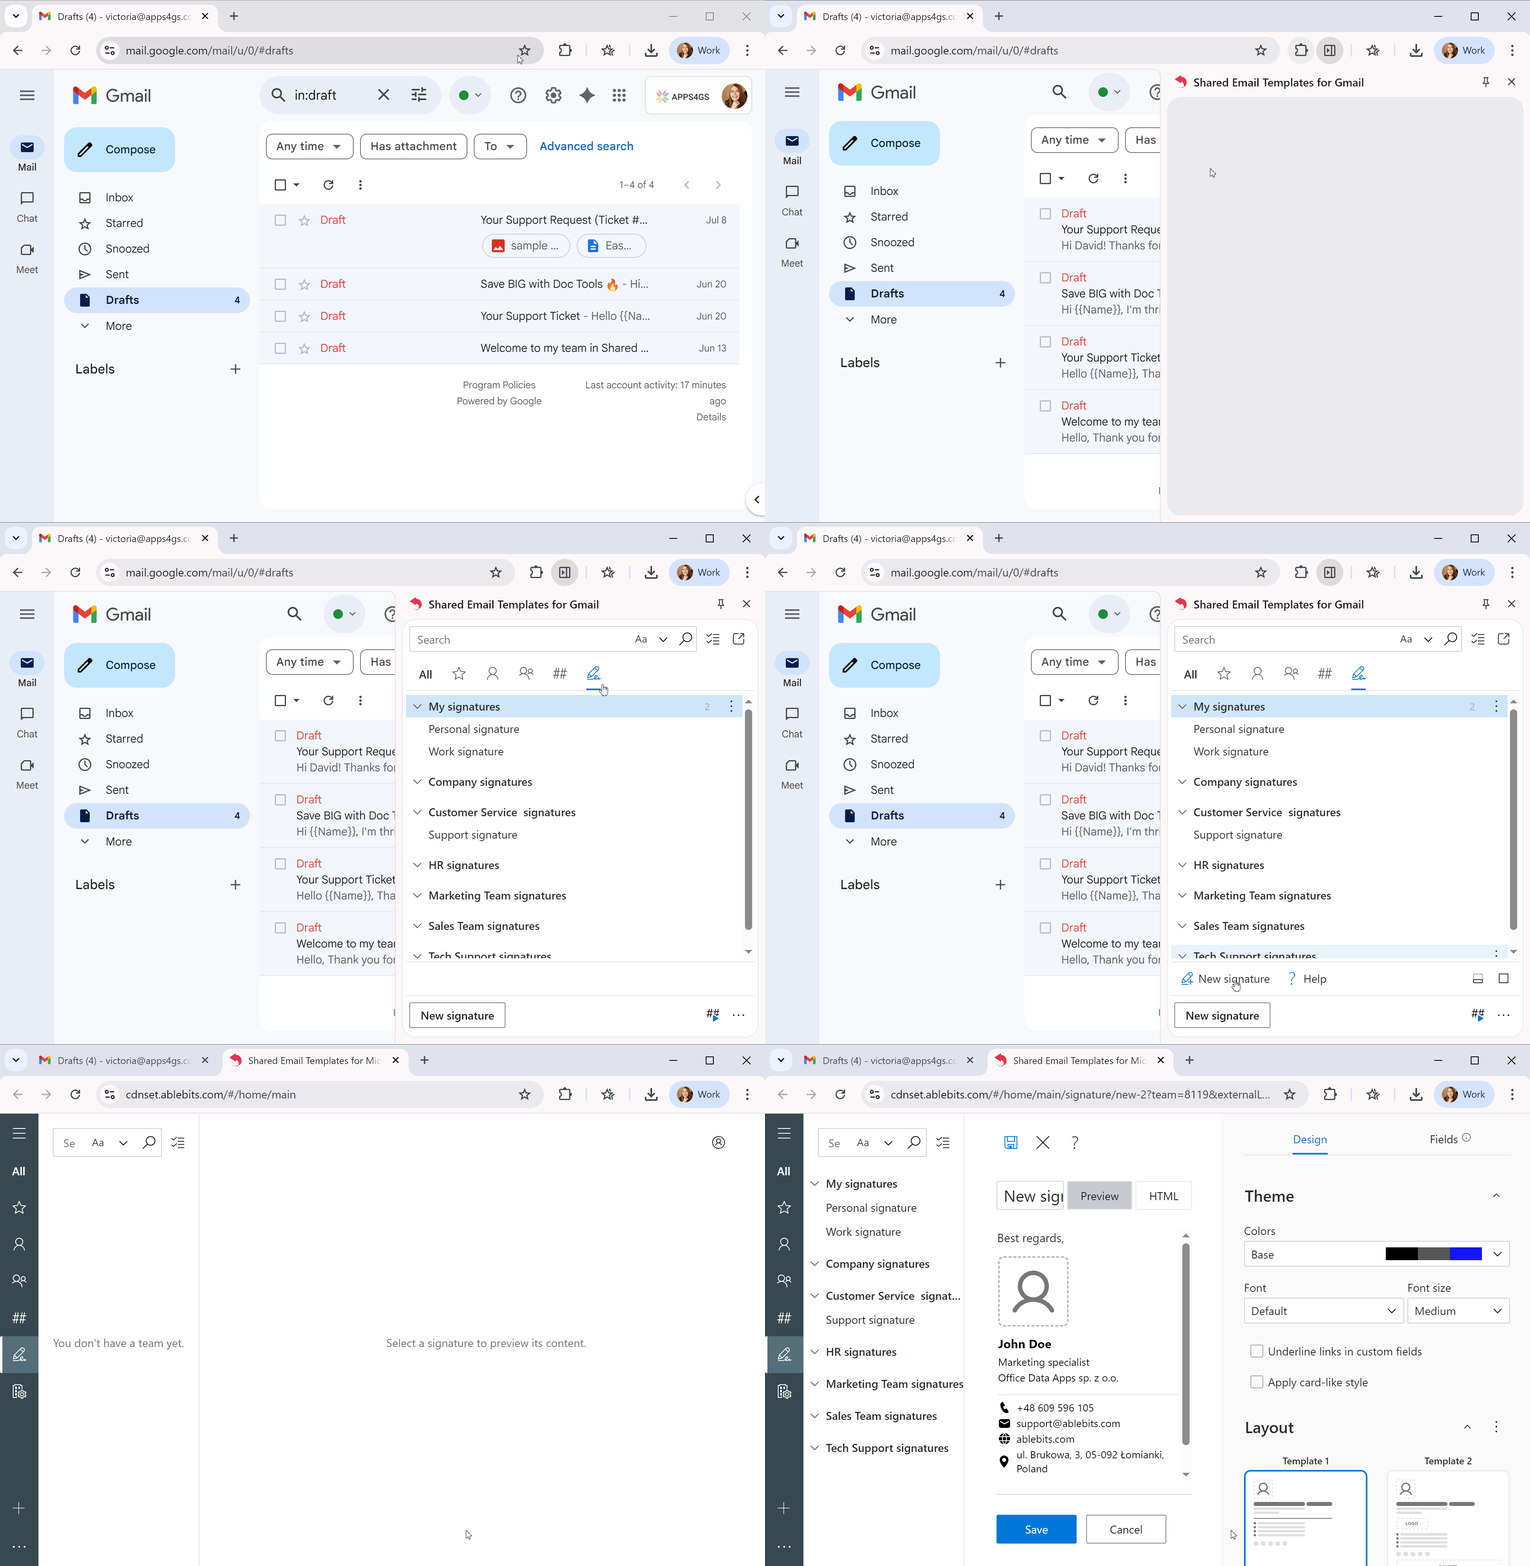
How to use multiple signatures in Gmail effortlessly
While Gmail offers basic signature options for creating and managing multiple signatures, the process can still be a bit time-consuming. This is where Shared Email Templates for Gmail steps in, offering more intuitive and feature-rich solutions.
Shared Email Templates lets you create multiple signatures for personal use, a specific team, or your company. To learn more about advanced template creation, refer to the link.
For your convenience, there is a library of 14 available templates for your signatures.
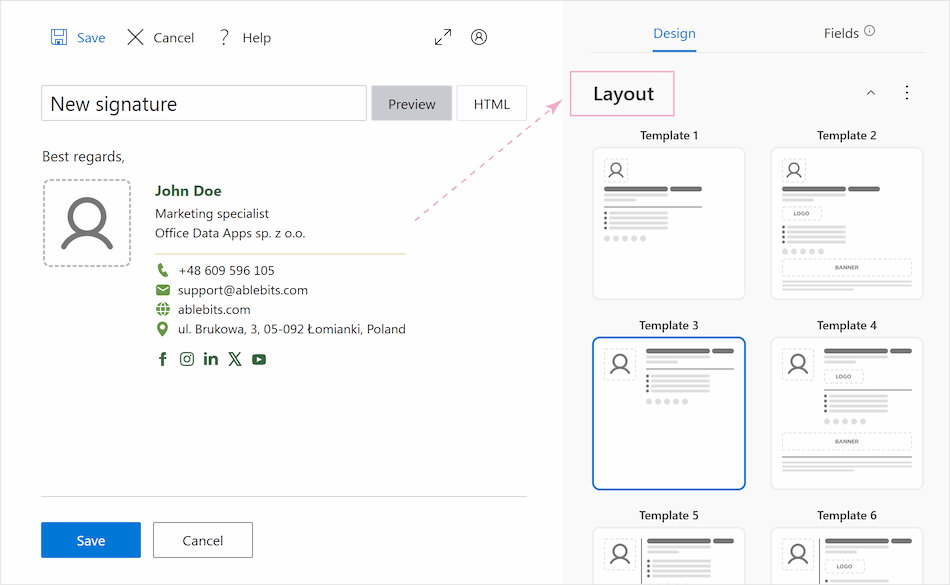
You’ll have advanced design tools like color themes, a wide range of fields for contact details, social media, and promotional banners.
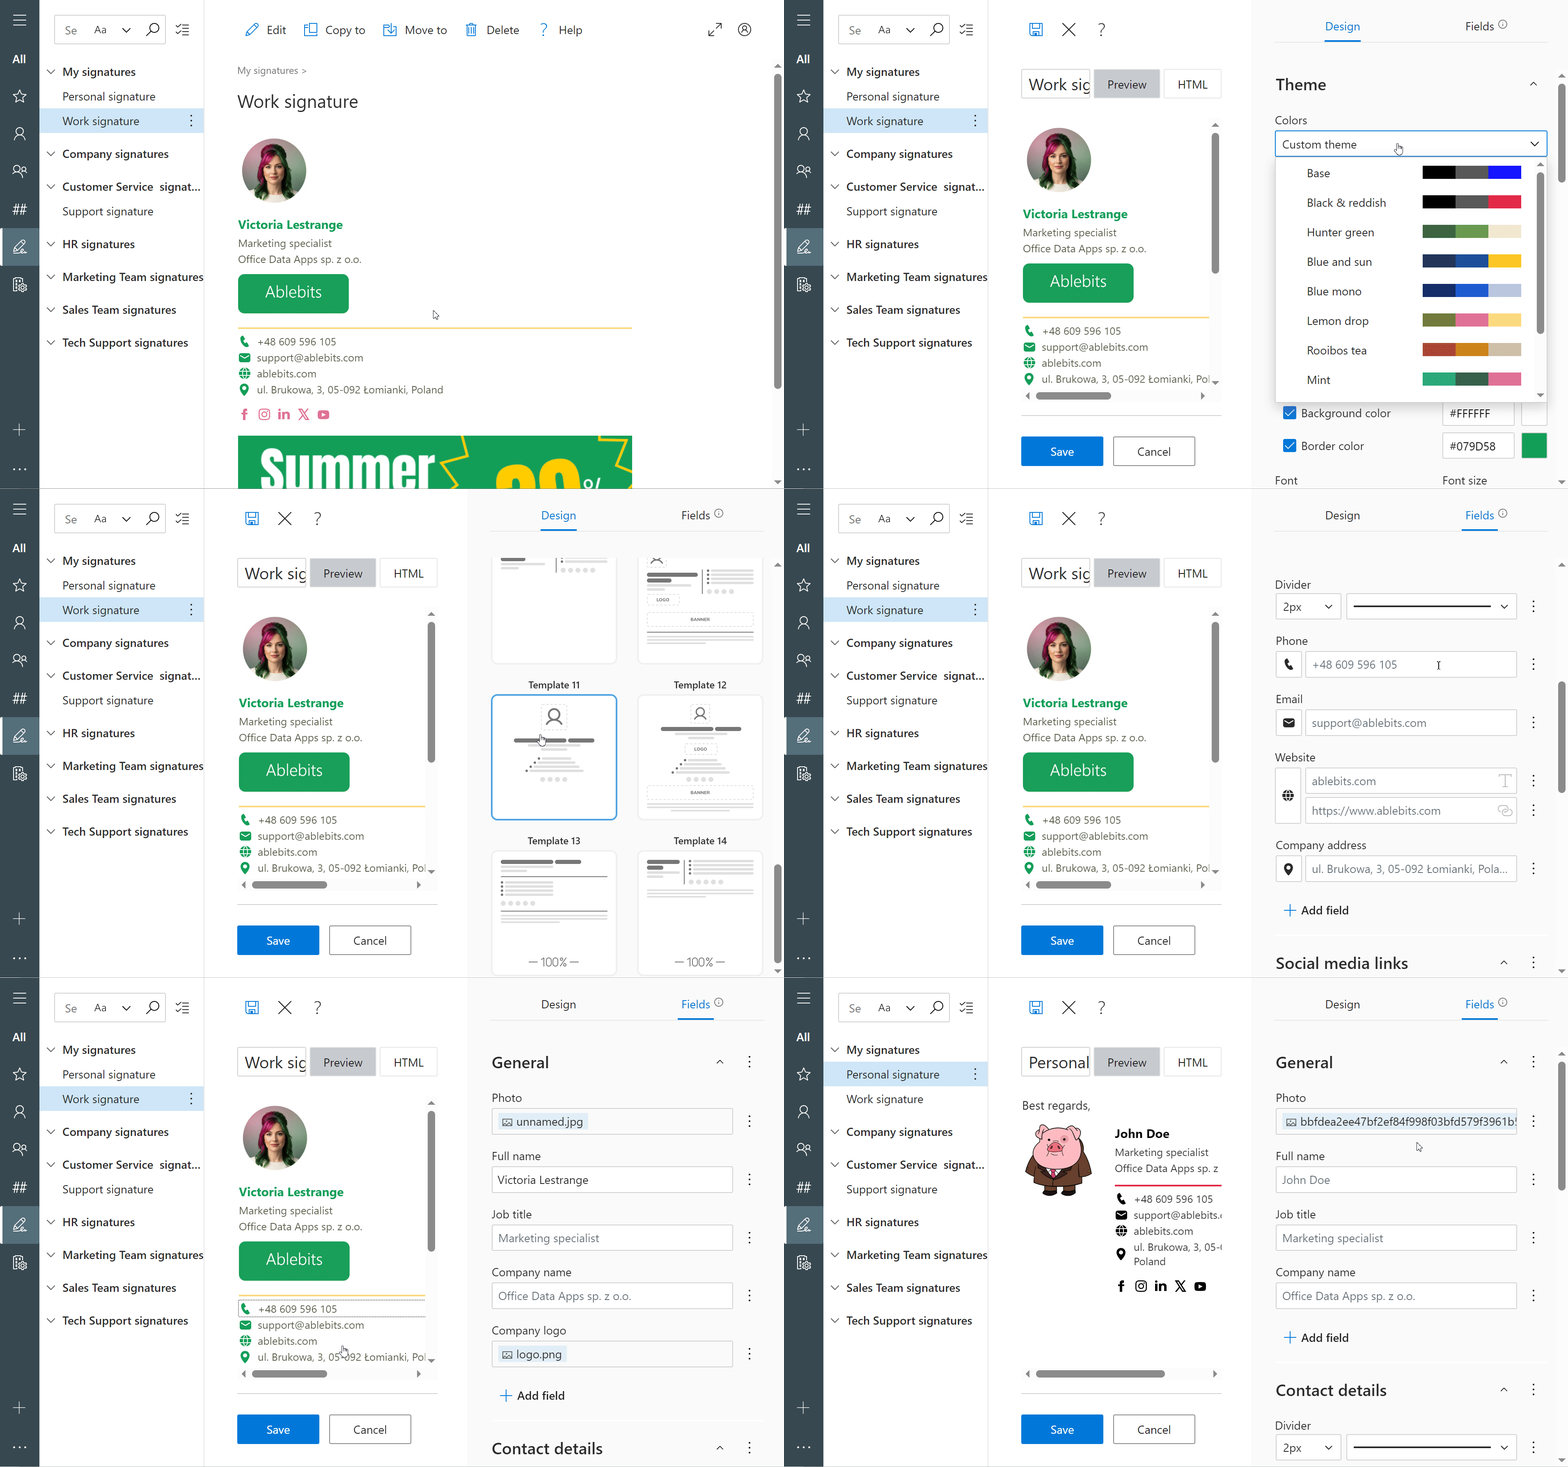
With your signatures set up, here’s what you can do with Shared Email Templates for Gmail:
- Switch between signatures in one click. Find your signatures on the Signatures tab and insert any of them into an email message when needed.
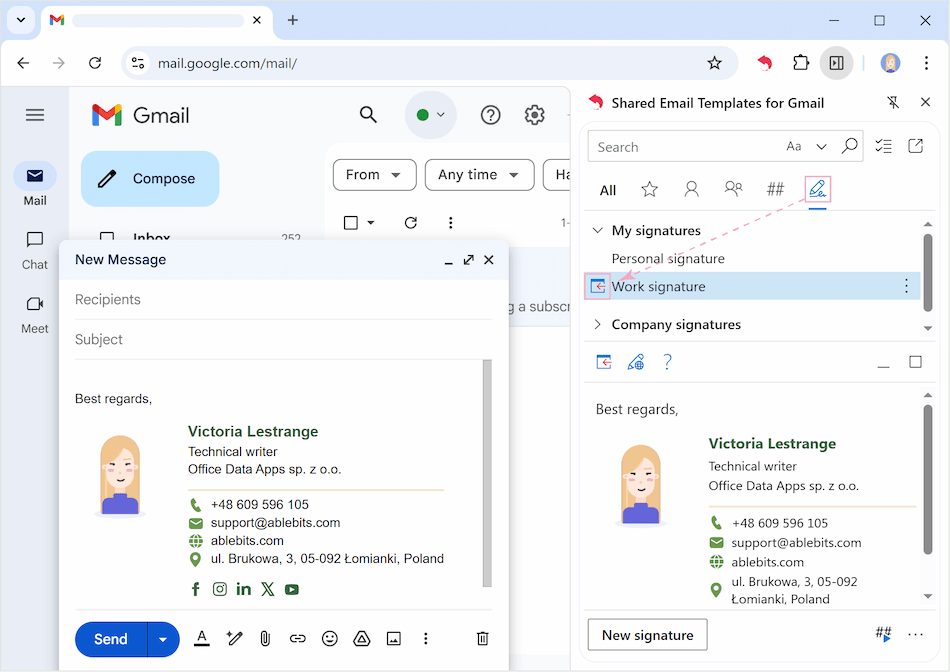
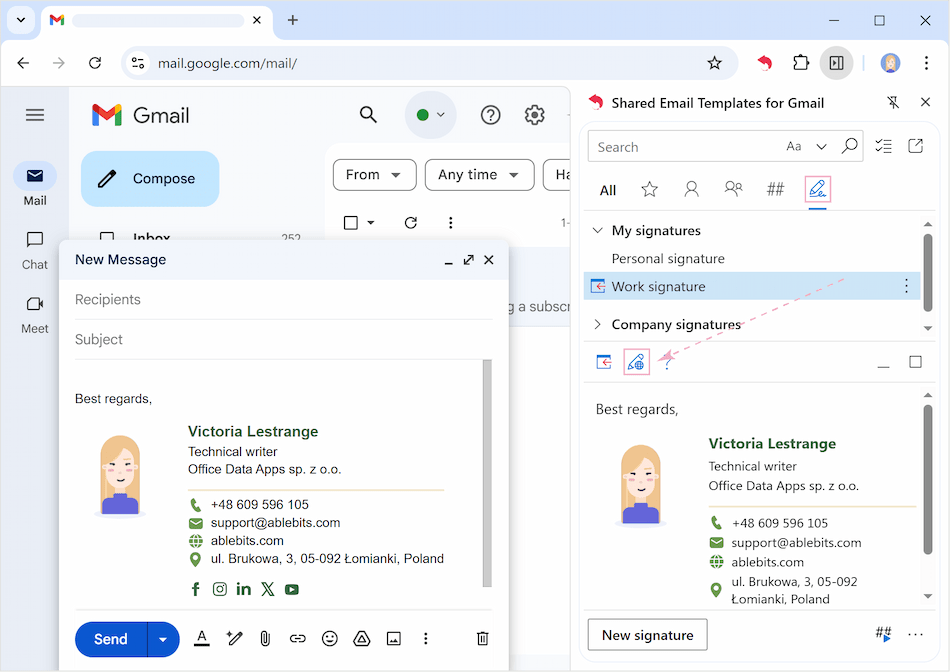
- Edit/update your signatures anytime. Just click Edit in browser and an editor will open. Moreover, you’ll be able to manage editing permissions for your templates. Learn more in this article.
- Set default signatures for new messages and/or replies and forwards to have them automatically inserted in emails. Just click on the three dots to the right of the required signature and select the desired settings.
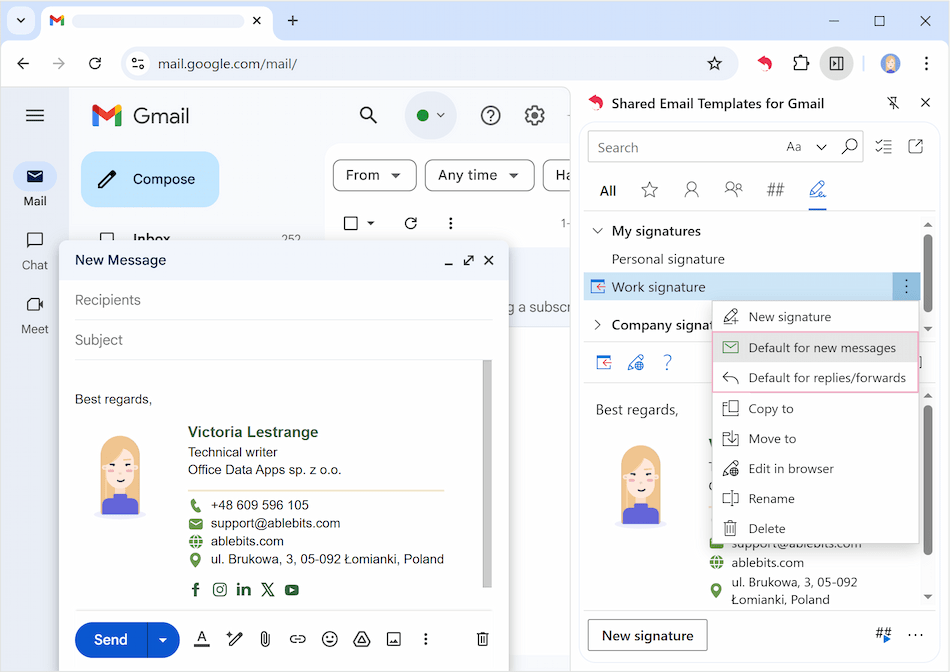
- Delete unnecessary signatures by clicking the three dots to the right and selecting Delete.
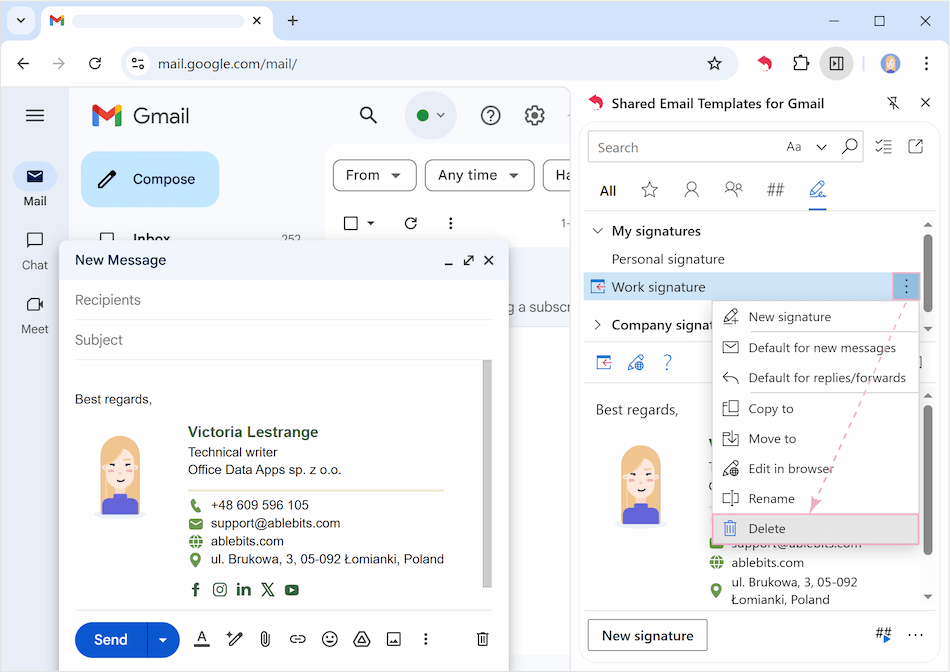
As you can see, while you can handle these tasks through Gmail’s native settings, Shared Email Templates for Gmail simplifies the process and adds powerful features. Want to try it? Download the free trial and craft perfect signatures in minutes!
 by
by