In this guide, you’ll learn how to add an outline in Google Docs, use and edit the navigation pane, remove or get headings back in the outline list.
Consider that you’ve received a hundred-page report from a teammate. To get an overview of all points, you have to look through the whole document. And when you need to analyze one specific detail more precisely? You’ll have to find it first and not miss any details somewhere in the text.
Getting lost in a multi-page document is frustrating. It’s much easier to jump to any section and find targeted information when you have a navigation pane. Read this article on how to add it and handle your data properly 😉.
What is an outline in Google Docs?
In Docs, the outline feature is a built-in navigation pane generated from your document’s headings.
You may think that it’s the same as the Table of Contents (TOC), but the outline has two distinctive features: it updates in real-time and appears in the sidebar, rather than inside the document.
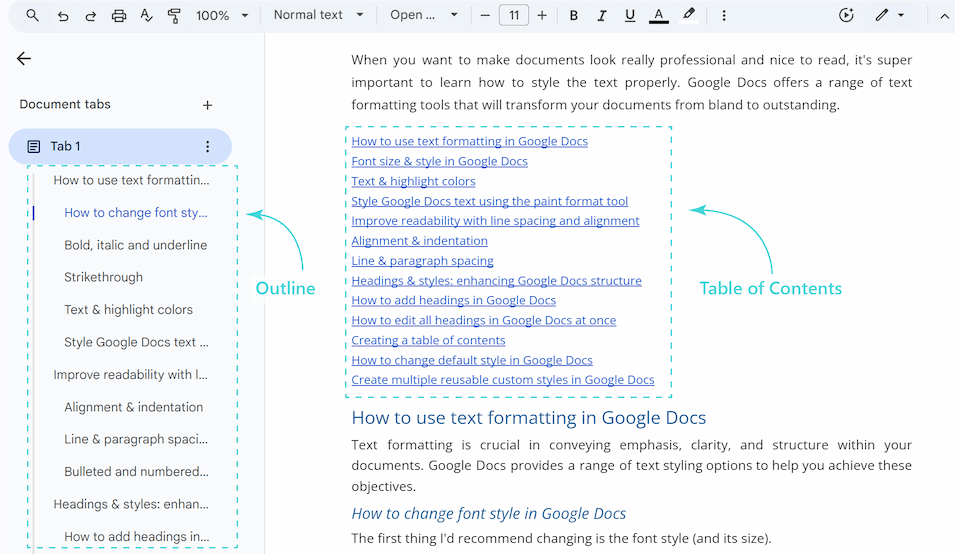
How does Google Docs generate the outline? It relies on your headings and their hierarchy.
Headings create a clear structure by nesting under each other. Use Heading 1 for main ideas, Heading 2 for sub-sections within main ideas, Heading 3 for points within those sub-sections, and so on. Understanding this simple hierarchy is essential for a well-organized document.
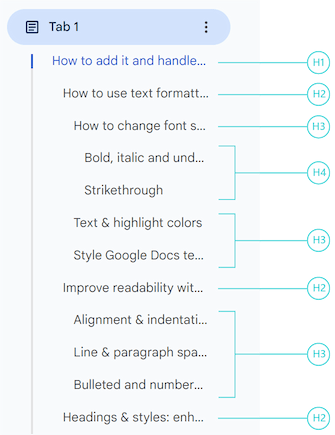
Whenever you add, remove or rename your headings, it’s instantly reflected in the sidebar.
Note: The outline does not reflect changes to font styles or colors.
How to create a navigation pane
Follow these simple steps to create a new outline in Google Docs:
- Open a document in Google Docs.
- Click on the View button and choose the Expand Tabs & Outlines sidebar option.
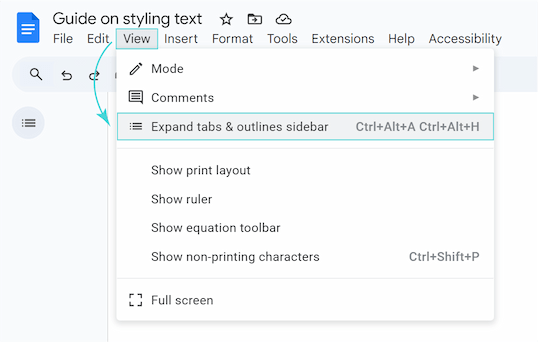
Note: The document outline icon in the latest Google Docs updates is visible in the top left corner of your document no matter whether the Expand Tabs & Outlines sidebar option is enabled or not. You can click it to go straight to the navigation pane.
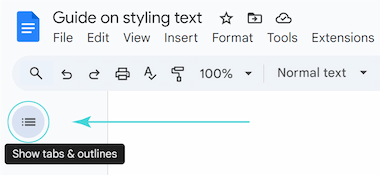
Tip: You can also use shortcuts to turn on the outline CTRL + Alt + A & CTRL + Alt + H.
How to add heading to outline in Google Docs
If there is only a Tab button in your navigation pane, it means your document lacks any title, subtitles or headings.
By default, each section is defined as Normal text. To populate the outline, apply other formatting to your text:
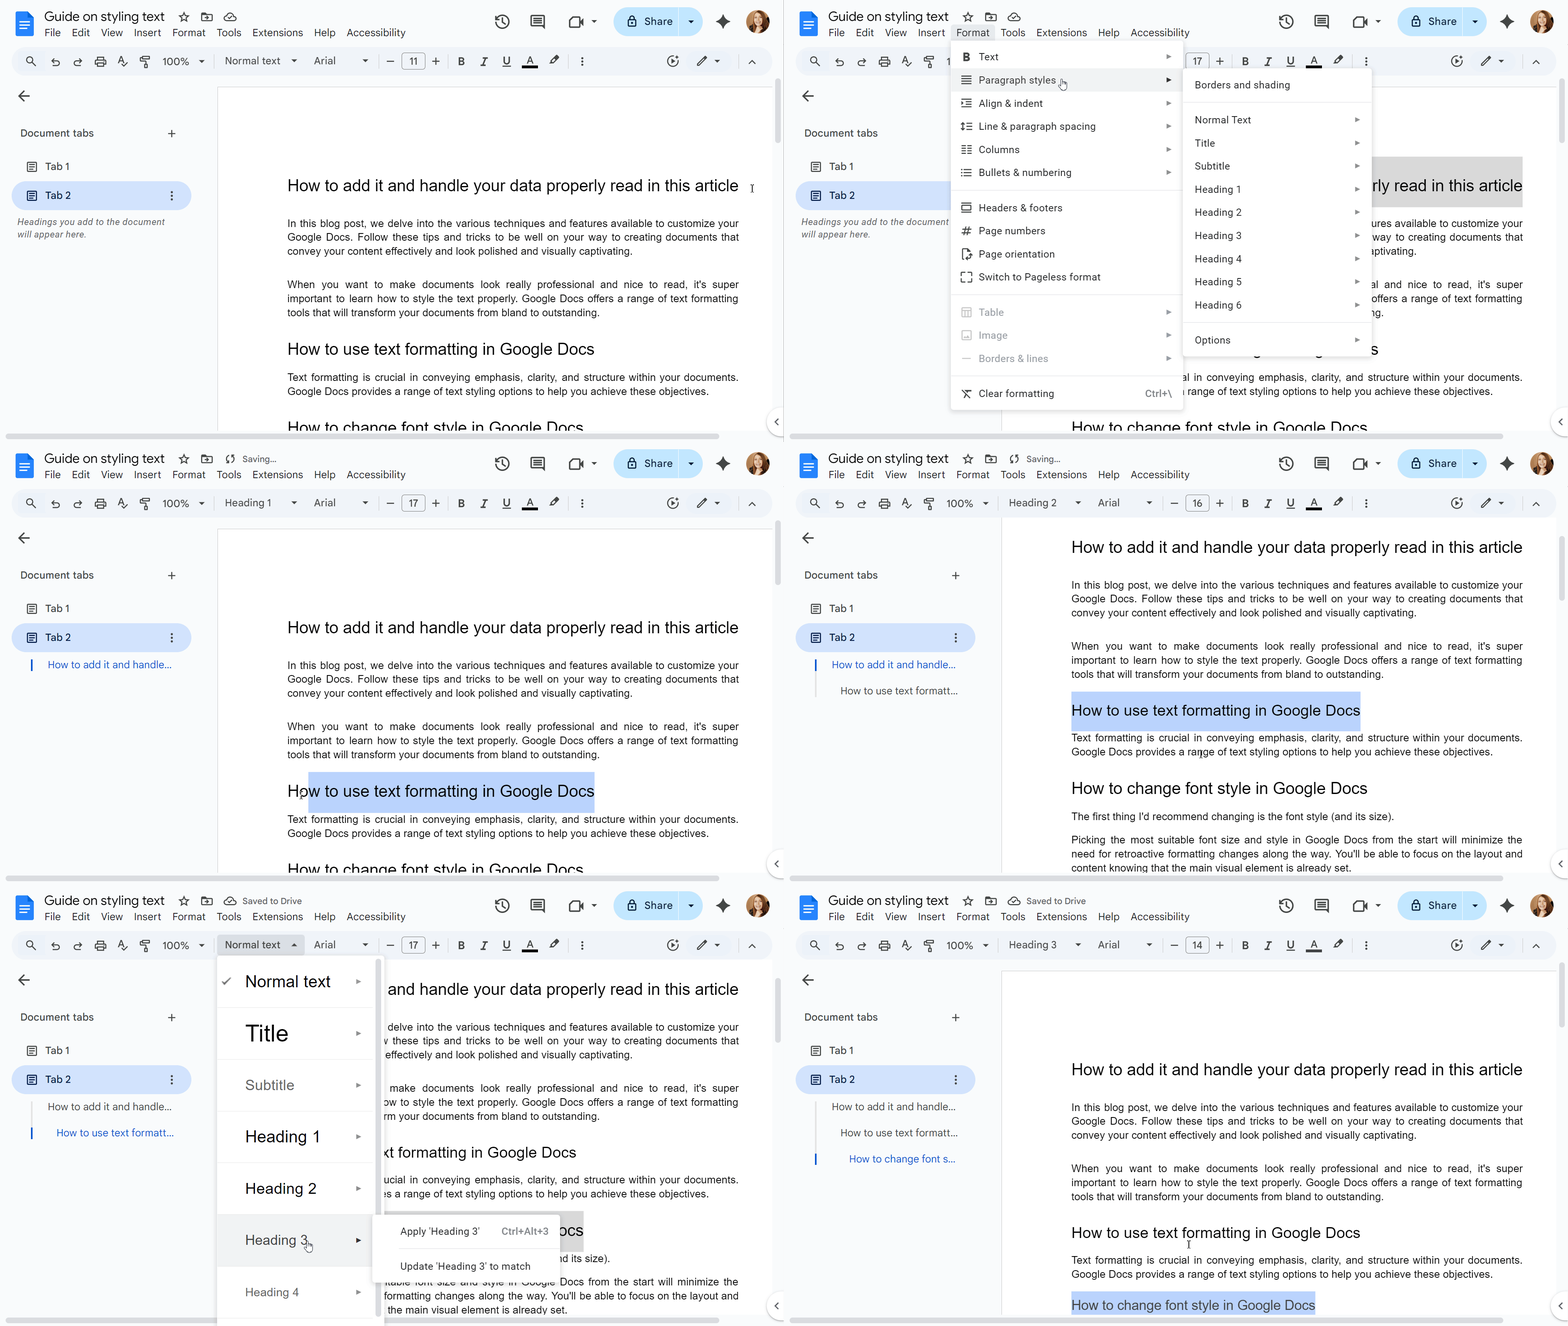
- Highlight a section you want to adjust.
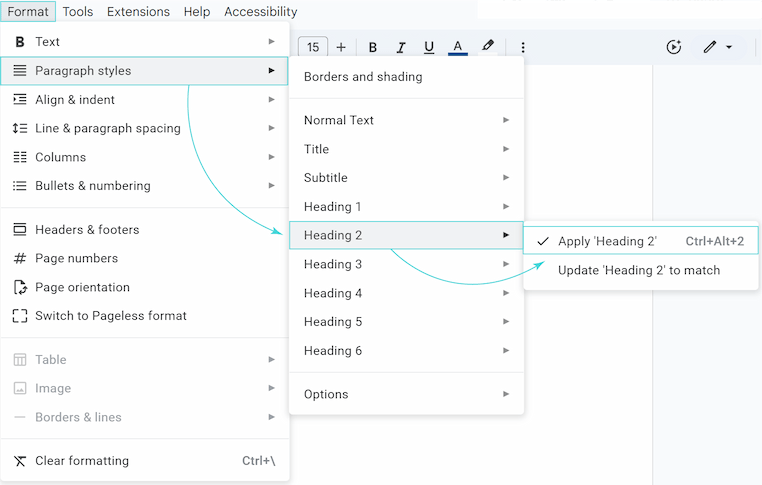
- Go to the Format in the main menu bar, click on Paragraph styles and change it to Title, Subtitle, Heading 1, Heading 2, etc.
You can also just click the Normal text button in the toolbar and select the proper format for highlighted text.
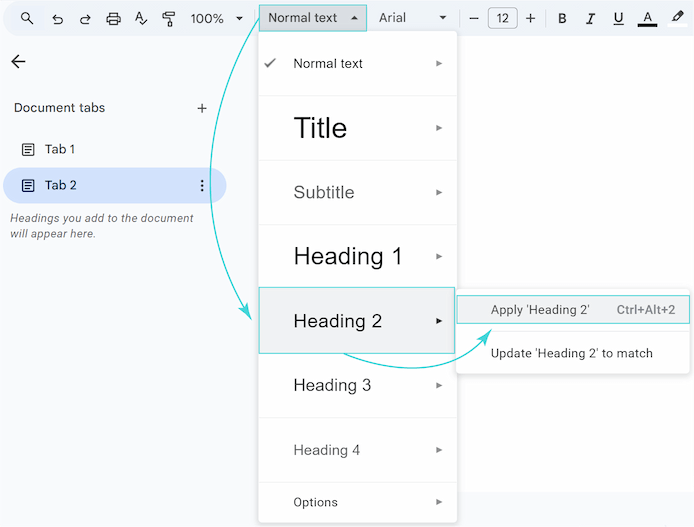
Tip: Use shortcuts on the highlighted text to easily apply the appropriate heading level CTRL + Alt + 1 for Heading 1, CTRL + Alt + 2 for Heading 2, etc.
- All your headings will appear in the navigation pane according to the specified hierarchy.
Note: Read how to edit headings, customize their styles, and work with the table of contents in our article.
Use and edit an outline to navigate a Google Doc
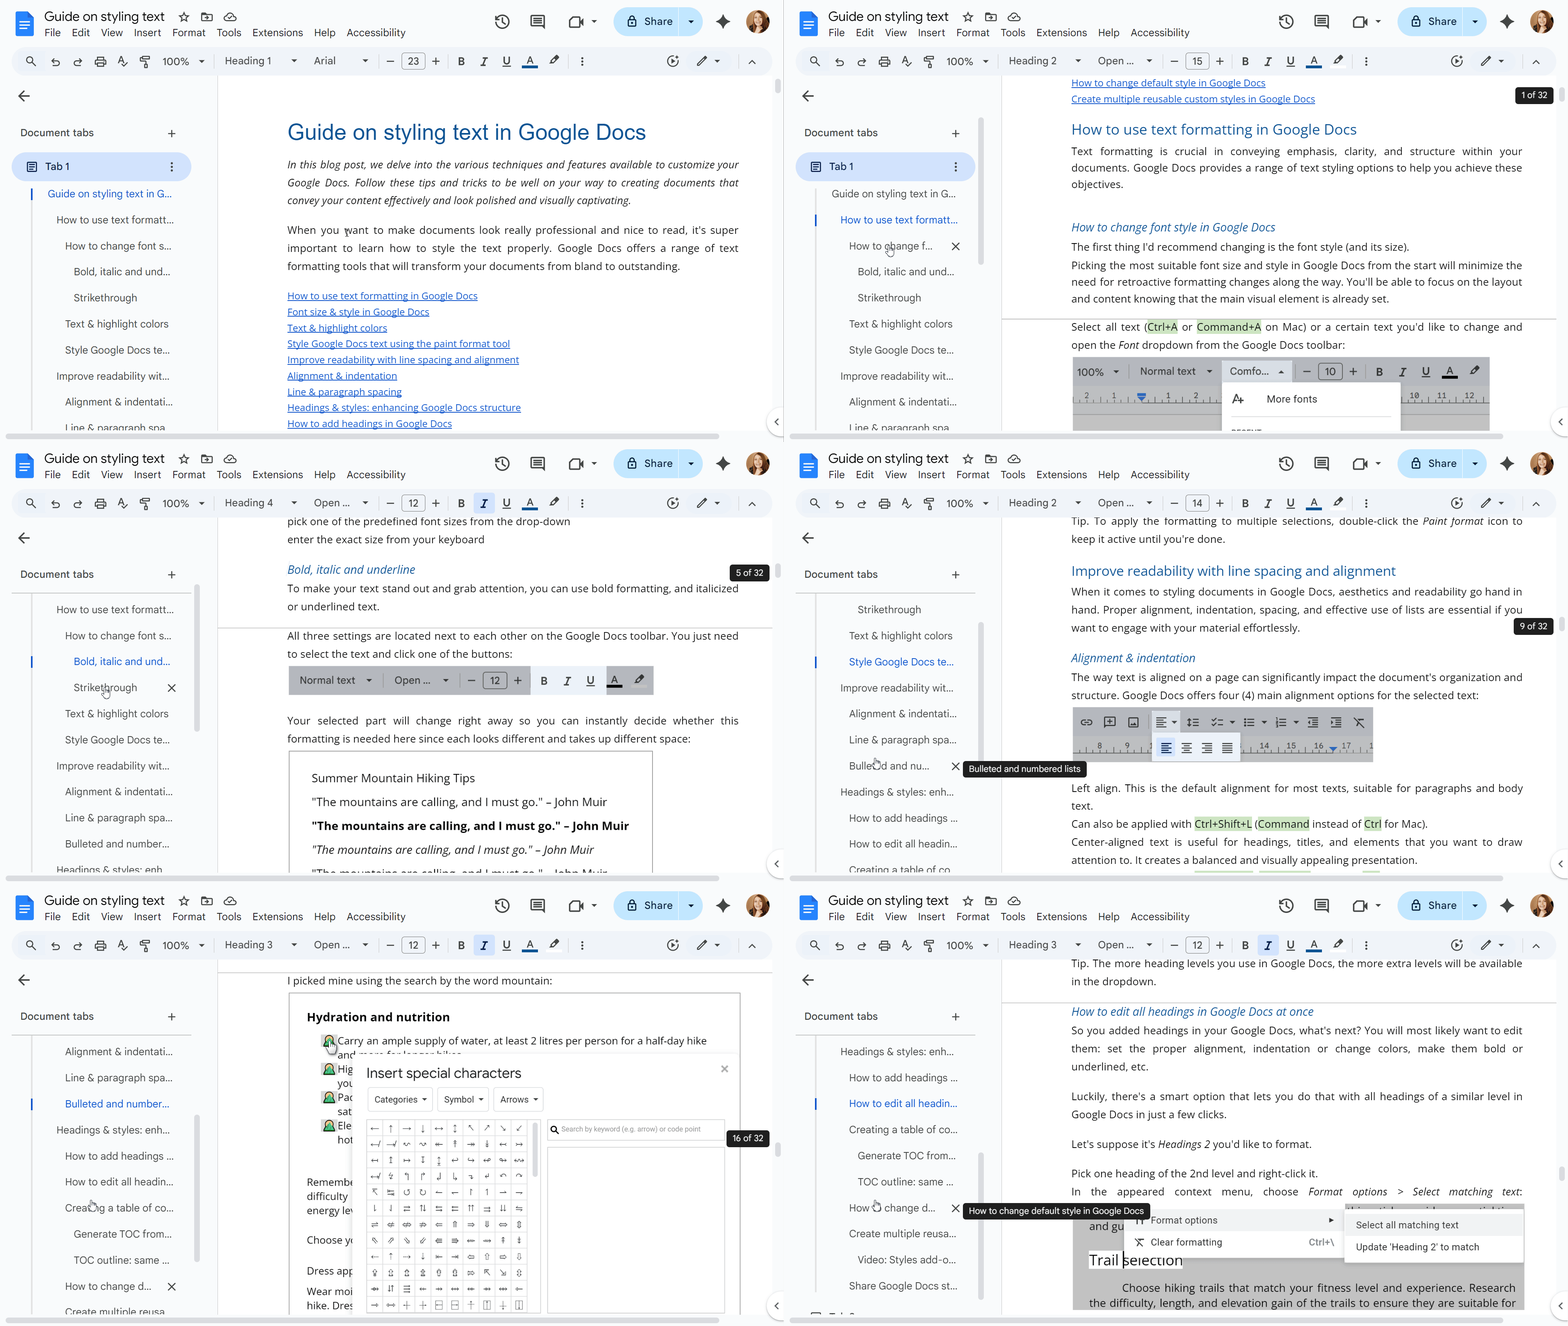
With the outline you can now easily navigate and jump to any section of your document:
- Open Tabs & Outlines sidebar.
- Click a Tab to collapse or expand the headings it contains.
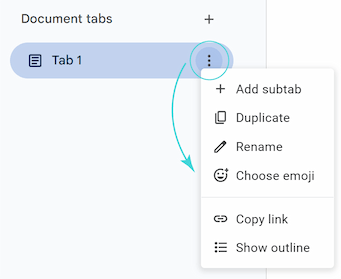
Tip: The three-dots icon next to each Tab opens a menu with more options, like Rename, Delete, Add sub-tab, and more.
- Scroll to the target section and jump to it simply by clicking.
Make a header without showing in outline
Your outline became too long and hard to navigate? You can easily hide specific headings from the outline without actually deleting them from your document:
- Hover the mouse over the chosen heading.
- Click on the X icon to remove it from the outline.
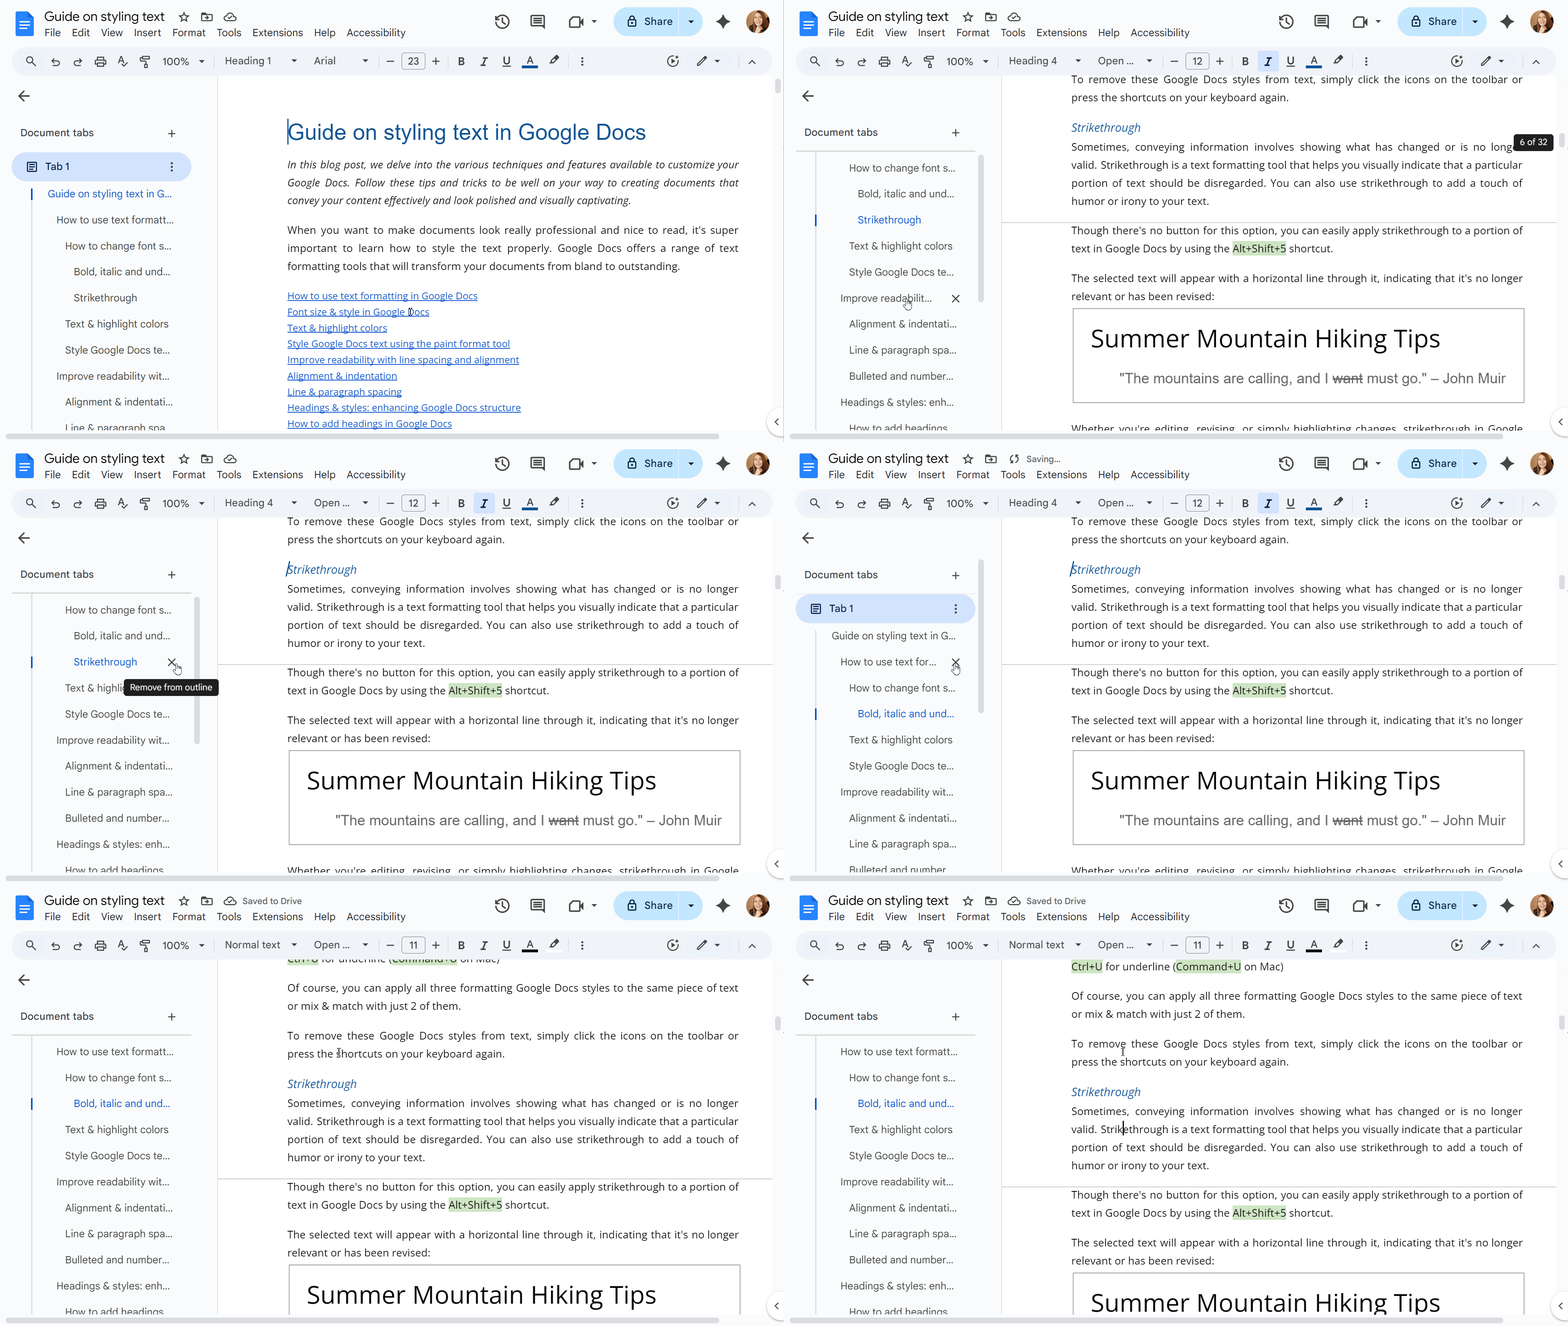
That's it! The heading will vanish from the outline, but it will still be visible in the body of your document.
Return deleted headings to the outline
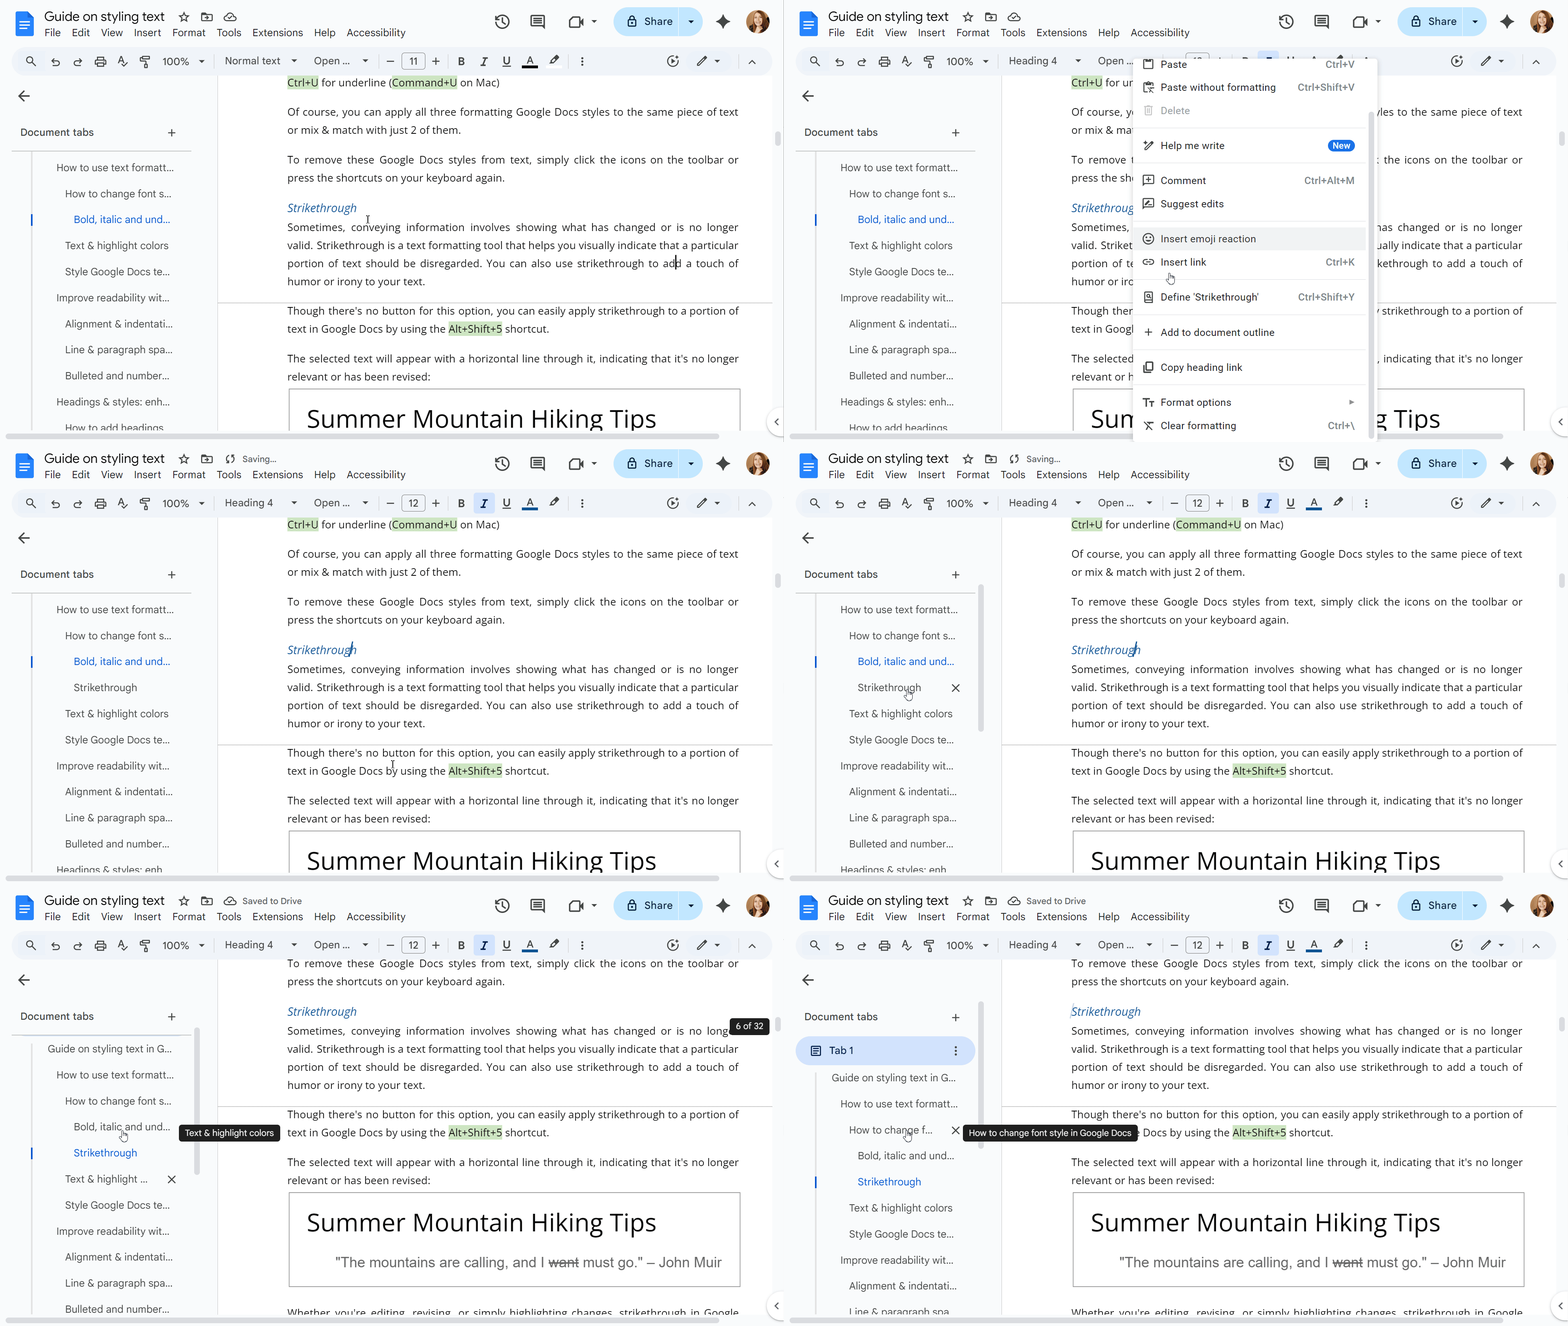
Accidentally deleted the wrong heading? To return it, follow these easy steps:
- Find the heading in the text.
- Right-click the highlighted text and select Add to document outline option.
How to add outline links in Google Docs
To enhance readability and navigate lengthy texts you may need to refer to other paragraphs within the document.
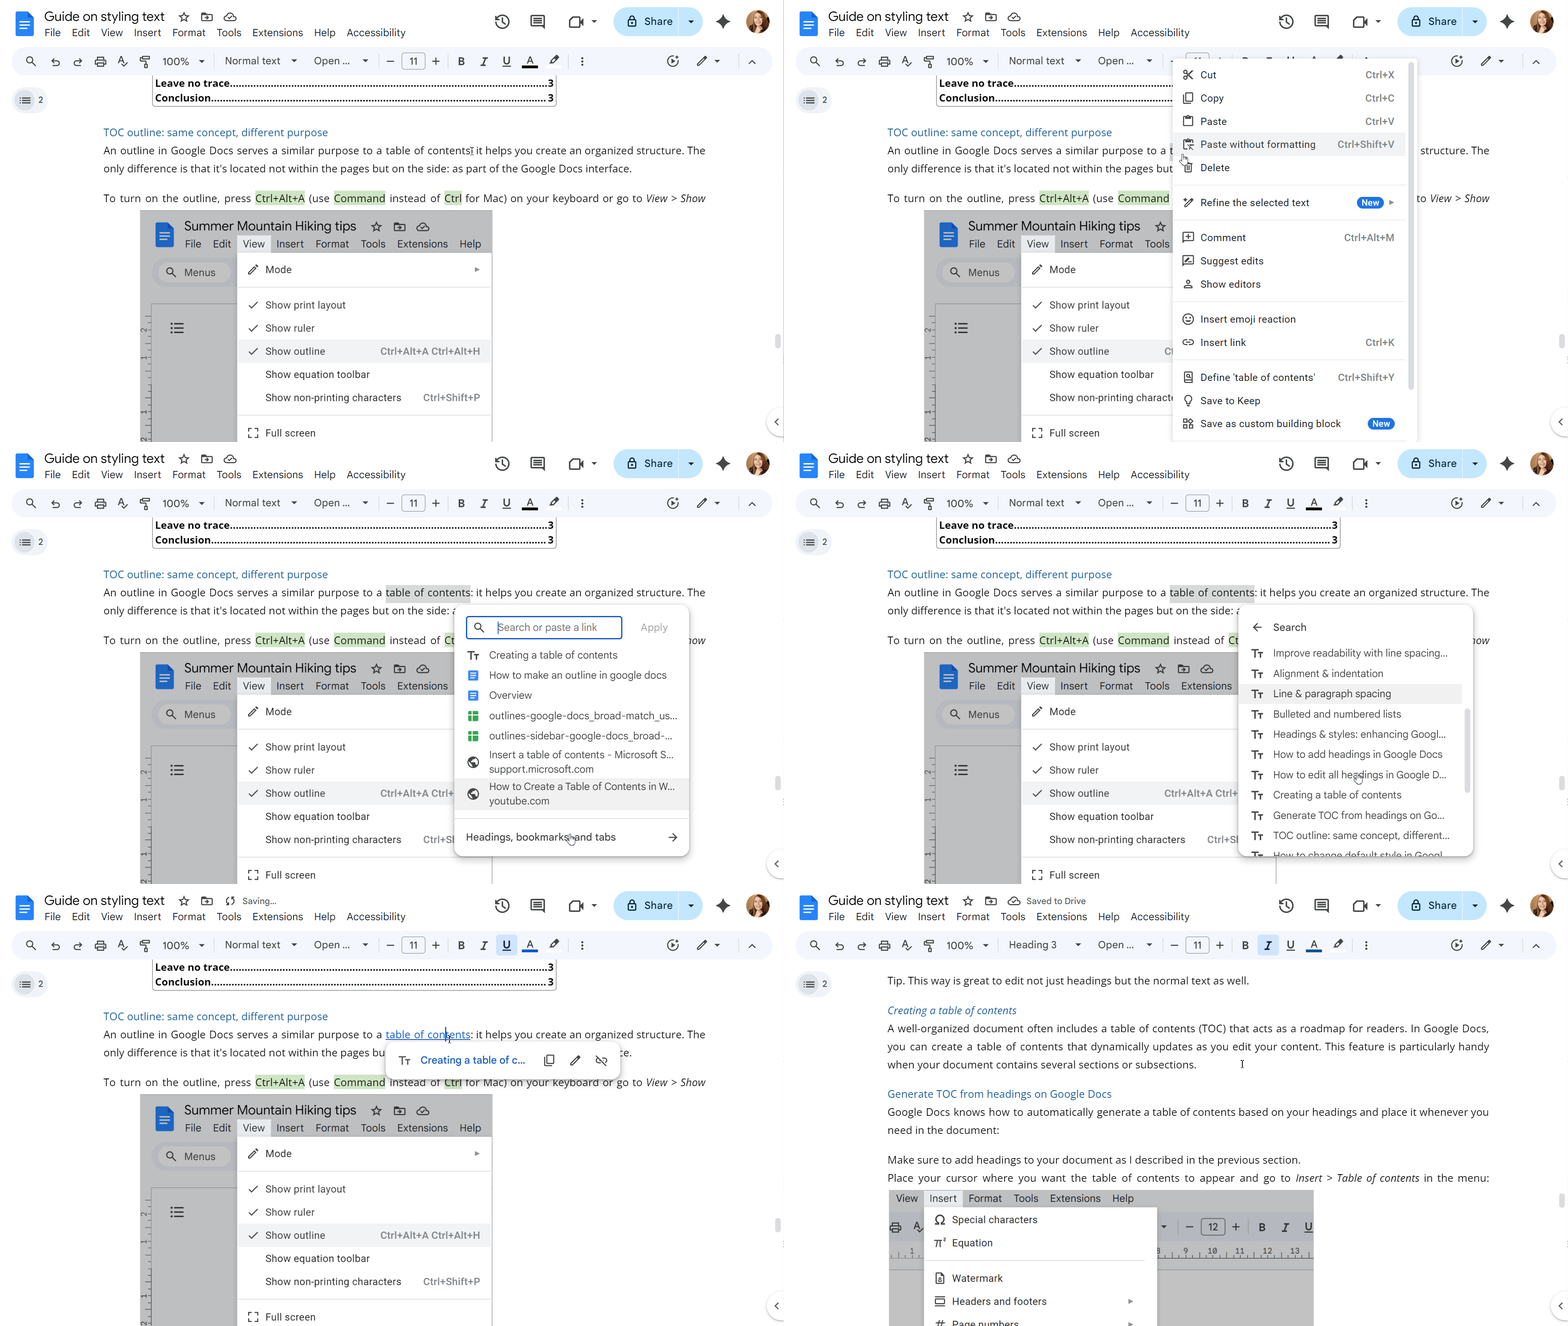
This is how you can do it:
- Find the necessary section where you want to add the link and highlight it.
- Right-click it and select the option Insert link.
- Go to Heading, bookmarks, and tabs and choose the target paragraph.
Search & Navigate tool
The built-in outline is a fantastic start, but it has significant limitations, especially for complex documents:
- It can only navigate between the headings.
- The standard search function (Ctrl + F) is not integrated into the outline.
- It offers no management capabilities for other document elements. No options for bookmarks, images, tables, or links.
Search & Navigate add-on goes far beyond the basic outline, giving you a powerful, feature-rich navigation sidebar.
Here’s why it’s better:
- You can quickly navigate your document using the outline, check the heading’s level right there and easily jump to any chapter.
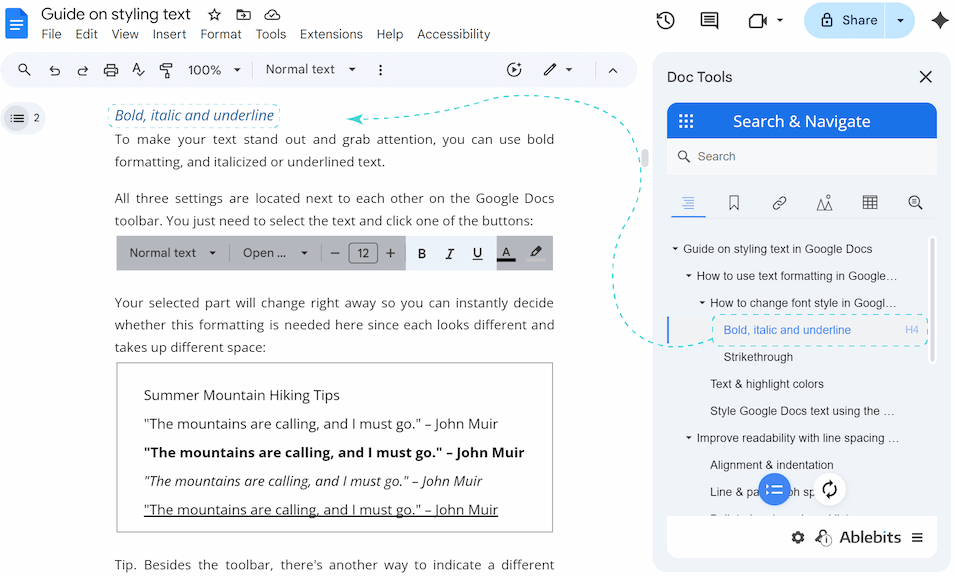
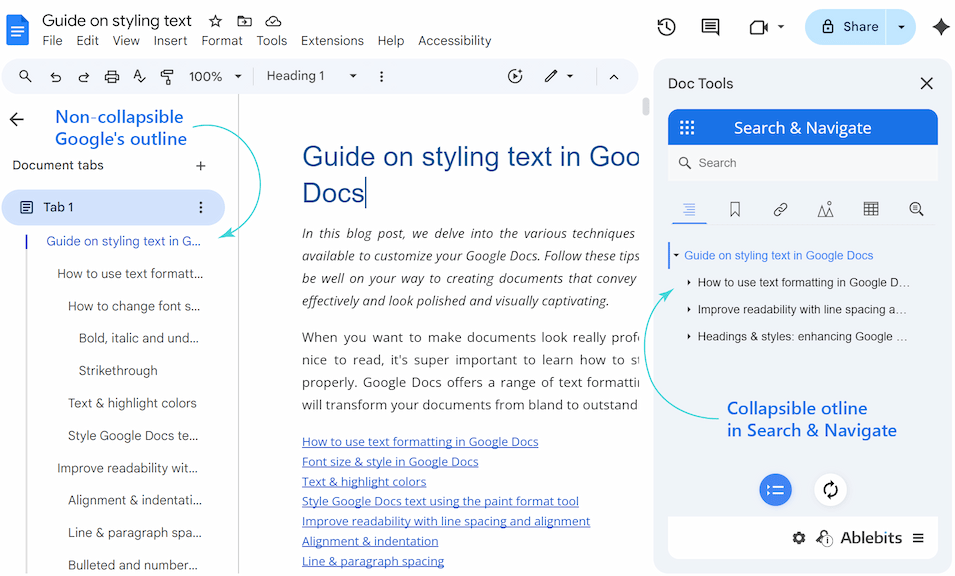
- Easily collapse or expand the outline for a cleaner view with one click.
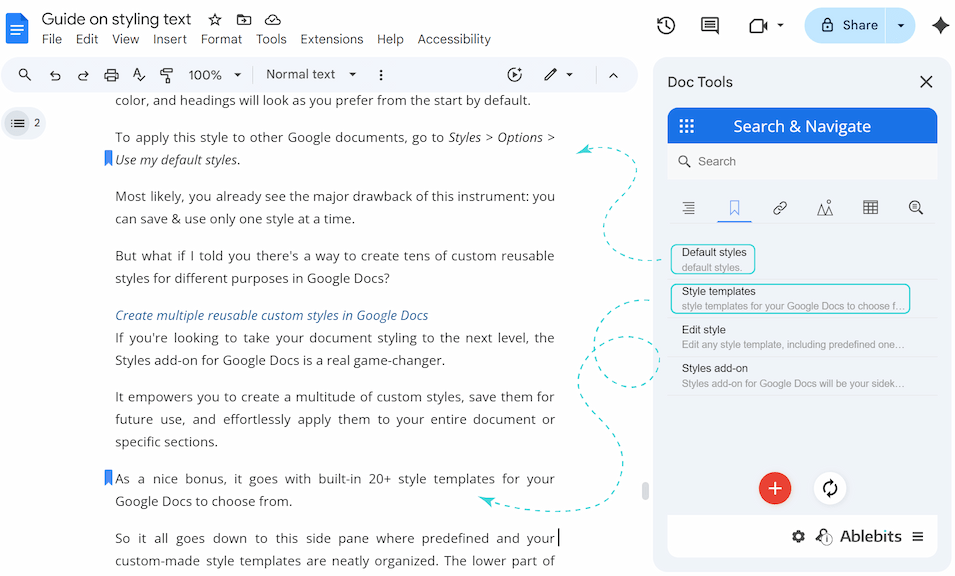
- Create a guide through the text with the help of bookmarks.
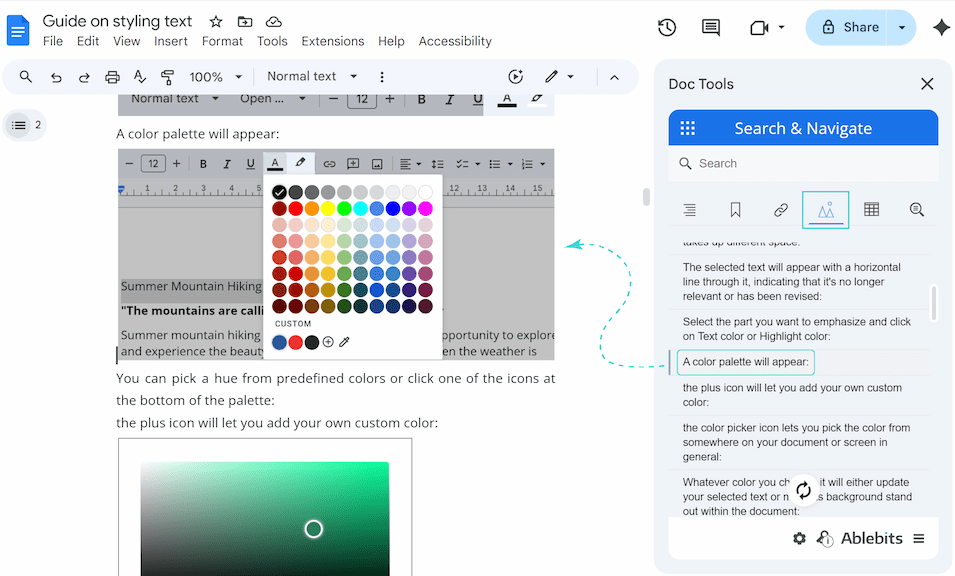
- Locate every image and table in seconds.
- Review all links from one organized list.
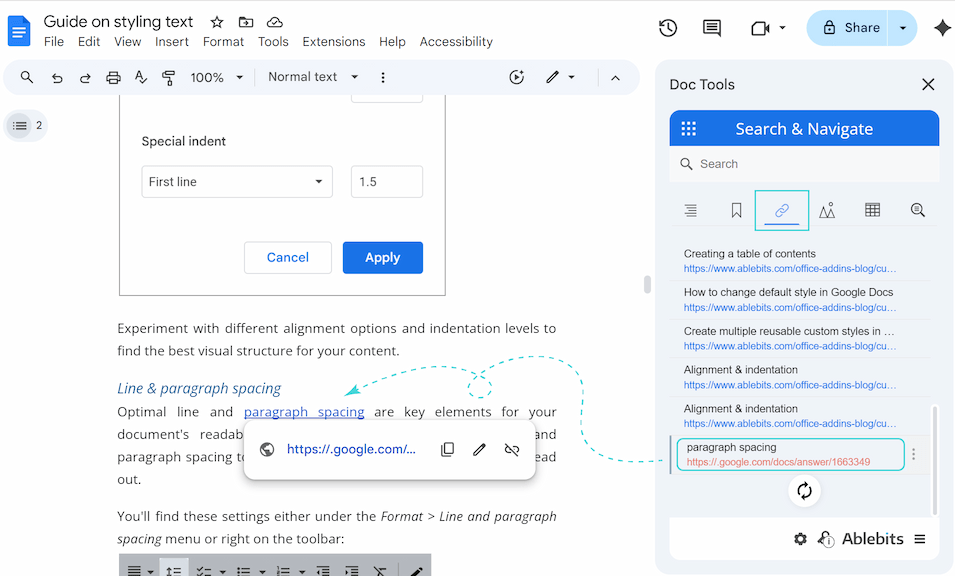
Note: This tab is available in the Doc Tools collection only.
- Use advanced search to find anything and anywhere, not just in text, but also in bookmarks, images, tables, and headings at once.
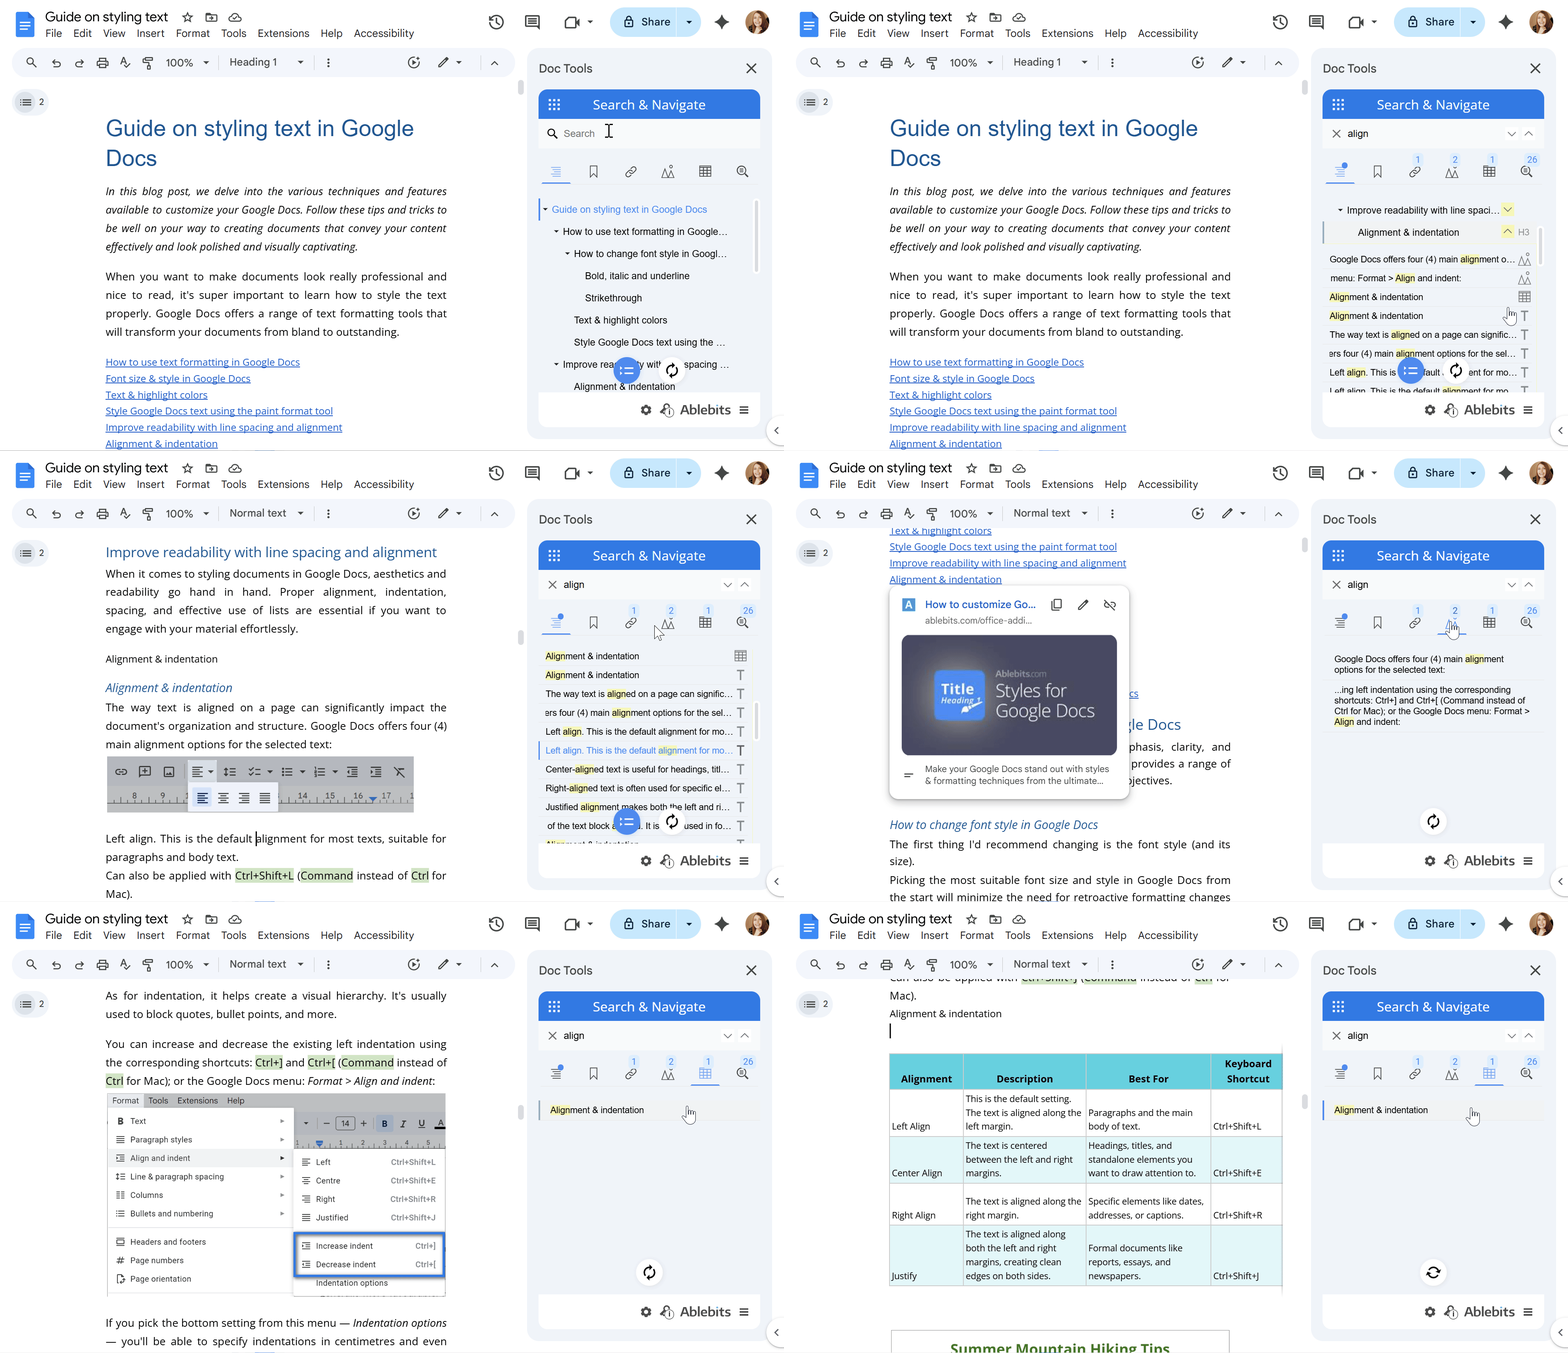
Video: How to explore your file in Google Docs
Check out this 1.5-minute demo to see our add-on in action:
Install Search & Navigate for a free trial period to check all the advanced options 🚀.
 by
by