Merge to Letter & PDF for Google Docs
Create multiple personalized letters, custom invoices, ready-to-print PDFs from a single Google Doc template and save them directly in your Google Drive. Simply link your template with a mailing list in Google Sheets to automatically customize each version for its recipient.
Before you start
Your generated files will be saved to your Google Drive, so please ensure you have enough storage space.
Prepare mailing list in Google Sheets
Your mailing list is a table in Google Sheets containing the recipient data and any other info that will help you personalize templates for each contact:
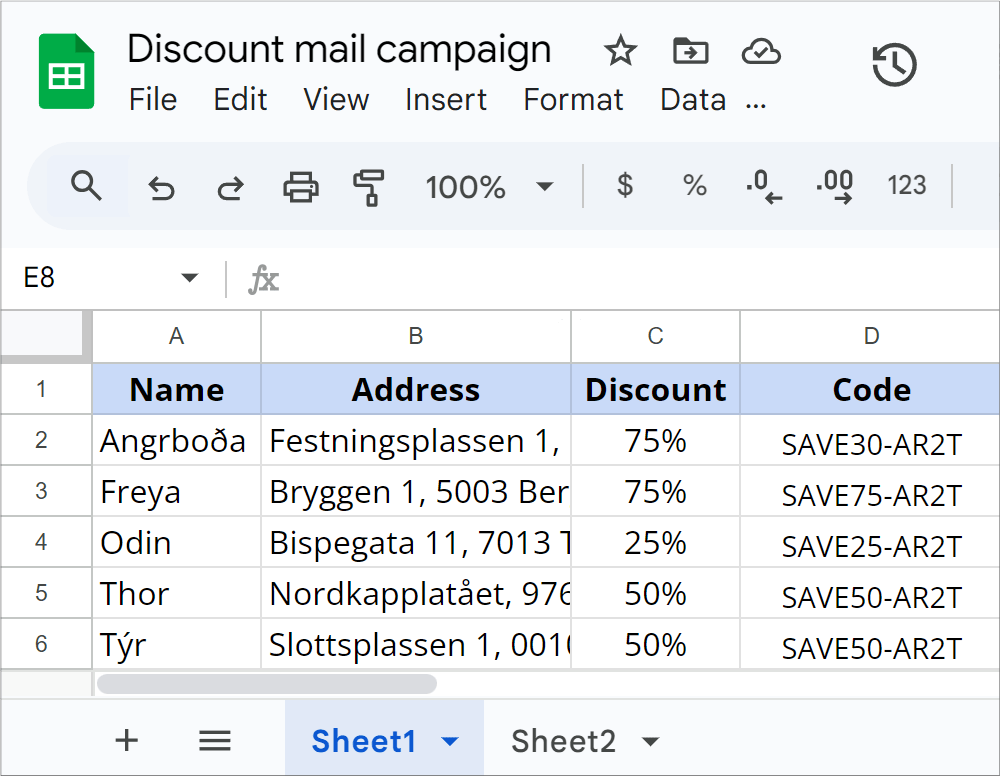
Create a template in Google Docs
For generating documents, prepare your template as a standard Google Doc. You can customize your document as you like. Add logos, tables, and images right in your template. Use placeholders to mark where the data from your spreadsheet should be inserted.
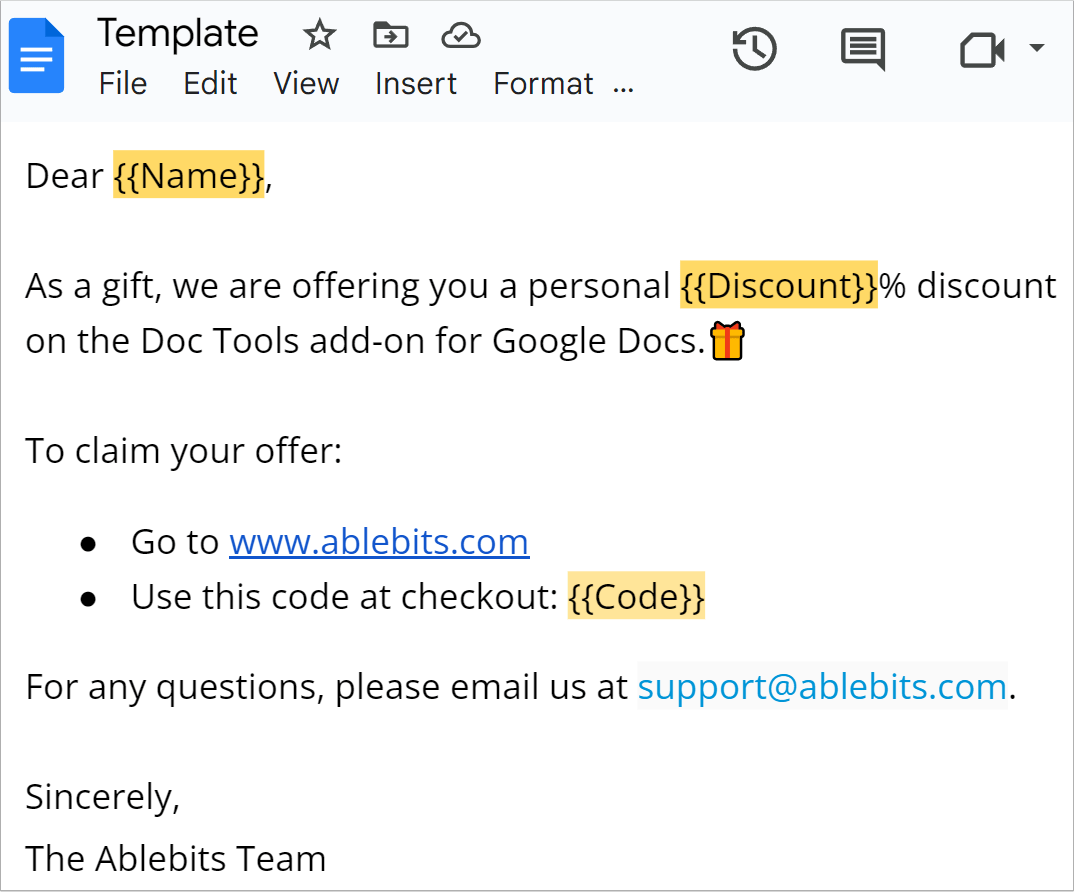
Working with placeholders
Placeholders are special tags enclosed in curly brackets, like {{Name}} or {{Company}}. They “hold the place” for unique information which will be inserted later. Each placeholder in your template must correspond to a column header in your Google Sheet. The add-on will look at your placeholders, find the matching columns, and insert the data from the corresponding cells to customize your emails and documents.
Key rules for placeholders:
- Case-sensitivity. Placeholders are case-sensitive. {{Name}}, {{name}}, and {{naMe}} will be treated by the add-on as three different placeholders.
- Spacing. The add-on ignores spaces in placeholders. It will see {{Name}} the same as {{ Name }} or {{Name }}.
- Validation. For each placeholder there should be a matching column. If any are missing, you’ll see a warning before sending.
- Duplicate columns. If there are several columns with the same name, the add-on will use the data from the first one and show you a warning.
- Hyperlinks. If you have a column with links, the add-on will keep the original format of the link.
Set up merge settings
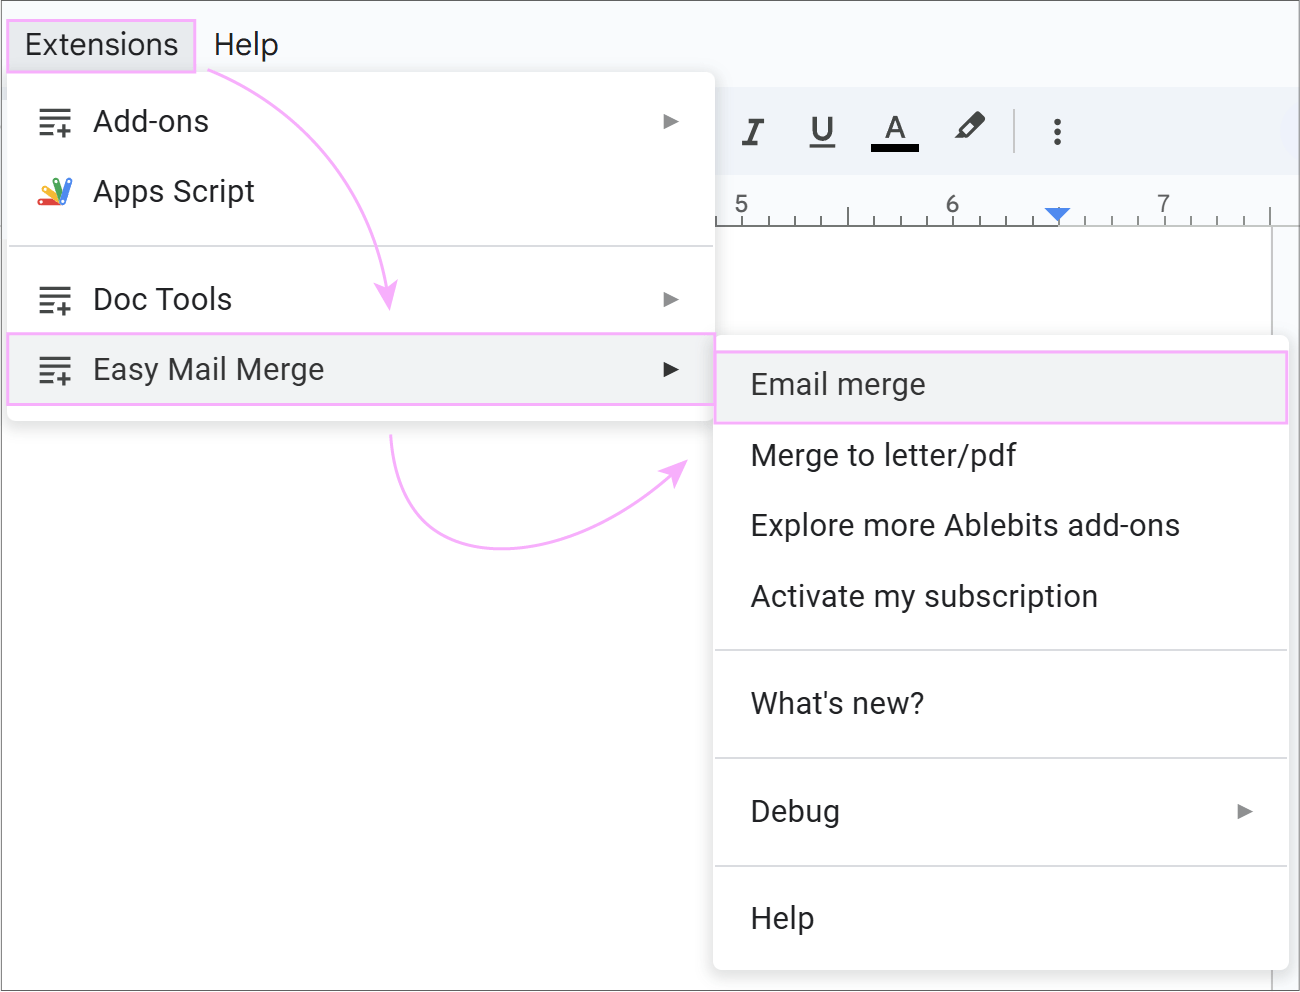
To connect your Google Docs template to your mailing list, go to Extensions > Easy Mail Merge > Merge to Letter & PDF (if you have a standalone extension) or Extensions > Doc Tools > Start (if you have this tool as part of the Doc Tools collection):
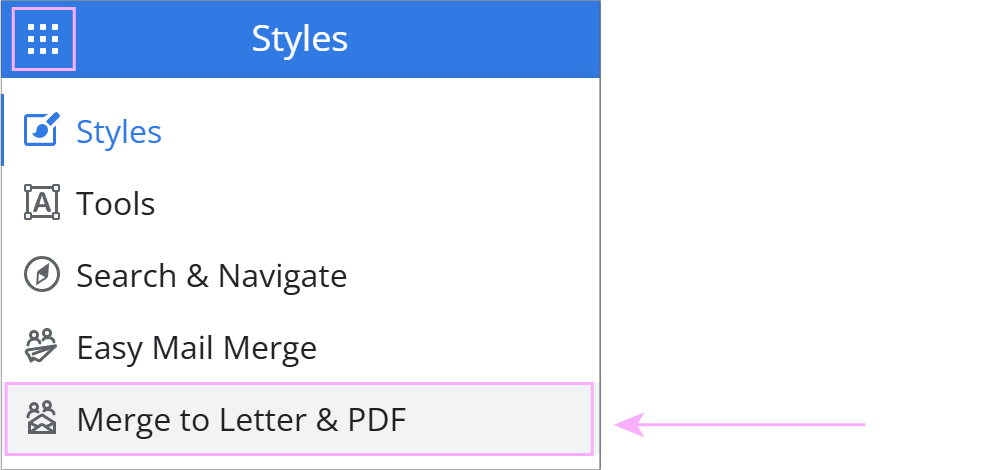
Tip. If you’re in Doc Tools, click the waffle icon at the top to switch to Merge to Letter & PDF.
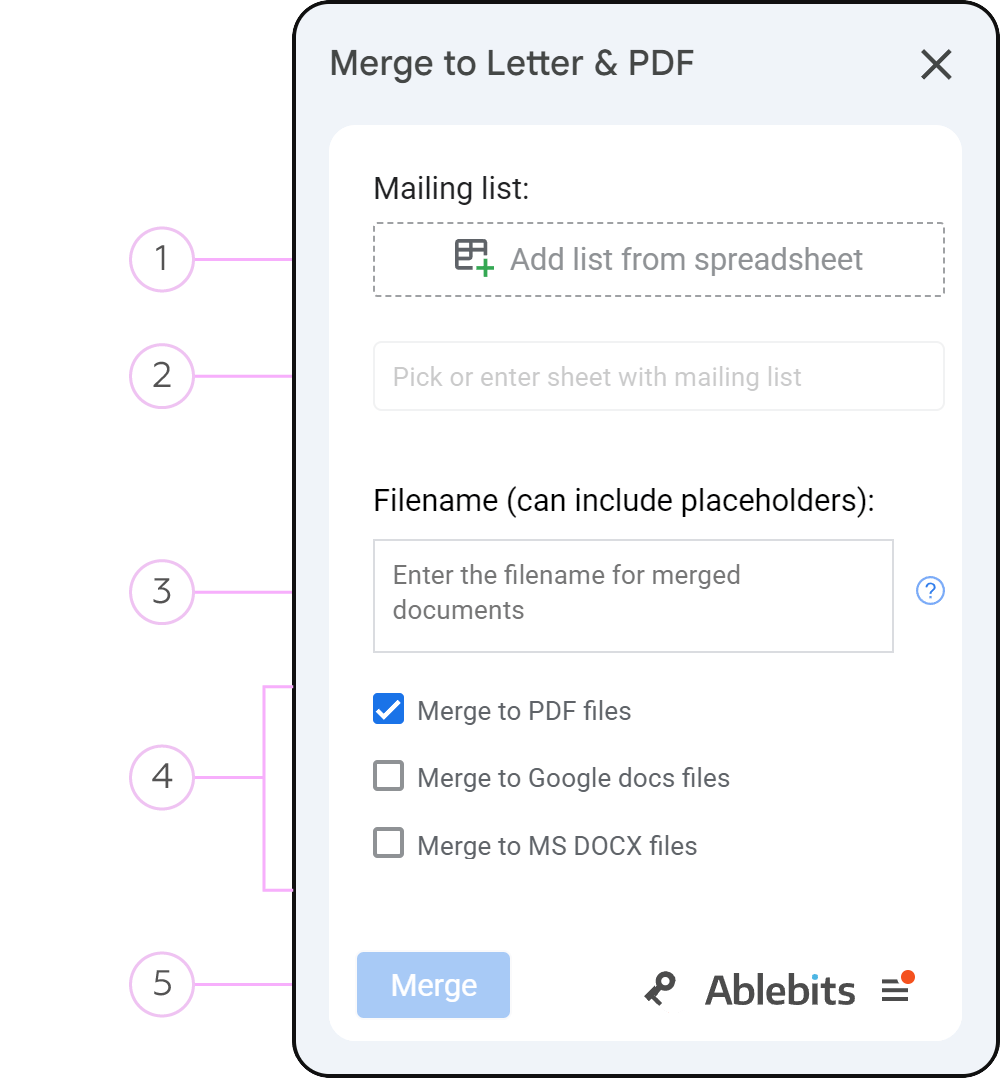
The sidebar of the add-on will open on the right side:
-
Click the Add list from spreadsheet button to add the spreadsheet that contains your data.

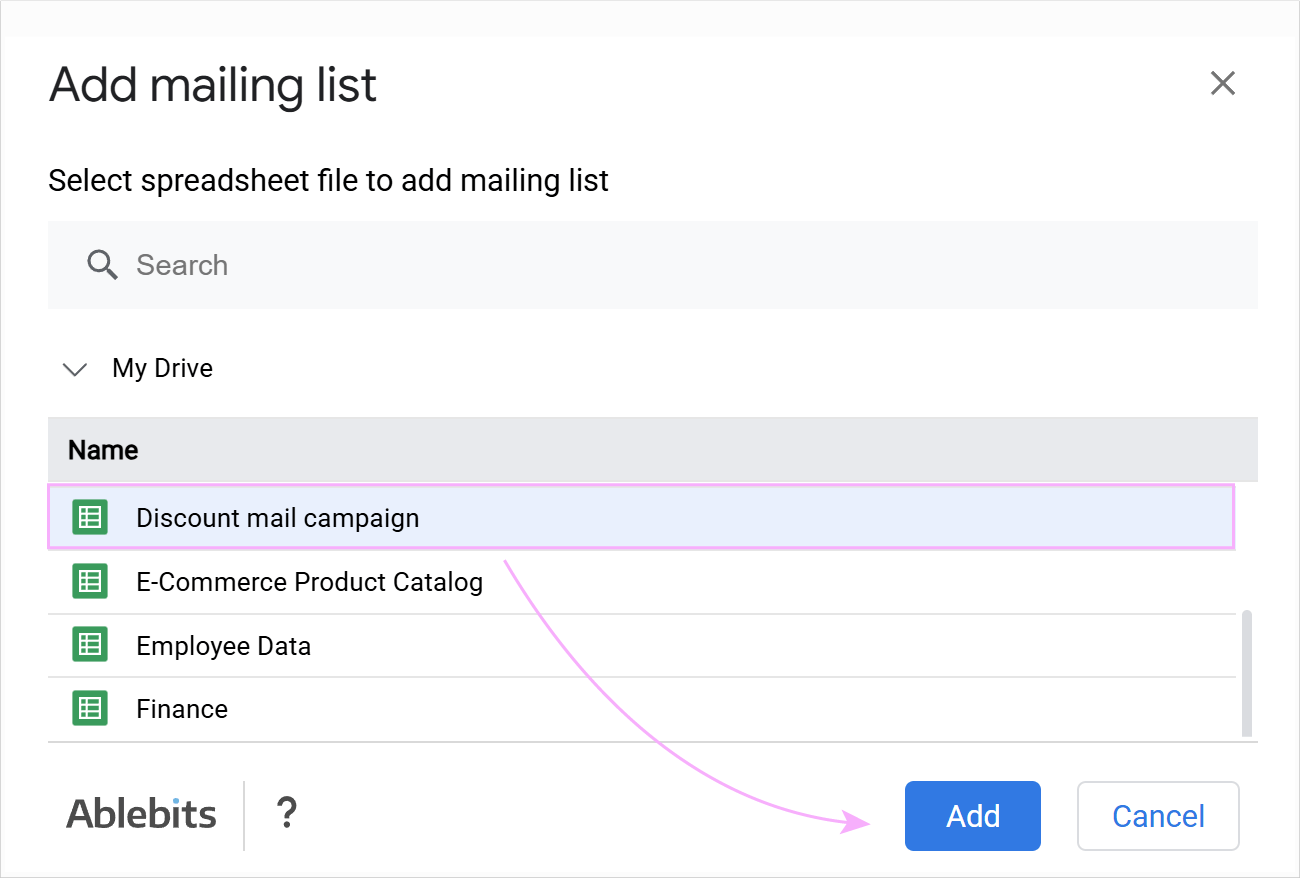
A Google Drive pop-up will open. Find your mailing list or use the search bar to find it quickly and click Add.
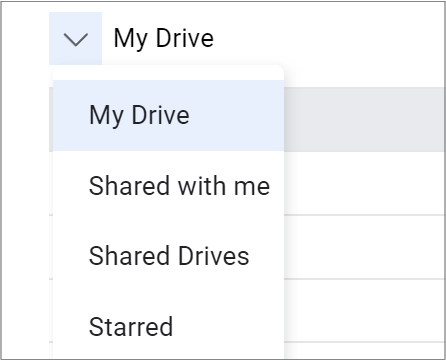
Tip. You can find your mailing list in other Workspace locations too. Click My Drive dropdown to search the Shared with me section, Shared Drives or Starred items:
After you add the spreadsheet, it will appear in your add-on. Click on the three-dots icon next to its name to:

- Refresh your mailing list. The content will synchronize with the spreadsheet in case of any changes in columns.
- Remove the spreadsheet if you need to upload a different one.
- The add-on connects to the first sheet by default. Click the sheet field to pick or enter another one:

- Enter the filename for your future documents. You can use placeholders that will appear once the mailing list is loaded:
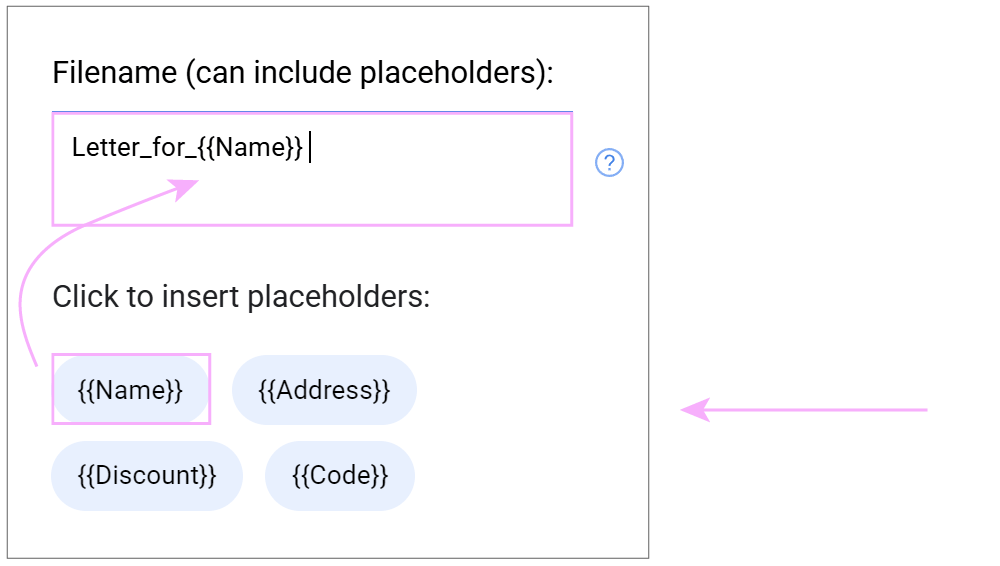
Tip. You can also use placeholders from the add-on to insert the spreadsheet data. Just place your cursor wherever necessary in the template and click on the required placeholder so it appears at the dedicated spot.
- Choose the format for your generated documents. You can generate them to PDF, Google Docs or MS DOCX files.
- Click Merge to start customization.
Get personalized documents
The add-on will automatically add two columns to track the status:
- Email Status
- Status Details
After the document is generated, you’ll see Merged as a status and the exact merge date and time in the Status Details column.

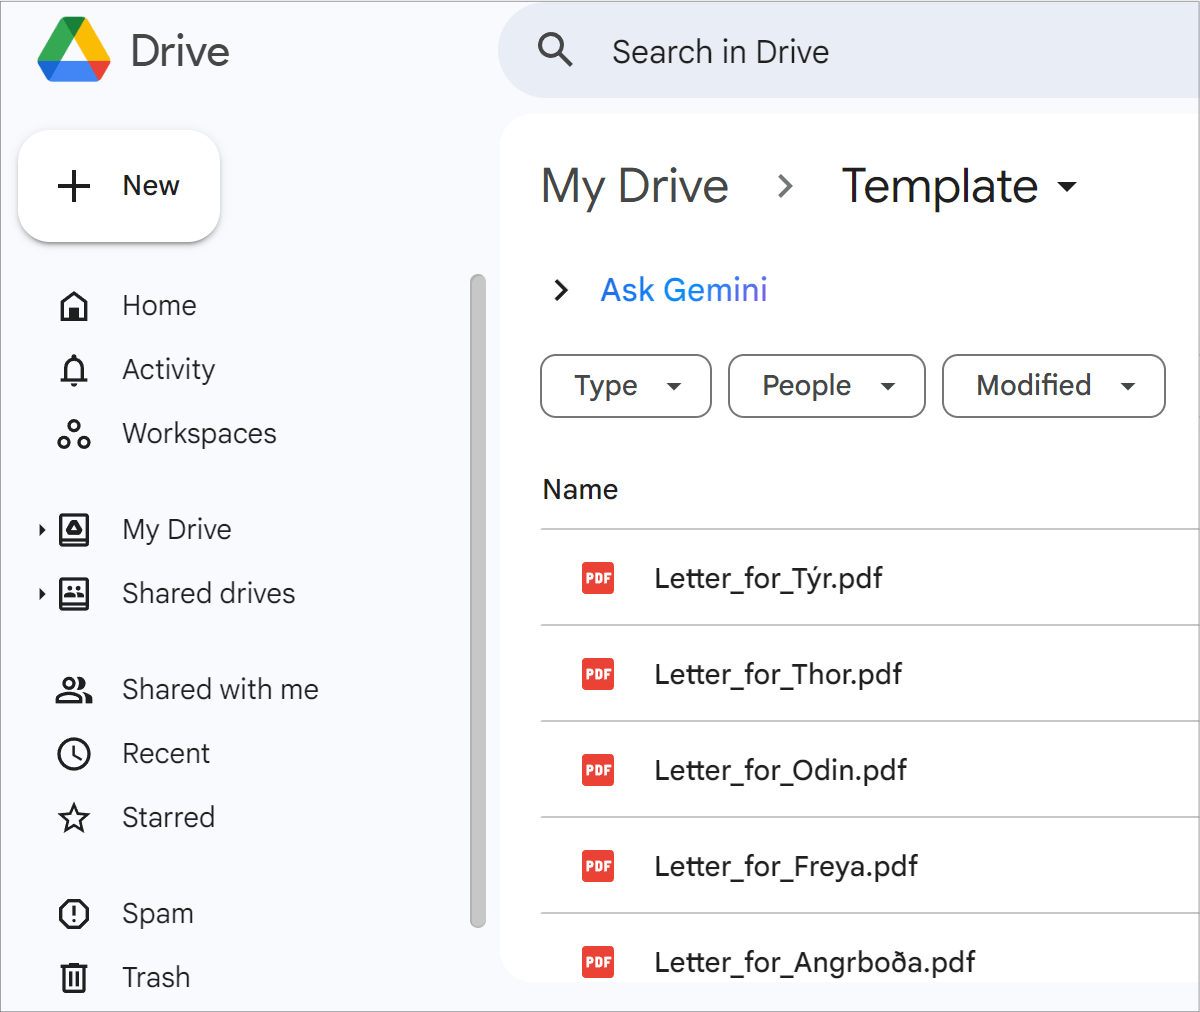
Your customized files will be saved automatically to Google Drive. Click Open merged documents folder to access them.
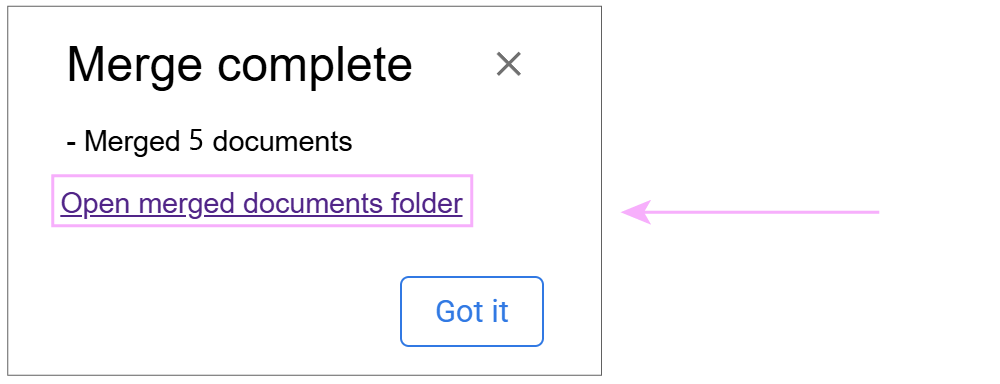
You are all set. Retrieve your documents from the folder.
How to ignore recipients in mail merge
To exclude specific individuals from the next campaign, enter X (or anything you want) for the related rows in the Email Status column.
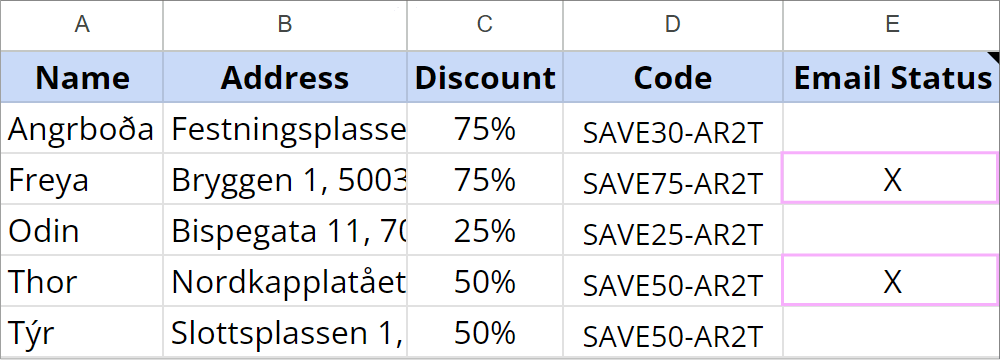
Merge to Letter & PDF skips rows with data in the Email Status field, only sending to recipients with blank status cells.
Please contact us here