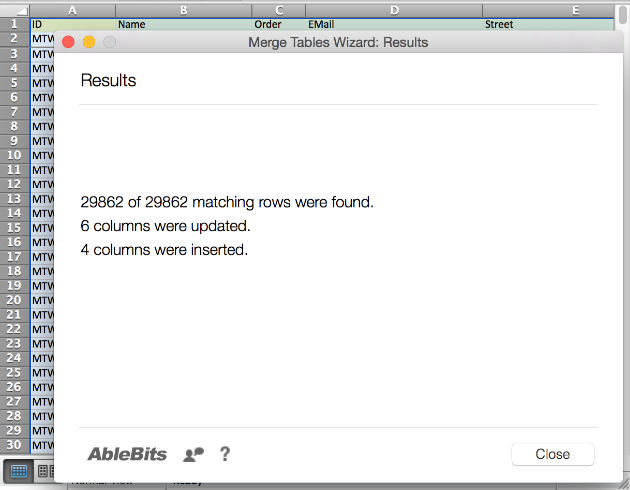
The Merge Tables Wizard app helps you copy matching rows from one table to another. You can use one or several columns as matching criteria, add new columns to the main table or update data in existing columns, highlight and filter the updated entries. Two tables can be located in the same or different workbooks.
Select your main table
The main table or Master Table is the sheet you want to update.
-
Open the Excel file or files that contain the tables you want to merge.
-
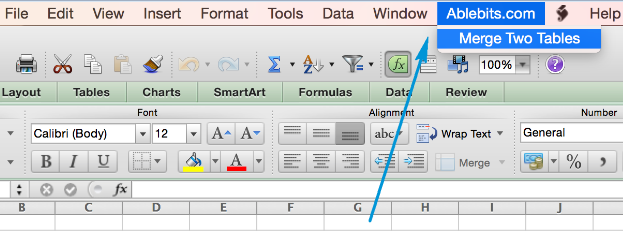
Click on the Ablebits.com tab and select Merge Two Tables:
-
Click on the Select Range button next to the Select the Master Table (first table) field and highlight the correct range:
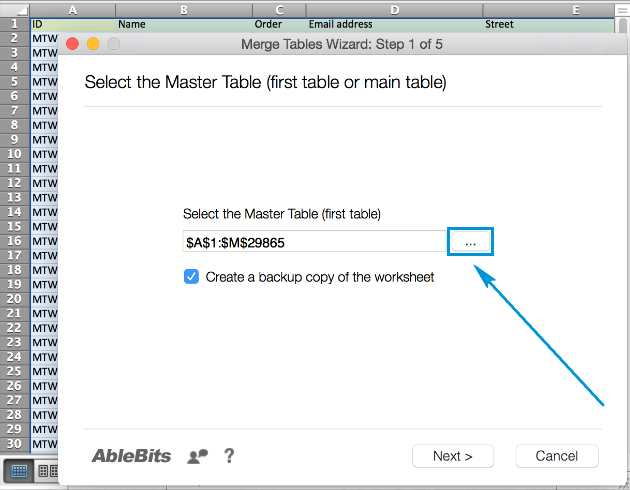
Tip. You can select any cell within your Master Table before starting the Merge Tables app. The entire range will be highlighted automatically.
-
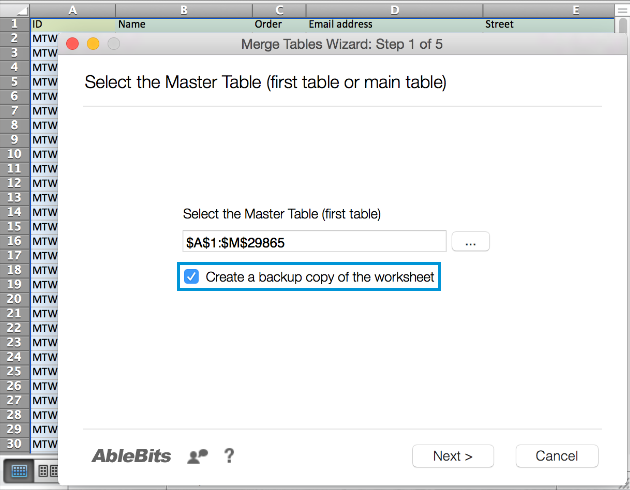
On this step, you can tick off the option Create a backup copy of the worksheet to make sure you don't lose any data:
-
Click Next to proceed to step 2.
Pick your Lookup Table
Lookup Table is the sheet where the data will be searched for (looked up). The add-in will pull information from this table.
-
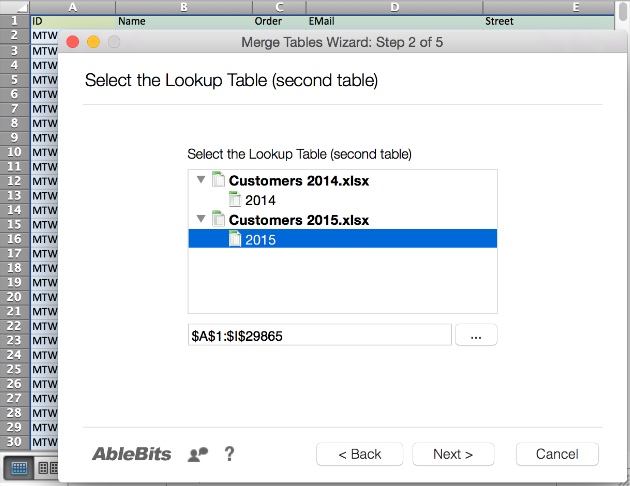
On step 2, you'll get the list with all open workbooks and sheets. Select the correct lookup spreadsheet by clicking on its name:
-
Press the Select Range button to highlight your second table:
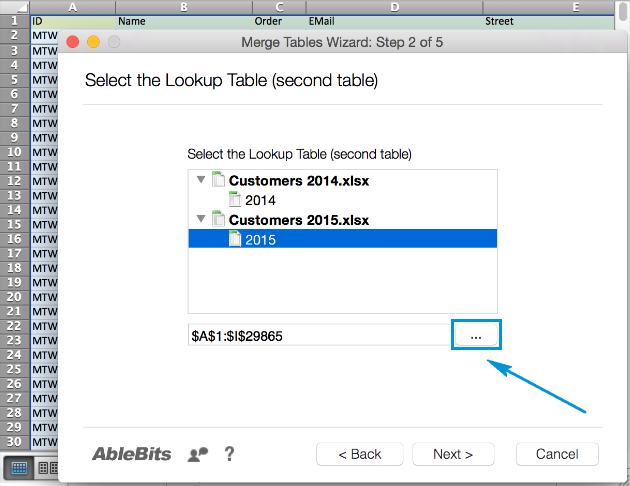
Tip. Before running Merge Two Tables, pick any cell within your Lookup Table. When you select this table in the list on step 2, the add-in will highlight the entire range automatically.
-
Press the Next button to continue.
Pick the matching columns
Matching or key columns are the columns with common index fields. Please note, the columns selected on this step are not updated, but matched or compared only.
-
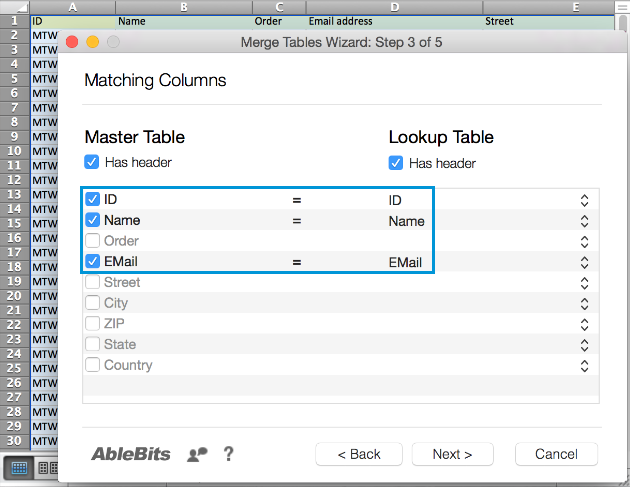
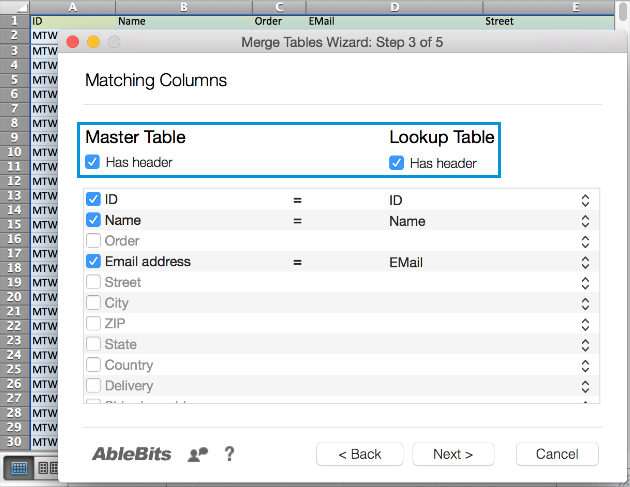
Tick the checkboxes next to the correct Master Table columns. As you tick off the Master Table columns, the add-in automatically picks the corresponding lookup column names:
-
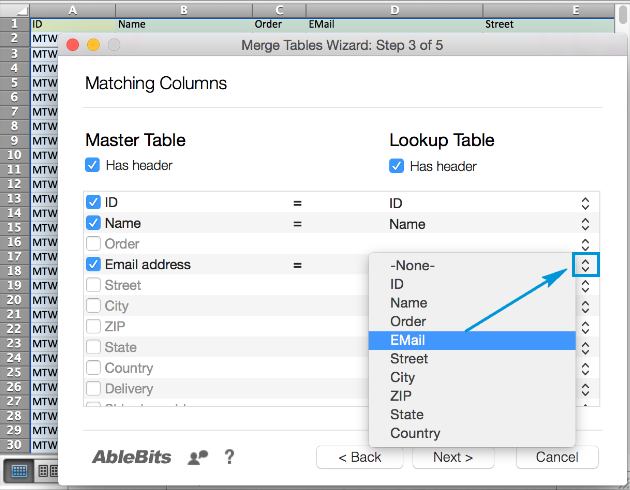
If the Master and Lookup Table column names don't coincide (like with Emails and Email addresses), you can select the needed columns by clicking on the double-sided arrow and selecting the necessary column in the list:
-
On this step you can also identify if your Master and Lookup tables have headers. To do this, just select or deselect the Master Table has header and Lookup Table has header checkboxes:
-
Click Next to navigate to step 4.
Choose the action for other columns
On the Choose action step of the wizard, you see 2 sections with column names: Update values and Add columns. Here you can select Lookup Table columns that will be updated or added to the end of your Master Table.
-
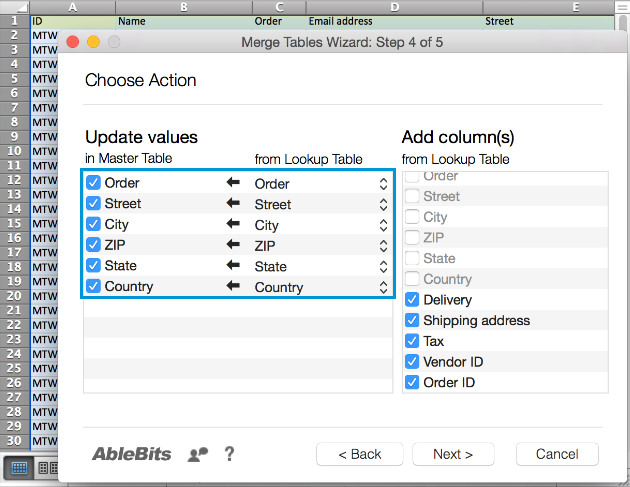
The Update values group shows the columns in your Master Table that can be updated with the values from the corresponding Lookup Table columns. The columns with the same names are selected automatically. Just deselect the columns you don't need to update:
-
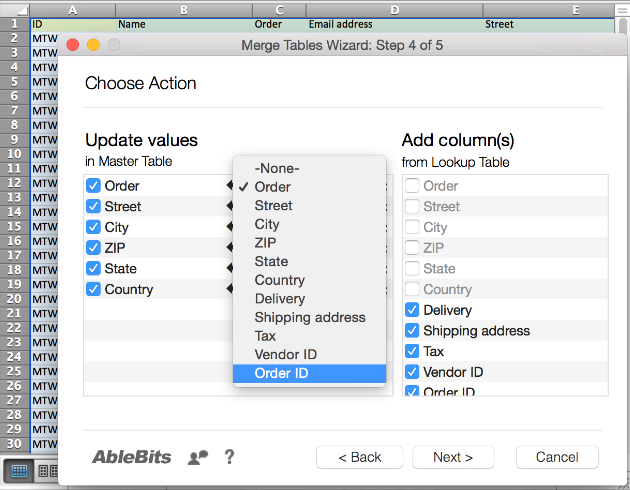
If you want to select another Lookup column name, click on the double-sided arrow next to the correct name and pick the needed column name from the list:
Tip.The columns you selected on the Matching columns step are not shown on step 4.
-
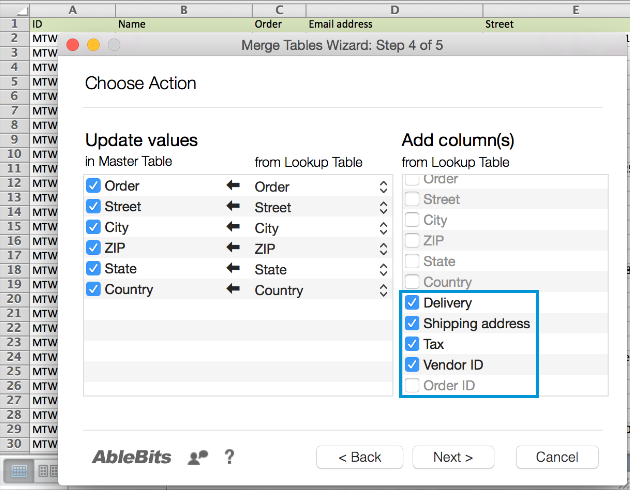
The Add columns group shows Lookup Table columns you can add to the end of your Master Table. The recommended columns are selected on the wizard by default. Just deselect the columns you don't want to add by unticking their checkboxes:
Select additional options for merging your data
On the last step of Merge Two Tables, you can see a number of adjusting options you can select to fine-tune the results.
-
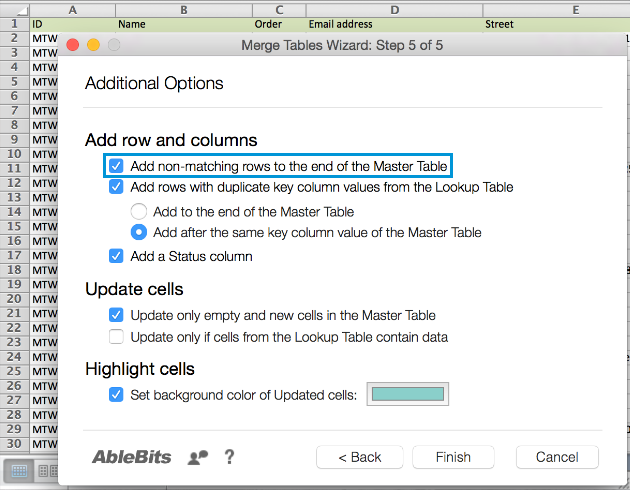
Tick off the option Add non-matching rows to the end of your Master Table to add extra rows that are not present in the Master Table. For example, both tables contain a column with names. The main table has the names from 1 to 20. The second list contains names from 1 to 25. Thus, the names from 21 to 25 in your lookup table are non-matching. When you check the Add non-matching rows to the end of the Master Table option, the rows with such values will be pasted after all rows of the Master Table:
-
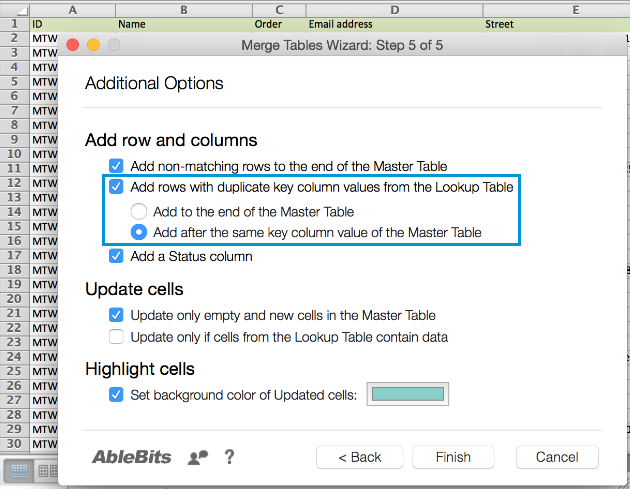
Add rows with duplicate key column values from the Lookup Table. When you update the same tables together with your colleagues, there can occur duplicate values on different rows that contain unique information. Not to lose data and to add such rows to your main table, select one of these options:
-
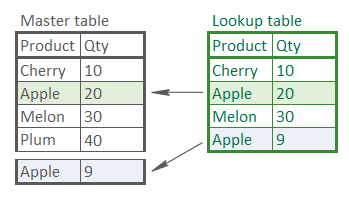
Add to the end of the Master Table. If you select this checkbox, the rows that contain duplicated key values, will be added after all rows in the Master Table:
-
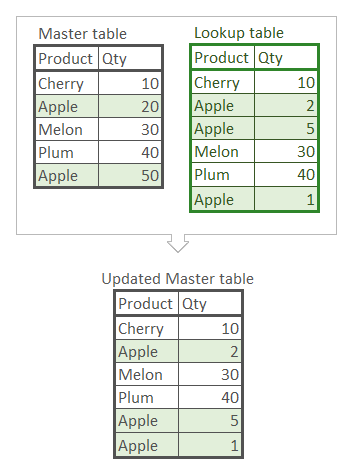
Add after the same key value of the Master Table. If you select this radio button, the add-in will merge rows with duplicate key values in pairs. If there are extra rows with dupes in the second table, they will be inserted after the row with the same key column value:
-
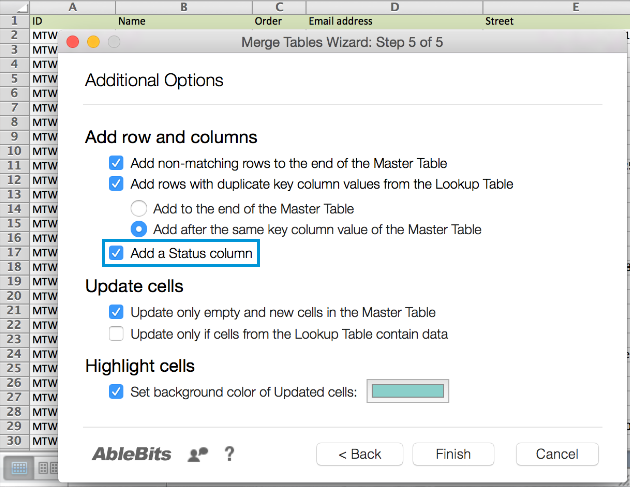
Tick off the Add the Status column option to add a column that will show the changes made to the rows and mark rows as: Duplicate, Non-updated, Matching:
-
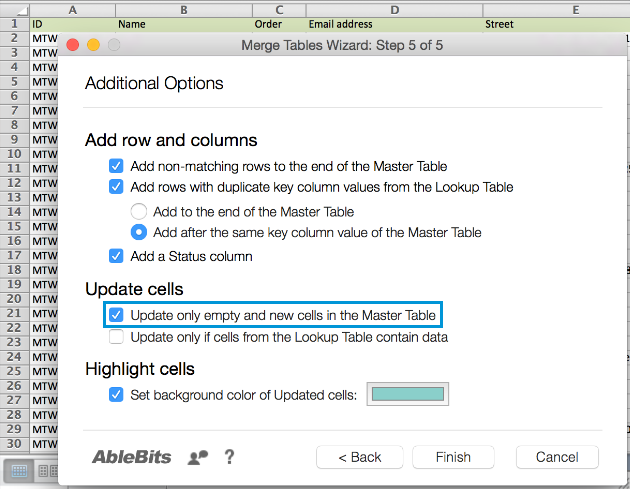
If you check the box next to Update only empty and new cells in the Master Table, the add-in will fill only the empty cells. The existing values in your Master Table will not be overwritten with this option selected:
-
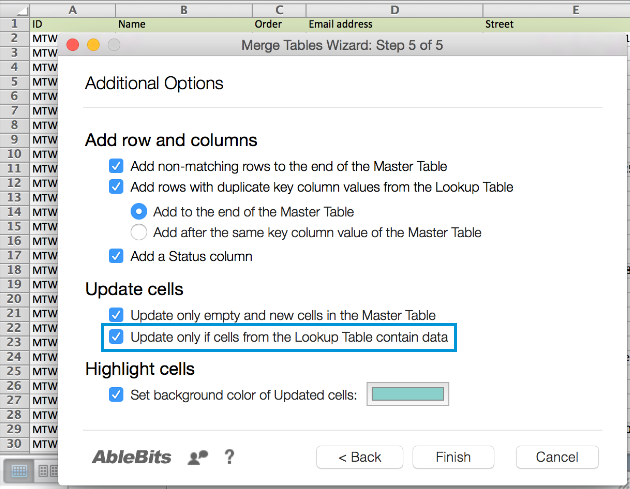
By selecting the option Update only if cells from the Lookup Table contain data you will avoid copying empty cells from your Lookup Table:
-
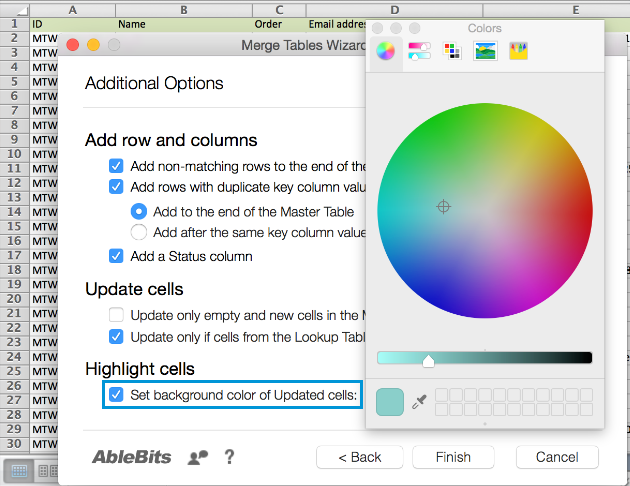
Tick off the checkbox Set background color of updated cells to change the fill color for the updated cells. Click the arrow next to the appropriate field and pick a color from the drop-down list. After joining, all the updated Excel data in the Master Table will be highlighted with this color and you will easily see the changes:
Now just click the Finish button and enjoy the results!
